Quantcast
Channel: Camera Ergonomics
Viewing all 824 articles
Browse latest View live

Measuring Camera Ergonomics, Part 2 of 3, Rationale

$
0
0
Red planet ?
 
In Part three of this 3 part series I will introduce a proposed evaluation schedule. If the reader has been following this blog the terms used in the schedule will be familiar. However the new reader will likely wonder where the material is coming from.

It's homework time I have done a lot of work on this over the last five years and posted my thoughts and findings on this blog. I will try to summarise these findings in this post but to fully appreciate what I am talking about I urge the reader to work through two key sets of posts as detailed below.

This blog started in February 2012. The first 14 posts from 28 February to 11 May describe the evolution of my understanding of the elements of ergonomics as they apply to cameras. Here I lay out my ideas about basic concepts of camera ergonomics and functional anatomy.

My first ergonomic review was of the Panasonic GH2 in May 2012.

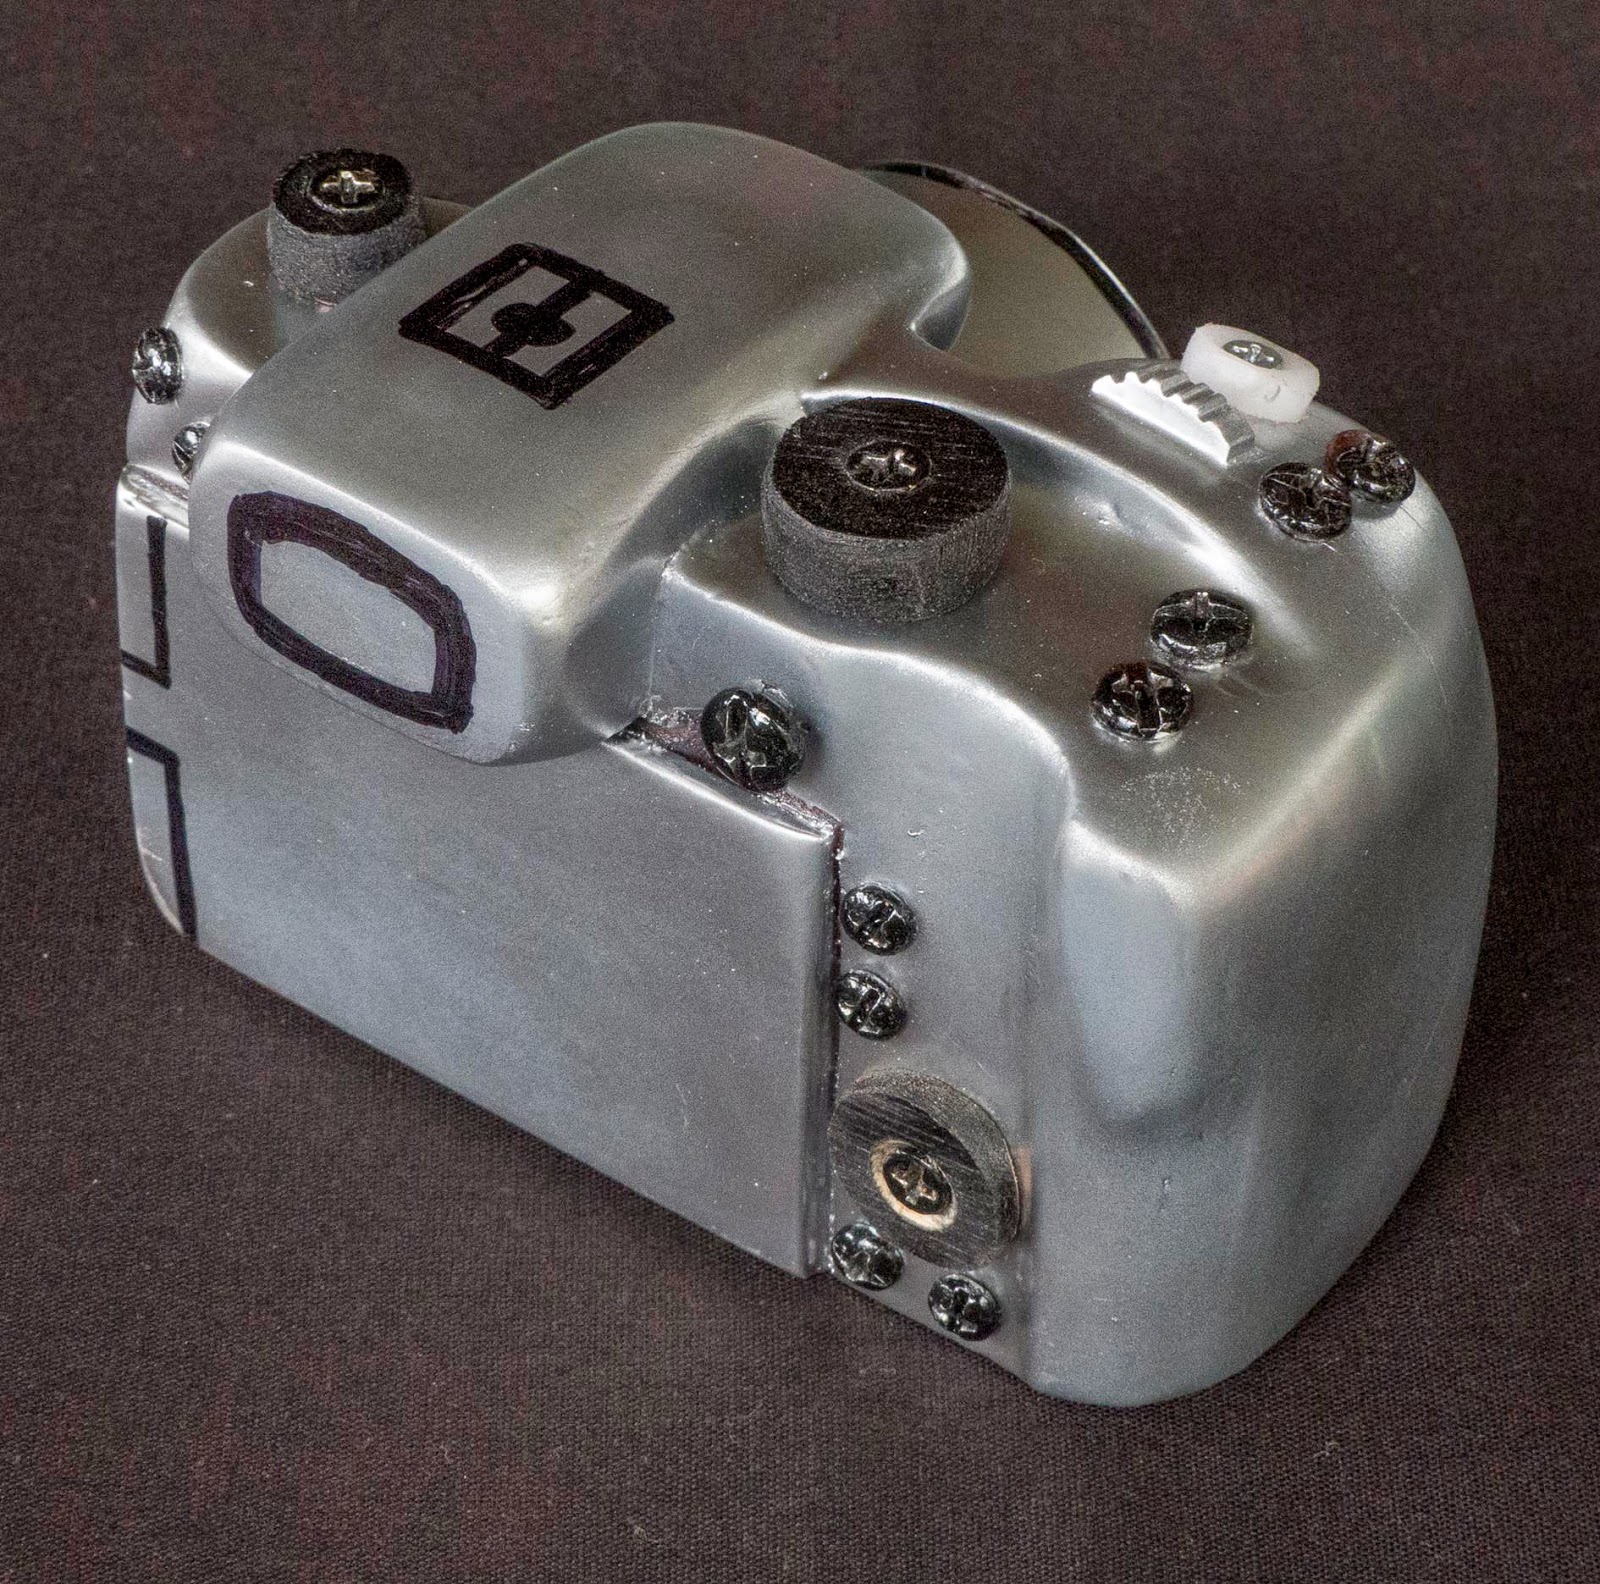
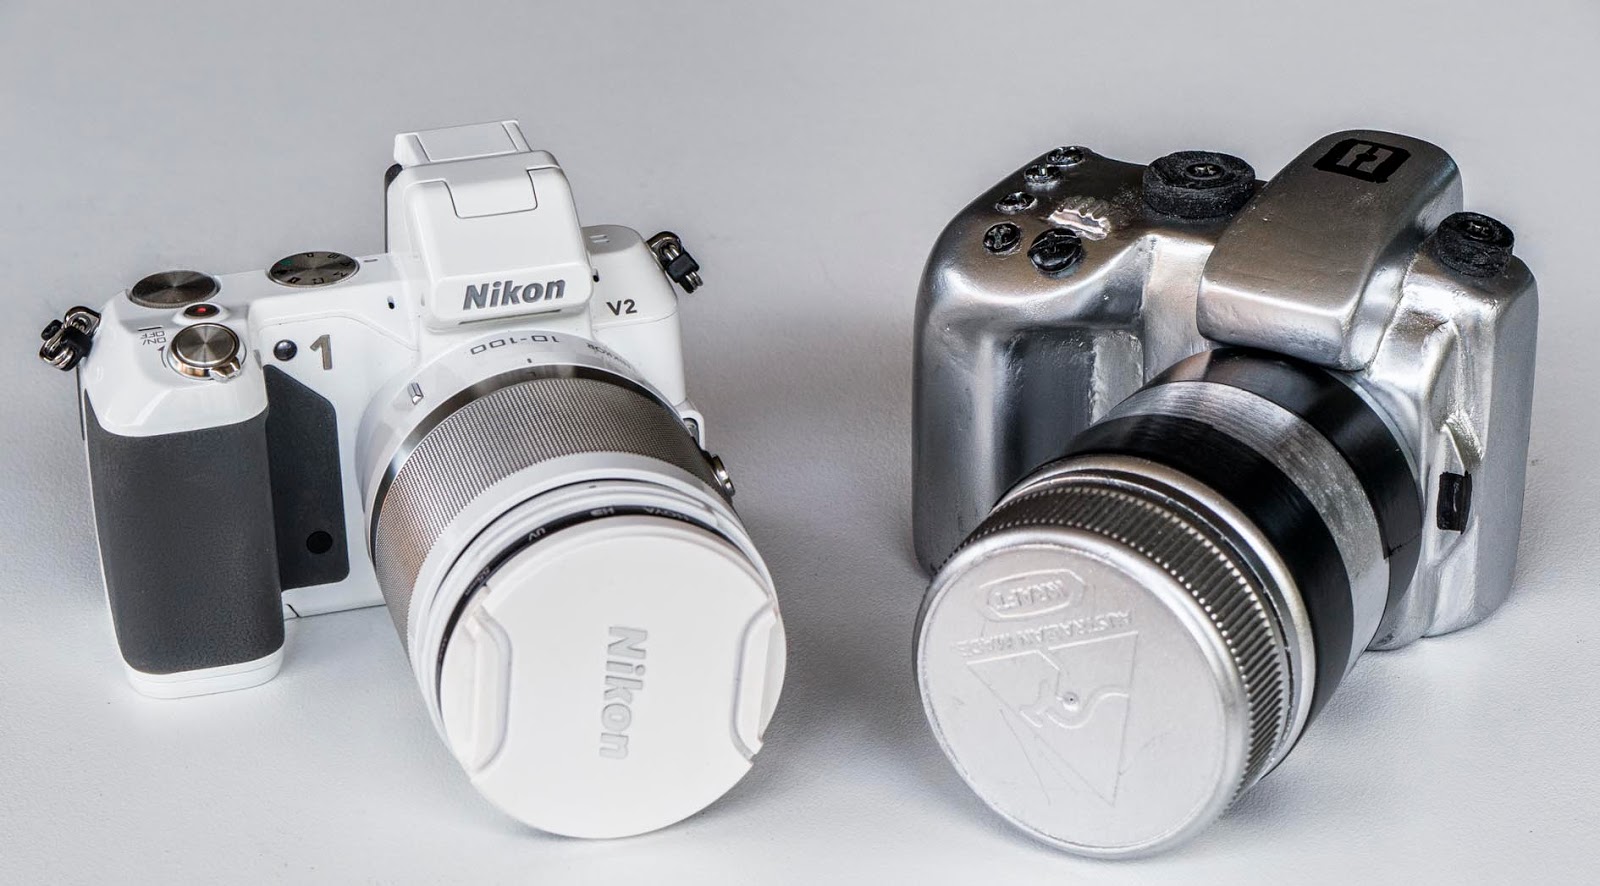
The second key set of posts begins on 1 April 2014, with a review of my use of mockups to better understand the elements of ergonomics. This by the way is not an April fool's post, it just happened to get posted on that day. The next 16 posts to 19 April this year represent an update, review and elaboration of my original 2012 work. In these posts I go into considerable detail about a range of ergonomic issues including handles, shutter button position, control systems, control dials and much more.

I particularly urge the reader to work, and yes it is work, through "Language and taxonomy of Camera Ergonomics" on 6 April and "The problem with likes" on the same date.

Brief summary of findings

There are 4 phases of camera use, Setup (prior to using the camera), Prepare (in the minutes before making pictures), Capture (the process of making pictures) and Review (which is pretty much self explanatory).

In the Capture Phase of use there are three ways by which the user interacts with the camera. These are Holding, Viewing and Operating.

in order to make the camera do his or her bidding the user must perform a series of Tasks in each of the phases and interaction modalities.

Completion of each task requires Actions. These can be examined by time and motion study. Anybody with access to a camera and a user can do such a study. It is just a matter of paying attention to every action required to make a camera work. This can reveal the number of actions required to perform each task. It can also examine the complexity of those actions and note the presence of any enabling actions required.

All evaluation systems have underlying assumptions. In this case some of these are:

* The camera is designed to be suitable for the expert/enthusiast user who wishes to take control of the process of picture making. Novices/snapshooters can use this camera perfectly well by setting auto mode and leaving menus, buttons etc at default settings.

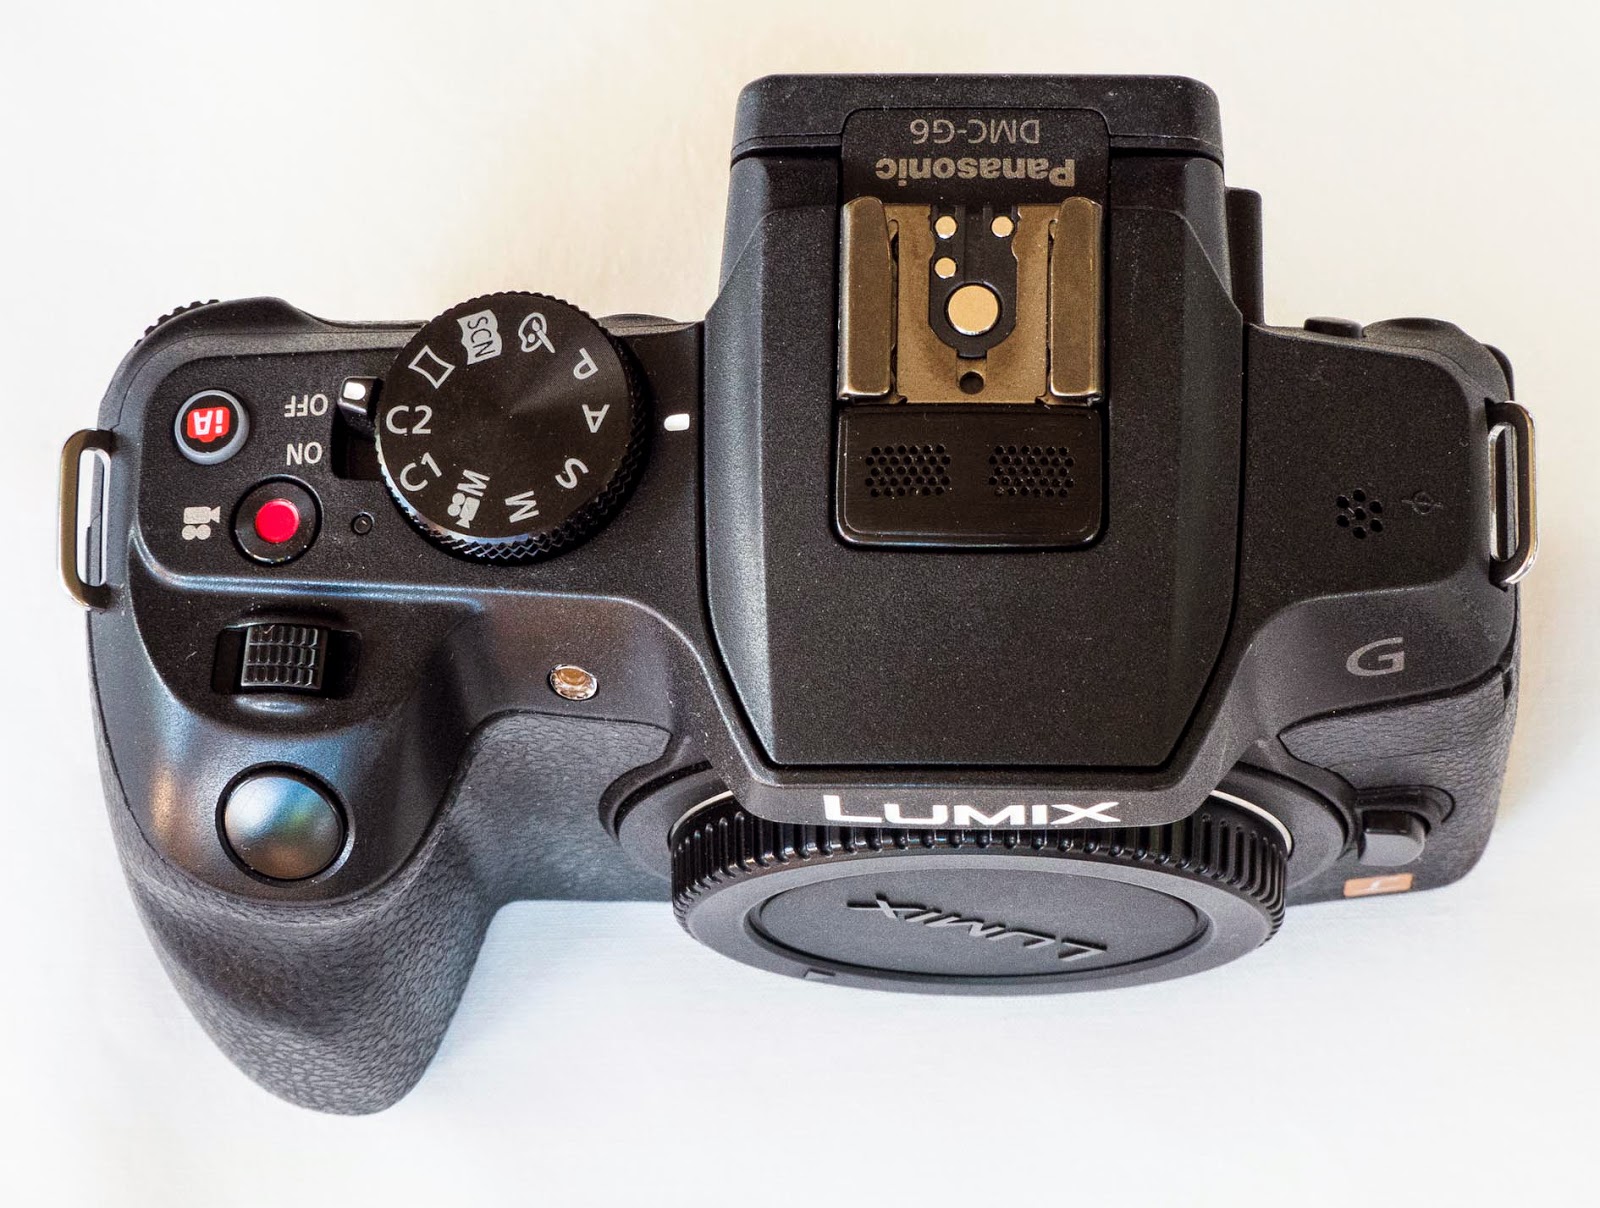
* A Proper Camera is envisaged. This has an anatomical built in handle (by which I mean one which is shaped to fit the hand which holds it), a built in EVF of high quality, a fully articulated monitor, built in flash unit, ability to fit accessory flash units, zoom lens or ability to mount one, responsive performance and good enough picture quality for most users and uses.

* The evaluation schedule is written for a mirrorless interchangeable lens camera (MILC). For a DSLR substitute optical viewfinder (OVF) for EVF. A well designed MILC does have several inherent ergonomic advantages over the DSLR type. The EVF allows much more data and choice of data in the viewfinder, the EVF can be configured to look the same as the monitor and the segue from EVF to monitor can be seamless with a MILC but not with a flipping mirror DSLR.

* It is ergonomically preferable for camera operation to require the minimum number and complexity of actions.

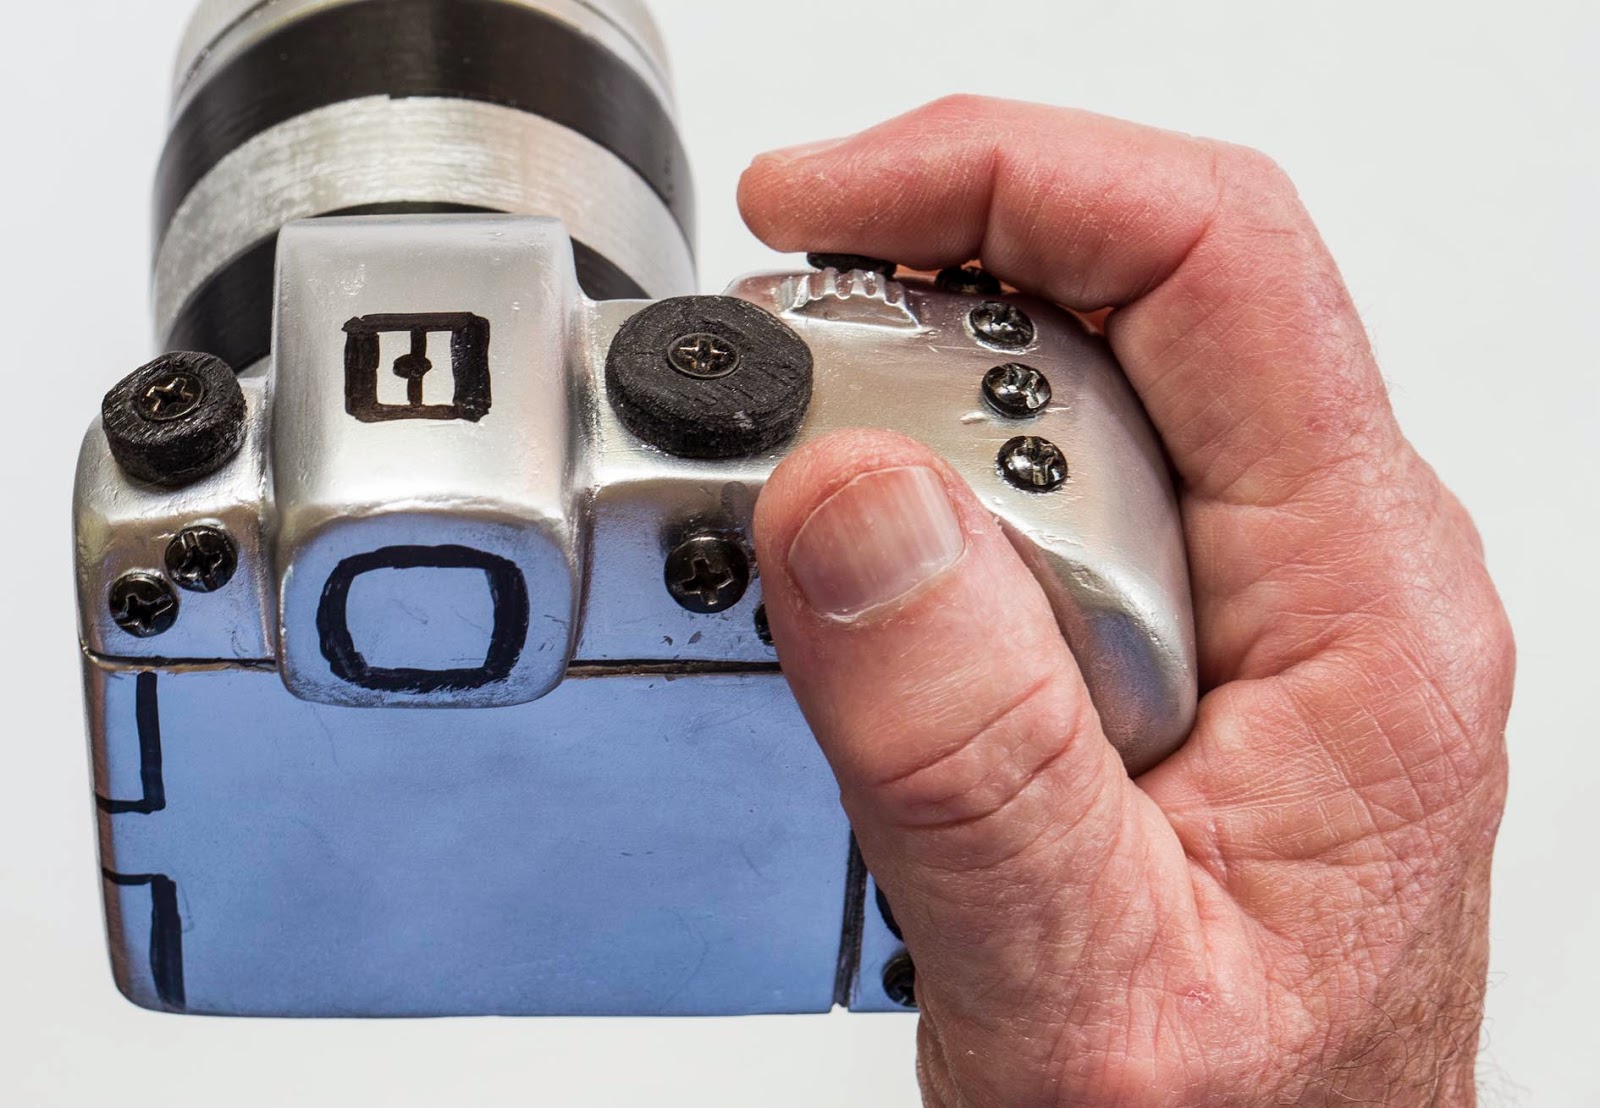
* A well designed camera should be comfortable and secure to hold.

* Viewing arrangements should provide a clear subject preview in all operating conditions.

This is completely different from and unrelated to any consideration of an individual's likes, wants and preferences. It is also unrelated to any questions about style.

As a result of performing time and motion studies on many cameras and mockups I have come to the view that some types of arrangement for holding, viewing and operating provide clear ergonomic benefit over other types. This is reflected in the evaluation schedule.

In the next post I put forward a schedule for measuring camera ergonomics. The alert reader will notice that some things are missing from consideration. I have nothing to say about many of the features which festoon modern cameras. There is an endless list of these things including "Best moment capture mode", "Motion Snapshot Mode"......etcetera.....

I also do not refer to some features which some might regard as pertinent to the ergonomic evaluation. One of these is touch screen operation. The touch screen is inaccessible when looking through the viewfinder. My scoring schedule is deliberately biased towards operating in Capture Phase with the eye to the viewfinder. The reason for this is that I regard viewfinder operation as one of the cardinal features which differentiate the proper camera from other photo capable devices.

I am well aware that some users say they feel happy to use a camera in monitor view but I bet they will be considerably less happy when the sun is shining on the monitor or a long lens is fitted or they want to exclude noise (auditory, visual, emotional etc.) intrusion from the immediate environment or all three. The touch screen might be a workable alternative to hard UIM's in Setup, Prepare and Review Phases of use. My thinking is that having provided plenty of hard UIM's for use in Capture Phase one might as well use them in the other Phases as well.

Wi-Fi technology is improving and might well deserve inclusion in a subsequent update.

I don't do motion picture so will confine my evaluation to still photo. I would imagine that the videographer will often want to mount the camera to a fluid head, in which case it might be best driven from the touch screen. There are several websites devoted to the world of video, this is not one of them.

Maximum score allocations: This represents a judgement call about which aspects of camera use are the most ergonomically important. Obviously this is contestable but I think it is reasonable to allocate the highest priority to the process of operating the camera in Capture Mode. The actual numbers are somewhat arbitrary as they must be but they can be adjusted in the light of ongoing experience, should that be necessary.

Phase of use Maximum score
Setup 15
Prepare 15
CaptureHolding20
 Viewing20
 Operating25
Review 5
Total 100


Measuring Camera Ergonomics Part 3 of 3, Evaluation Schedule

$
0
0
 
Summary of abbreviations used:

UI = User Interface. Can be hard (buttons, dials etc) or soft (screen based).

UIM = User Interface Module. Refers to a button, dial, lever, switch collar, ring etc.

Set and See module. This is usually a dial, lever or switch. It has manufacturer predetermined function represented by permanently marked icons, numbers, words, etc. marked on the module. You set and see the selected parameter right on the dial. Repeater readouts of the set parameters might or might not be presented in the EVF/monitor.

Scoring In each subsection the maximum score will be gained if a camera allows the user to efficiently perform all the tasks , has all the hardware and positive factors with none of the negative factors. Total maximum score is 100.

Setup Phase [Max score 15]
Tasks Make Main Menu selections, Allocate My Menu items, Allocate Quick Menu items, Select Function Button and dial assignments, set up Custom Modes, set up other functions such as Wi-Fi.
Elements Has a Main Menu, My Menu with user selected items and a separately accessed Quick Menu with user selected items for Prepare Phase selections.
Most UIM's enable user selected function.
Content Menu headings and subheadings are logical, coherent, systematic and easy to navigate. Like items are grouped together.
User interface All items are clear, legible and easy to read. The process navigate>identify>select is easily learned and becomes second nature.
Negatives Main Menu confusing, contains mystery icons or items, not logically designed, like items scattered about in different submenus. No My Menu. Q Menu items not user selectable. No Custom Modes. Navigation complex or confusing. Setup Phase UIM's located where Capture Phase UIM's need to be.

Prepare Phase [Max score 15]
Tasks Set Main Mode, set frequently used modes (usually Focus , Autofocus, Drive), set less frequently used modes and other adjustments required in the minutes prior to Capture Phase.
Hardware Has dedicated set and see UIM's for the most commonly used Modes. Allows quick access to other modes and functions required in Prepare Phase, by Quick Menu button, Function buttons or other quick access portal(s) on body and lens.
User interface Clear graphics, icons and displays on monitor and EVF when navigating and selecting items via Q Menu, Function buttons or other portal. UIM's for Prepare Phase do not displace UIM's for Capture Phase from top value locations on the body.
Content Quick access portals allow adjustment of other modes and functions, for instance flash, metering, recording quality, image size, ISO (if set in Prepare Phase) shutter type, image stabiliser, display, burst/continuous rate, electronic level, elctronic shutter, grid lines, histogram ...............and many more, as user selected.
Negatives Any Prepare Phase items only accessible via main menu. Settings locked while camera is writing files to the memory card. Q Menu items, functions of buttons and other UIM's not user assignable. Prepare Phase UIM's located where Capture Phase UIM's need to be.

Capture Phase [Max score 65]
Holding [Subscore 20]
Tasks Hold the camera in a relaxed but secure grip with both hands with right index finger on the shutter button in relaxed position. Maintain this grip while carrying out the "operating" tasks below.
Hardware Built in ergonomic anatomical handle, inverted L type is optimal. Ergonomic thumb support. Diagonal type is optimal. Optimal shutter button position is forward, top left on the handle (as viewed by the user).
User Experience Handle and thumb support work together to allow the user's right hand to adopt the half closed relaxed posture in basic hold position. Shutter button location enables this optimal holding posture.
Negatives Absent or poorly shaped handle. Handle only available as accessory. Thumb support inadequate in position, elevation or orientation. Sub optimal placement of shutter button.
 
Viewing [Subscore 20]
Tasks the operator can comfortably and clearly, in all conditions, view in the EVF or monitor the information listed below.
* Subject preview (live view) unobscured by overlays.
* Major camera data, displayed outside the preview image, in either landscape or portrait orientation, optimally below but possibly also above:
Aperture, Shutter Speed, ISO, Exposure Compensation, White Balance, Battery Status, Capture Mode in use, Remaining exposures on card. * Secondary camera data/displays, superimposed over the preview image:
Active AF Area position and size/shape, Grid lines, Histogram, Manual Focus Guide indications, others as user selected.Hardware There is a built in high quality EVF with high quality viewfinder optics and comfortable eyecup. There is a high quality monitor. Fully articulated type is optimal.
Content EVF and monitor gain up or down to represent exposure compensation. 100% accurate preview is provided.
User Experience EVF and monitor both provide the same information presented in the same way. There is a seamless segue from one to the other. Look in the viewfinder, see the viewfinder; look at the monitor, see the monitor. Optimally there is no perceptible EVF blackout time after each exposure.
Negatives EVF not built in, Camera data is only available superimposed over the preview image, EVF refresh rate slow, EVF delivers poor viewing quality in some conditions. Monitor fixed or only swing up/down.
 
Operating [Subscore 25]
Task list While continuously looking through the EVF (or monitor, but the EVF is a more stringent test) and without shifting grip on the camera with either hand, Capture Phase requires that the following tasks be carried out smoothly and efficiently, without impeding the capture process. Obviously not every exposure requires every one of these tasks to be performed but the camera should be configured so it is possible to do so:
* Adjust primary exposure parameters: Aperture (f stop), Exposure Time (Shutter speed), Sensitivity (ISO).
* Adjust secondary exposure parameters: Exposure Compensation, Program Shift, AE Lock, White Balance.
* Adjust primary framing and focus parameters: Zoom, Initiate/Lock autofocus, Manual Focus.
* Adjust secondary focus parameters: Change position and size of active AF area, manual over ride focus, AF Lock.
Hardware There are sufficient UIM's of appropriate design on body and lens with which to drive the camera as described in the task list. UIM's on the lens controlling zoom, focus and aperture (if fitted) are of circumferential type. UIM's on the body can be operated by the right index finger and thumb without having to shift grip.
User experience With practice the user can learn to drive the camera like a motor car. The user looks through the viewfinder (windscreen) at the subject (traffic ahead) and operates the device by feel without looking at it. With further practice the user does not have to think about the process of operating the camera any more than a driver thinks about operating a motor car.
Negatives The camera is configured so the user has to interrupt the capture process in order to change one of the parameters listed above. UIM's for Capture Phase are located in a physical position lower in the ergonomic hierarchy than UIM's for Setup, Prepare or Review Phase. The user has to enter a menu or shift grip or take the eye away from the viewfinder to adjust on of the parameters in the task list.

Review Phase [Subscore 5]
Task list Tasks which photographers might want to perform in Review Phase may vary greatly according to individual preference. Some photographers do little in camera review, others a lot. Ergonomically this is the least critical phase of use as the photo has already been captured. As a minimum I would list:
* Recall the last 1-9 photos captured and select one.
* Zoom into and move around in a review image.
* Jump from one image to the next or previous at the same level of magnification and the same location in the frame.
* Delete one/many.
Hardware The camera needs UIM's to enable the tasks above to be performed. These need to be located low in the positional hierarchy on the camera.
Content Comprehensive data about each image is available and efficiently recalled onto the monitor screen or in the EVF in the same form.
User experience The task list can be carried out efficiently.
Negatives Essential file data is not able to be recalled. It is not possible to scroll from one frame to the next at the same location and magnification. Auto review cannot be disabled. UIM's for Review Phase occupy high value locations on the camera which are better reserved for Capture Phase.

Panasonic 100-300mm lens reappraisal, Part 1, specifications and operation

$
0
0
100-300mm at 300mm, hand held shot by the roadside. 1/500sec at f5.6. Sharpness is adequate for this type of shot  even though the shutter speed is quite slow for this lens.
 
Panasonic's first and the world's first electronic mirrorless interchangeable lens camera the G1 was introduced in 2008. Two years later the 100-300mm tele zoom arrived. This gives the M43 system a full range of zooms from the ultrawide 7-14mm to the super tele 100-300mm.

Review history I bought a 100-300mm three years ago, used it for over a year then sold it. I had become dissatisfied with pictures taken at the long end of the zoom range, many of which were not sharp. Several reports on user forums confirmed my own experience, namely that the lens was sharp at the short end but soft at the long end. Then I read some more reports suggesting the problems at the long end might be more about operator technique than outright optical capability.

So I bought another one and carried out a more comprehensive set of tests than I had done previously.

Picture courtesy of camerasize.com  Sometimes the picture tells the story. On the left Canon EF 200-400 f4 [with inbuilt 1.4xconverter] on 5D3. On the right 100-300mm on GH3. Same angle of view range, same aperture range.

Specifications The 100-300mm f4-5.6 OIS lens [H-FS100300] is compatible with the Micro Four Thirds format and works on both Panasonic and Olympus M43 cameras. With 67mm UV filter, front and rear lens caps fitted it is 145mm long. With the supplied lens hood reverse bayonet mounted the diameter is 88mm. These are the dimensions you need to fit into a camera bag. Mass with UV filter, front and rear caps and hood is 605 grams. The lens comes boxed with a soft pouch and operating instructions.

On the outer barrel are a focus ring towards the front and a wide zoom ring in the mid section. At the rear is an OIS on/off switch. There are no other user interface modules on the lens.

No tripod collar/mount comes with the lens and none is available from Panasonic.

Panasonic does not reveal in it's literature whether the lens is parfocal (stays in focus when zoomed) or varifocal (has to be refocussed after zooming). On my informal testing it appears to stay in focus on the monitor when zoomed however at the long end focus accuracy is very critical to sharpness so I always refocus after zooming. The lens is not weather sealed.

Closest focus distance is 1420 mm at the short end and 1485 mm at the long end. This enables one to zoom in on small subjects like little birds from a not-too-threatening distance,

The lens mount is metal as you would expect.

Diagonal angle of view is 12 degrees at the short end and 4.1 degrees at the long end. This is the same as a 200-600mm lens on a full frame (sensor 24x36mm, 43mm diagonal) camera.

GH3 with 100-300mm on Roesch tripod collar.


Comparison with full frame You can see in the photograph that although the 100-300mm is the largest lens in the M43 system it is dramatically smaller than it's full frame equivalent. The closest full frame lens I could find for comparison is the Canon EF 200-400mm f4 [With inbuilt 1.4x converter] This gives effectively a 200mm f4 to 560mm f5.6 range which is a little short of the Panasonic lens but close. You can see them side by side in the photograph. The Canon lens is 3x as long, 7x as heavy and ...........19x as expensive. It had better be good.

Mechanical properties As the lens zooms the inner barrel extends by up to 57mm. Zoom action is a little uneven and slightly stiff although I notice this is improving with use. Autofocus is quick and accurate on the GH3, although AF is a little slower at the long end. OIS effectively holds the EVF preview steady for composition. I did not systematically test it's effectiveness at producing sharp pictures but see my comments about this in the next post.

Follow focus on moving subjects is effective on the GH3, using AF Continuous (not focus tracking), 1 Area center focus point and Burst Mode M which provides AF and live view on each shot. I have noted that with any M43 camera which I have used the 100-300mm gives a lower frame rate than other tele zooms, including the 35-100mm, 45-150mm and 14-140mm. In addition the shutter sound has a different cadence when the 100-300mm is used. I have no idea why this might be so. I have read that the aperture mechanism on the 100-300mm is slow but the frame rate is still slow even at maximum aperture. So, it's a mystery.

On the GH3 or G6 unsharpness due to shutter shock is readily produced with the mechanical shutter especially at the long end. For this reason I recommend use of the E-Shutter and a sturdy tripod for speeds slower than about 1/400 second.

I found when using the lens at the long end that it is very important to keep my fingers or any other source of pressure off the inner barrel. Pressure on the inner barrel deflects it out of proper alignment leading to softness along one edge of the frame. This could be a significant issue when handholding or with the lens placed on a bean bag or similar soft support.

After market tripod collar/mount Rudolf Rosch (with an umlaut on the o) in Germany, contact at info@roesch-feinmechanik.de makes a very nice aftermarket tripod collar/mount. It is beautifully made to very close tolerances and fits on the lens nicely. I paid E75 delivered to Australia. Payment is by PayPal. I think the 100-300mm really does need a tripod collar/mount as the body/lens combination is rather unbalanced on tripod using the camera tripod socket. On the GH3 this is 19mm from the front edge of the camera base but on the G6 the center of the tripod socket is only 10mm from the front, placing a lot of strain on the socket.

Although the Rosch product is as well engineered as you could wish there are still problems resulting from the fact that it is aftermarket and not incorporated into the original design. When handholding it impedes the left hand's grip on the lens and the ability to rotate the zoom ring. If you try to deal with this by rotating the collar, it bumps into either the handle or flash housing. So for hand held use, I leave it off.

The collar is at it's most useful when shooting in portrait orientation. If the camera is mounted to the tripod via the tripod socket then flipped over for portrait orientation, substantial twisting force is applied to the camera base by the weight of the lens and the screw has to be tightened hard to counteract this. The aftermarket collar allows the camera and lens to be rotated while the collar and tripod mount stay in place, with all the weight balanced nicely over the top of the mounting point.

100-300mm on GH3 at 100mm, hand held, 1/1000 sec f4.5, OIS on. This picture has been reduced and compressed for the internet so some loss of original detail rendering will be inevitable. The houses are about 200 meters from the camera.  In the original file individual leaves on trees and blades of grass are rendered quite clearly. Apart from some explicit commercial, strategic or scientific purpose, I am not sure why anybody would want more information in a photograph. 


Next Post, optical performance


Panasonic 100-300mm lens reappraisal, Part 2, Optics and Techniques

$
0
0
100-300mm lens on GH3, 300mm, f8, 1/500 sec, E-Shutter, sturdy tripod, cable release, no wind. The yachts are about 300meters from the camera. You can see the posts marked C and D. Just above the C and D is some writing. In the original converted RAW file at 200% on screen I can just read "Welcome to the Alfreds"   This picture has been reduced and compressed for the internet so you won't be able to make out the writing. I chose this subject as a test as it presents the lens with a mass of detail which has been rendered rather well.
 
Sample variation ? I did not have my original copy of the lens available but my distinct impression is that the second copy is better optically at all focal lengths. My experience across all brands is that sample variation is a fact of life particularly but by no means exclusively at the budget end of the price spectrum. The 100-300mm is remarkably inexpensive for a superzoom so I guess sample variation is not surprising.

The short and the long of itUsing the lens toward the long end requires a more demanding technique from that which works well at the short end.

Challenges at the long end I recently tested and reviewed in this blog the Panasonic FZ200 which has the same angle of view at the long end as the 100-300mm on M43. Both kits present similar challenges at the long end making sharp pictures more difficult to achieve than they are at the short end. The problem is that everything is working against sharpness as the lens is zoomed out and subject distances increase. The main issues appear to be:

* Even with impeccable technique in ideal conditions and absolutely no camera shake at all,
a) The lens has somewhat lower resolution and contrast at the long end.
b) Optimum resolution is achieved at f8 whereas at the short end peak performance comes in at about f4.5.

* The effect of camera shake is greatly magnified at the long end and

* OIS is not able to counteract the effects of fast jitter typically produced when hand holding or even on a less than sturdy tripod. Panasonic OIS works well to stabilise the appearance of the preview image in the EVF mainly due to it's ability to compensate for relatively slow camera/lens movements.

* Atmospheric haze and heat distortion are significant detractors from image clarity as distance from the camera increases.

* Autofocus is a little less confident at the long end but simultaneously greater AF precision is required due to the small depth of field at long focal lengths.

* My tests show that the standard rule for minimum safe hand held shutter speed is too slow by about one EV step at maximum zoom. So the rule would indicate that a hand held shutter speed of 1/600 sec should be safe but I find that reliable sharpness hand held requires a shutter speed of 1/1250 or faster. Even at 1/1000 sharpness is not consistent at the long end. With slower shutter speeds I will get an occasional sharp frame but lots of unsharp ones.
Same subject as the photo below, different day and slightly different camera position. 100-300mm at 300mm, 1/500 sec, f8, cable release, E-Shutter, sturdy tripod. Sharp, clear, no artefacts.

100-300 at 300mm. Handheld, 1/1000 sec at f5.6, E-Shutter. Look at the top row of windows. The frames appear to be bent. This is one of the E-Shutter artefacts referred to in the text.


Optical performance

Resolution and contrast are excellent to outstanding at the short end. I rate the 100-300mm at 100mm as equal to the 35-100mm f2.8 with both at f4. It really is a top performer at this focal length right from maximum aperture.

In the middle of the focal length range, 150-200mm, it is excellent. On my tests the 100-300mm has better resolution than either the 45-150mm or 14-140mm at 140mm. Again there is little to be gained from stopping down apart from reduced corner shading.

Towards the 300mm long end resolution and contrast drop a little from excellent to very good. There is a definite improvement as the aperture is stopped down from f5.6 to f8. I found no benefit to further reduction in the lens aperture in fact on several of my test sequences resolution fell slightly at apertures in the f9-f10 range.

Corner shading is obvious at wide apertures, becoming less so as the aperture is decreased.

Flare is generally well controlled especially if the lens hood is ued which I recommend at all times. Veiling flare becomes evident if the lens is pointed directly into the sun or sunlight reflected off water. However shadow details are quite well preserved and can be revealed in Camera Raw.

Chromatic aberration and Purple fringing CA is corrected in Panasonic cameras so is not usually an issue. However small amounts of both CA and PF can appear at bright, high contrast edges. They are easily corrected in Camera Raw.

Distortion is minimal at al focal lengths.

Centering My copy appears to be well centered with no significant asymmetric unsharpness at any focal length as long as no pressure is applied to the inner barrel.

Bokeh is generally smooth although at some focal length/focus distance combinations I did see some tendency to a jittery appearance in out of focus backgrounds.

Artefacts with E-Shutter The following phenomena are mostly seen at maximum zoom. If the E-shutter is used handheld some curious artefacts can appear in the image. One type I have seen at low shutter speeds is horizontal bands of blurring across the image (landscape orientation). Another, seen at higher shutter speeds is a horizontal band in which vertical subject elements are distorted in wavy fashion. I attribute both these artefacts to camera/lens movement occuring while the E-Shutter is scanning a strip of pixels. It takes 0.1 seconds to scan the whole frame which is a long time in relationship to the shutter speeds required for hand holding a long lens.

The houses in this photo are 1.4 kilometres from the camera. Some afternoon haze present. 100-300mm lens at 300mm. Sturdy tripod, 1/500 sec, f8, E-Shutter, cable release. As usual there are details in the original which will not survive the passage to internet publication.


How to get sharp pictures at the long end

Hand held Key message: Fast shutter speed, careful technique.
Settings: Mechanical shutter, speed 1/1250 or faster, let the ISO come up to allow f8. OIS on (IBIS if Olympus).
Technique: Auto focus very carefully on a clearly defined part of the subject, make sure there is nothing in front of, behind or near the desired focus point to cause misfocus. I find that AF is more reliable than MF on the GH3, but even on a camera with peaking, hand held MF will be difficult as the enlarged image is jumping about so much. Do your relaxation exercises before shooting. Consciously relax the arms and hands. Adopt a comfortable posture. Breath in then out and at the point of full exhalation gently squeeze the shutter button.
Tripod mounted Key message: Keep the camera/lens absolutely still during the exposure.
Equipment: Use a sturdy tripod. My experiments with a lightweight tripod showed it is not stable enough. Wind will cause havoc even with a solid tripod. Use the aftermarket Collar/mount for portrait orientation. Trigger the shutter with a cable release or smart phone. If you use timer delay I suggest 10 seconds. The preview image appears stable on the monitor after 2 seconds but my results with 2 second timer have been inconsistent so I think there is still some residual vibration happening there which is not problematic at shorter focal lengths.
Settings: E-Shutter on, unless the exposure time is longer than 1 second in which case use shutter delay of at least 2 seconds (Panasonic) or antishock (Olympus). OIS/IBIS off.
Technique: For distant subjects choose a clear cool calm day or time of day with low air pollution.

100-300mm at 300mm, sun shining directly at the lens and sunlight reflected off the water also shining directly into the lens. this produced moderate veiling flare which was easily managed by juggling the sliders in Camera Raw. This photo also shows the character of the bokeh at f8.  I focussed on the front yacht.

Summary My original, very likely inadequate, evaluation of the Panasonic 100-300mm lens was that it was quite good at the short end and a bit soft at the long end.

My re evaluation reveals a much better lens which is really excellent at the short end and very good at the long end. The second copy may have been better than the first but I believe the main reason for the different result second time round is that I used more careful technique. The lens represents outstanding value for money and is one of the reasons for the M43 system's appeal.

My wish list for the Mk2 version I think the basic concept, focal length and aperture range are just fine. Some contributors to user forums have wished for a wider aperture and/or longer focal length. But those things would make the lens larger, heavier, more expensive and therefore less appealing to most users. So my wish list is:

* Same focal length and aperture range. Of course if the designers came up with a way to make the lens more compact that would be a bonus.

* A built in rotating tripod collar standard with every lens.

* Faster burst rate in continuous shooting. I think this will become a more pressing issue when users start mounting the 100-300mm on their GH4's. There are already reports that the advertised frame rate is not achievable with this lens.

* Some improvement in resolution/contrast at the long end would be welcome.

* Some improvement in zoom smoothness would be nice also.

* As a user I would prefer a lens with internal zooming like the 35-100mm f2.8. I would opt for this even if it meant the lens were slightly longer in the camera bag. A lens with internal zoom is easier to work with both on the tripod and hand held and is not subject to mechanical decentering by external force.


Why Panasonic needs the G7, Part 1, Concept

$
0
0
On the right, current model G6. On the left, mockup of proposed successor, the G7
 
In decline I keep reading reports of declining sales across all categories of camera. One has the feeling that some manufacturers are going to fail. In the face of this most of them are churning out ever more models presumably hoping that one or some of them will be the money spinner which allows them to survive while others fail.

Panasonic started the mirrorless interchangeable lens initiative with the G1 in 2008. The G1 looked and mostly worked like a little DSLR. Since then the G series has delivered the G2 which was much like the G1, then the G3 which was an ergonomic backward step with a top/rear shutter button position and only a mini handle. There was no G4 apparently for superstitious reasons to do with the number 4. (but there is now a GH4, so much for superstition). The G5 which was announced in July 2012 had a much improved user interface with good handling.

G5 marketing ? I can't speak for other countries but in Australia Panasonic did not market the G5 in any way which I could detect. I found it difficult to find one so I could buy it. No surprise that it did not sell very well. When I look through the current catalogue of Australian vendors I see G5's are still being offered for sale.

G6, coming ready or not Without clearing stocks of the G5 Panasonic released the G6 in April 2013. The G6 is a makeover of the G5 with enough improvements to make it attractive to G5 owners wanting to upgrade. Assuming there were enough G5 owners to make this a viable proposition, which apparently is not the case. In fact the G6 is a very nice camera in the mini DSLR style. It is enjoyable to use and it makes very good pictures.
G6 in hand


Now I read rumors that there will be no G7 this year. With unsold stocks of G5's and G6's that is not surprising. Panasonic is trying to turn around it's overall financial position, apparently with some success, so I guess underperforming lines and products will not be tolerated by head office.

The 43 Rumors website recently polled readers about their wishes, with the question "what camera line should Panasonic keep and what not"? Most support has been declared for the GH line followed by the GX, GM, G and GF, in that order.

If Panasonic (or any other maker) is to survive in the camera business I believe they need to establish a core line of models and stick to it, with incremental updates. Non core models can come and go. Consider the automobile business and Toyota in particular. Their core passenger car models are the Corolla, in the small car category (well, actually it's not all that small these days, they got size creep) and the Camry in the medium car category. Motoring writers love to hate these vehicles but they sell very well because they provide what the customers want and expect in a reliable passenger car. I think that Panasonic, and by the way Sony, Fuji and Olympus need to consolidate their product lines into a small set of core models which reliably and consistently meet the needs of most photographers.

My work on camera ergonomics leads me to the view that within the genre of mirrorless interchangeable lens cameras a well designed humptop type provides the best ergonomics and best user experience. This is a proper camera with an inbuilt EVF, anatomical handle, forward shutter button, fully articulated monitor, built in flash and a full set of hard controls suitable for the expert/enthusiast user. The control system is of the modern Mode Dial and Control Dial type. Novices can be very happy using the Auto Mode and have the opportunity to graduate to the expert modes as their skills increase.

GH series Every camera makers needs a flagship, or hero line of models. These are the cameras with the highest possible picture quality and performance, able to tackle almost any photographic assignment. The GH3 comes close to hero status. From all current reports, it appears the GH4 has what it takes with a combined level of still and video imaging capability never before seen in a single consumer product. So Panasonic has it's flagship.
G7 Mockup in hand


G series I have briefly described the G series story above. In the CanoNikon world very few buyers opt for the hero camera. Most buy an entry or upper entry level model. That is CanoNikon's bread and butter. Panasonic needs an entry/upper entry model for the same reason. If the product development people at Panasonic are really smart they will offer just one such model (to contain R&D costs) and make it fully featured so novices can use it with no trouble on Auto Mode, while more experienced users can customise their camera in the expert modes. A fully evolved G7 can be that model.

GF series Until quite recently and I suspect even now at Canon and Nikon, MILC's were regarded as a kind of half way stage between a compact and a Real Camera which some people still think is a DSLR. I never believed this and have long been of the view that the only way forward for MILC's is to compete head on with DSLR's and beat them at their own game. It has always seemed to me that the "half way" camera is really a "half baked" one ultimately serving no user group particularly well. So I would not shed a tear if Panasonic dropped the GF series.

GM series (assuming the GM1 is the start of a series) I see this as a demonstration project showing just how much photo capturing technology can be stuffed into an amazingly small package. Sony has also been on this trip recently in various guises. I think when buyers get over the "OMG look how small it is" initial response they will come to discover that it is burdened by many holding, viewing and operating compromises forced by that very smallness.

In brief I think the GM is a techno-frolic and buyers will get over the novelty.

GX series This is a bit more complex as Panasonic changed the GX series concept in mid stream. The GX1 appeared towards the end of 2011. It was initially well received but it has no built in viewfinder, a deficiency which limits it's long term appeal. Panasonic kept the GX name but changed everything else with the GX7 of 2013. This camera does have a built in EVF. But the retro styling places the shutter button in the suboptimal top/rear position on the body and forces use of a mini handle which does not provide a secure grip on the camera. In addition the thumb support is vestigial. In consequence the camera is not particularly comfortable or secure to hold. In Australia Panasonic marketed the GX7 with some of the vigour which was so notably lacking in the (non existent) campaign to sell the G5 and G6.

In brief I think the GX7 is a niche model enjoying some success right now on a little wave of retro enthusiasm. But I do not see it as the core small/entry/upper entry fully featured Panasonic MILC.

So, I think the way ahead lies with continuation of the G series in the form of the G7. I have some explicit ideas about the shape which this camera might take and will present these in the next post.


Why Panasonic needs the G7, Part 2, The Mockup

$
0
0

On the left, the G7 mockup, made of plywood. This is slightly smaller in all dimensions than the G6 on the right. But the shape is designed to "fill the box" more with higher shoulders and a taller handle with inverted L shape providing a much larger top plate for the quad control group of UIMs. The mockup is more of a handful allowing a full five finger grip with the right hand.  You can see the [alt] button on the mockup just to the right of the bottom of the handle.    To the casual eye, these two cameras might look very similar but the mockup has a substantial ergonomic advantage.
Rear view. You can see that the monitor housing of the mockup is smaller horizontally so although the mockup is a few millimetres narrower, the control panel on the right side of the mockup is considerably larger. The right rear of the body is more softly curved, the buttons are well clear of the edge of the body, the control dial has moved to the front where it has more room, and a Jog lever has been added just to the right of the viewfinder. Even though the lens axis has moved to the left, the shape of the mockup provides space for a set and see dial on the left side of the hump.
 
 
Like many bloggers I have formed views about various matters photographic. In the case of camera ergonomics and the user experience , these views have evolved over 60 years of using many different types of camera and in the last four years from my camera mockups. The mockups in particular have taught me a great deal about those aspects of camera design which enhance the user experience and those which diminish it.

In the last post I put forward a consumer's case for Panasonic to retain the G series of cameras.

In this post I present a mockup illustrating the form which the G7 could take.

I believe that one reason the G5 and G6 have not sold as well as Panasonic hoped has been a lack of assertive marketing .

But there is another reason. The G6 is a nice camera but it doesn't really make a strong case for the MILC in the way that the GH4 does. There is a lack of "Wow !" factor.

The G7 needs to step up several levels in order to make a persuasive case to would be buyers. it needs to improve specifications, picture quality, performance, ergonomics and the user experience.


My contribution in the form of the mockup described here is about ergonomics and the user experience.

In what way could the G6 ergonomics be improved ?

The G5/6 are a great improvement over previous G models such that I rate them as quite good ergonomically. The size is just right for a small fully featured MILC and the hump top form with EVF, flash and hotshoe on the lens axis has some advantages over the flat top shape. There is a decent handle on which the right hand can get a grip.

But there are some grumbles which I have noted and users have reported on forums. Those of which I am aware include:

* The Disp and Fn4 buttons are often pressed inadvertently. Fn4 is too close to the edge of the body. Disp is right under the lie of the thumb.

* Playback and Disp which operate in Review and/or Prepare Phase are located in a higher priority (more easily reached by the thumb) position on the control panel than Fn3 and Fn4 buttons which could be used for Capture Phase adjustments.

* The rear dial is located far over to the right side and is not as easy to operate as that on, say the GH3/4.

* The toggle lever behind the shutter button is (a) too easy to activate inadvertently and (b) has been allocated a very limited number of functions. If this was a mode dependent front dial it could be much more useful.

* Neither the iA button or the Video button allow user assignable function.

* The matte black finish picks up dirt and face makeup very easily. The rubberised finish on the lens side of the handle is easily scuffed by the fingertips.

 
You can see that although the mockup is a few millimetres smaller than the G6 it provides much more space on the top deck. This allows for a more natural position to be adopted by the right index finger on the shutter button and reduces crowding even though there are more UIM's on top of the mockup.  The quad control layout of shutter button, front dial and two buttons (1 and 2) allows the user to drive the camera with just one finger most of the time.


In designing the mockup some of the matters which I considered are described below:

* Monitor/control panel ratio on the camera back. G cameras have a fully articulated monitor, which is the most versatile type and should be retained. But the monitor is 91mm wide, forcing the control panel (the area on the right side of the back which houses the cursor and other buttons) into the remaining 28mm on the right side. Only 55mm (in 4:3 aspect ratio) of that 91mm is actually occupied by the review image. Other cameras manage a higher image: housing ratio. So the horizontal dimension of the monitor could be reduced without substantial deficit. This frees up space for the control panel. This in turn allows buttons to be moved away from the right side and a more curved, hand friendly shape to be built into the rear part of the handle.

* Even with the change described above, when I got into building the mockup I discovered that there is still not enough space for an easily operated rear dial. I tried various arrangements but none of them worked well with a rear dial. However the redesigned handle described below provides plenty of space for a front dial.

* Still on the back of the camera, I have given the G7 mockup a JOG lever. One of the great benefits of the MILC is its ability to place the active AF area almost anywhere on the frame. But to maximise this benefit there has to be a way to move that area quickly and efficiently while continuing to look through the viewfinder. Many MILCs and DSLRs use the cursor (4 way) buttons for this. That works but requires the right hand grip to be released in order to allow the thumb to drop 50mm down from its rest position in order to operate the 4 way buttons. One solution to this problem is the JOG lever which I have located just to the right of the viewfinder where it can be easily reached by the thumb without having to shift grip with the right hand. The JOG lever has a very textured surface so it can be pushed up/down, left/right with the thumb to instantly move the AF area.

* I have spent much time and many trial mockups on handle design. The one shown in the mockup has the following features:
* Raised height. This allows an adult male with average or even slightly above average hand size to get a full five finger grip with the right hand. That is a substantial achievement on such a small camera.
* The inverted L shape creates
* The opportunity to locate the shutter button where the index finger wants to find it. This is somewhat further to the left (as viewed by the user) than is the case on the G6 and many other cameras.
* A notch beneath the overhanging part of the inverted L which fits the middle finger nicely and allows the right hand to support th camera's weight without strain.
* A platform on top of the handle which allows placement of the Quad Control set. This consists of the shutter button located forward in the most relaxed position for the index finger, the front dial 12mm behind the center of the shutter button, and buttons 1 and 2 both with user assignable function. This is a highly efficient way to gain control of primary and secondary exposure and focus parameters with just the right index finger.

* There is a balance of set and see dials with fixed functions, and buttons with user assignable functions allowing the camera to be configured to individual preference, or simply left in Auto mode for snapshooters.

* On the front, easily accessible to the tip of the right 5th finger is an [Alt] button. This is a way to achieve two dial function with just one dial. Pressing the [Alt] button+ Front Dial causes the dial to perform a second, user allocated function. Or it could evoke an alternate function from button 1 or 2.

Overall the mockup is extremely comfortable to hold. It provides simple operation for the novice and highly configurable, controllable operation for the expert. All the buttons are larger than those on the G6 so they are easiler to find by feel, but none is placed where it wil be bumped inadvertently.

Styling All my mockups are designed to feel good and operate really well. So all the components and user interface modules are located where my fingers tell me to put them. Beauty is in the eye of the beholder.


"Classic and Authentic" or "Ergonomic"

$
0
0
Classic and authentic Church Point scene made with ergonomic Panasonic G6 camera 
 
An interesting piece by Sam Byford appeared in The Verge (www.theverge.com) on 8 May this year, titled " The beautiful blueprints for Fujifilm's camera of the future". In this Mr Byford quotes Masazumi Imai and other Fujifilm designers explaining some aspects of the process by which Fuji came to the X-T1 design.


Some of these quotes were of great interest to me as a student of camera ergonomics.

Quote 1. ....."To this end, the X-T1 features a more substantial grip than any X camera to date, but it’s not oversized and doesn’t break the compact lines of the body too much. Imai showed me some early prototype sketches for the X-T1 that looked similar to regular DSLRs, with ergonomic, bulbous grips that would have made the camera an even greater departure from Fujifilm’s X-series lineage.


"Our X design is classic and authentic," says Imai. "I could have chosen an ergonomic style but our X design is completely different. It’s flat and straight and based on ‘good-old-days’ camera style." In particular, Fujifilm’s own Fujica ST901 from 1974 served as inspiration for Imai. "Late ’70s to ’80s SLRs were very cool to me," he recalls. "The ST901 was very small with a very characteristic finder, so this was very close to the X-T1 concept. Very simple, not so ergonomic — this was the basic inspiration."
My thoughts: I used cameras very similar to the ST901 for many years through the mid part of the 20th Century. In fact I have in my camera drawer right now a Pentax Spotmatic which looks almost identical to the ST901 except for the maker's logo. The Spotmatic and many film SLRs of the day were indeed quite small (but heavy) and they were indeed "not so ergonomic". In fact compared to my current camera of choice the Panasonic GH3/4 they were buggers of things to hold and operate. In those days we managed. We had no choice. But now we do have a choice. For goodness sake why on earth would anyone want to return to the ergonomic travails of the (not so) good old days ?

For the dubious merit of partial adherence to a style of yesteryear ? Seriously ?

Quote 2. ...."One area where Fujifilm didn’t budge is the classic, dial-heavy control scheme, which the company believes is a more efficient and enjoyable way to shoot than the abstracted, context-sensitive wheels used by nearly all its competitors. Imai traces the shift back to Minolta’s 1985 Alpha 7000 camera, the first to use autofocus and automatic film advance, and the designers compare this movement to the rise of automatic transmission in cars. "The X series is a new combination, the dials and digital," says Imai. "At first, film cameras with dials were common, then it changed to PASM with automatic cameras. Next came digital cameras with PASM that were also automatic. But now, we should be coming back to the standard."

My thoughts:

First: the "classic" control scheme was not dial-heavy at all. There is only one dial, for shutter speed, on top of the classic film SLR. There are rings for aperture and focus on the lens. And that's yer lot.

Second: Fuji designers can "believe" what they like but believing something does not make it so. They can believe that a "dial heavy" control scheme is a "more efficient and enjoyable way to shoot than the....context sensitive wheels.... of competitors". But I have done and anybody with a little time can repeat for him or her self a series of time and motion studies demonstrating that the modern, (Main dial+Control dial) user interface requires fewer, less complex actions to operate the camera than the hybrid, Dials+Digital system used by the X-T1.

There seems to be an idea here that a camera with a PASM dial is "automatic" and this for some reason is a bad thing. In truth the user of a camera with a Main Mode Dial gets to choose. It can run in fully auto mode or fully manual mode. You get the best of both worlds.

Quote 3. "The viewfinder is another prominent area where the X-T1 takes influence from SLRs — it’s housed in a hump in the middle of the body, directly above the lens. This is how Fujifilm was able to achieve the X-T1’s headline feature — the huge electronic viewfinder that displays a larger image than full-frame DSLRs. The X-T1 isn’t the first mirrorless camera to house an EVF inside a facsimile of an SLR prism hump, a look I’ve always thought came across as a little inauthentic and dishonest to the digital reality of these products".


My thoughts: Is the hump "inauthentic" and "dishonest" or not ? If so how come they used it on the X-T1 ? If the Fuji people have been quoted correctly they just seem confused about this and in any case far too concerned with the ephemeral issue of "authenticity", whatever that means.

Quote 4.... "These are cameras designed to be used manually by people who know what each physical control is for; there are no automatic sports or portrait modes as found on almost all competing models. "Nowadays we don't need special technique, the camera does everything," says Iida. "We think we should go back to basics. The photographer can control the camera, the camera doesn't control the photographer."
My thoughts: This is disingenuous nonsense. The photographer can fully control a well designed camera with modern Mode Dial+Control Dial user interface and do so with greater efficiency than the hybrid, old style interface.

Quote 5. ..."Not everyone will prefer Fujifilm’s approach, and the X-T1’s design choices have sparked disagreement even among those who do. The team agonized over countless minor decisions that all add up, and it’s impossible to satisfy everyone. "Basically we asked a lot of professional photographers," says Iida, "and if we asked a hundred people, we’d probably get a hundred different answers." The engineers decided to put a lock on the ISO dial because they thought it would be less frequently used, but they stiffened the exposure-compensation dial after feedback that it was too loose on the X100 and X-Pro1. "Maybe in the future we can provide some kind of a service where the customer can come to our support center and we can customize that sort of thing," says Iida. "Because there is no perfect answer."
My thoughts: Of course, if you ask a hundred people you get a hundred different answers. That is because a person's likes and preferences at any point in time are idiosyncratic, transient and often poorly formulated. So the camera designer has to do the hard work of design and figure out, regardless of all those confusing, competing and contradictory likes and preferences, exactly what design will allow the operator to drive the camera in the most efficient fashion. This can be worked out by identifying what tasks must be performed in each phase of camera use and what actions must take place to carry out those tasks.

On the subject of customising cameras, I simply note that other makers such as Panasonic, enable extensive customisation of their current cameras without the customer having to attend a "support center".

Summary These revealing quotes from Fuji designers show they are deliberately preferencing style over ergonomics. The particular style they have selected derives from classic film SLRs of the 1960's to 1980's.

Why ? They say ...." It's flat and straight and based on 'good old days' camera style."

What is thought to be so appealing about this particular "style" ? They don't say. No argument of substance is provided to support the proposition.

They state "....But now we should (my emphasis) be coming back to the standard" by which presumably they mean the "good old days" style referred to above. Why should we be doing this ? No case is presented.

My careful observations of the process of camera operation indicate that

a) Cameras with a properly designed anatomical handle are easier to hold and operate and

b) The new type user interface using a Main Mode (PASM) dial and Control Dial(s) allows more efficient operation and more options for automatic or manual operation plus the ability to have pre programmed Custom Modes.

Conclusion Fuji has been making some interesting products recently. Some of them have qualities which suggest that someone at Fuji mission central is trying to make cameras which expert/enthusiast photographers might want to buy and use.

But I believe that in preferencing style over ergonomics they are heading in the wrong direction. I think they will do their customers a very big favour by placing good ergonomics at the top of the design priority list. The resulting product will probably end up looking like some other modern cameras.

So what ? The dearly beloved ST901 which is referenced as the inspiration for the current X-T1 had exactly the same appearance and operation as dozens of extremely similar film SLRs from many makers in a former era. They were that shape and they worked that way because the requirements of film transport and manufacturing limitations meant there were few realistic options.

Now manufacturers do have options. They do not have to make cameras which look (a bit) like and operate (a bit) like a 1970s era film camera.

Buyers also have options. In the ILC category, most choose a Mode Dial+Control Dial model.

The X-T1 is not, in my view, a "camera of the future". I looks to me like a camera which can't decide what it is trying to be. It seems to want to be modern yet retro and has gotten itself stuck in the middle, neither fully one or the other.

If Fuji would stop messing around with half baked retro style ideas and start making "authentically" modern cameras, I might seriously consider the prospect of buying one.

Panasonic G7 mockup, silver

$
0
0
G7 Mockup showing uncluttered but comprehensive control layout, clear space for the thumb, large buttons located where they will not be hit accidentally, JOG lever, quad control set.
 
Last week I posted a two part piece arguing that Panasonic needs to proceed with a G7 camera even though there is unsold stock of the G5 and G6 on camera store shelves. I illustrated the argument with a mockup of the camera I would like to see as a replacement of the G6. This was criticised by a user forum member for it's "dried blood" color. On reflection I have to agree the color didn't work so I have rebirthed the mockup in silver.

One of the fun things about making mockups is that I can, and do, change anything then rebirth the mockup at will. This is also highly instructive, as it allows me to develop a considerable understanding of the effect on holding and operating of various different variations on a theme.

I will use this rebirthing as an opportunity to illustrate the features of the mockup in more detail.

On the left, G7 mockup, on the right, G6. The styling differences are easy to see. The ergonomic advantages of the mockup are best felt.

The process When I set out to make a mockup I decide on a few basic dimensions. These are overall width and height, monitor width and height, height allowance for EVF, body depth (not including the handle or EVF eyepiece rear projection), distance from lens side of handle to center of lens mount and distance of lens axis from left side of body. I take these from an existing camera, often with small alterations, to be sure that the resulting mockup would be able to contain the guts of the device if it were used as the basis for a real camera.

Next I decide what I am trying to achieve with this particular mockup. In most cases that is to evolve a camera which I have used and which I think has possibilities for ergonomic improvement, within or very close to the same physical and conceptual envelope.

I have a good idea of the shape and style which I want and I initially express these in the form of rough sketches. But I do not make drawings of the mockup before construction begins. This is very important, particularly on the right side both at the front (handle) and the back (thumb support and control panel). I do not lock in the body shape or location of user interface modules (UIMs) before construction. I cut, glue and shape pieces of plywood until the result feels very comfortable in my hand. I often get this not-quite-right resulting in a tear down and rebuild. Having done this many times, I have developed a very good idea of which shapes are comfortable and which are not. When the shapes are to my satisfaction by feel, I start allocating positions for UIMs where my fingers want to find them.

The process of building and rebuilding mockups has taught me much more about camera ergonomics than simply using the cameras which one buys. With the mockups, I can say .."what would happen if I just changed this..."? And I get the answer. For instance in the process of changing the G7 mockup's color I took the opportunity to relocate the shutter button and button 1, 2mm to the right and also shaved 2mm off the lens side of the handle for a more comfortable holding feel and also to allow a little more space between the fingers of the right hand and a large lens.


Dimensions
I gave the mockup a fraction more body depth than the G6, measured from front face of lens mount to rear face of monitor housing. Actual measurements are G6, 41.2mm, G7 Mockup, 42.4mm.

 Width mm
excl lugs
Height mm
excl hotshoe
Depth mm
Total W/O lens
Monitor housing width mmBox Volume cc
G7 Mockup118816979659
G6122836991699


You can see the mockup is a little smaller in width and height than the G6. The mockup width works as it stands at 118mm but if it were 4mm wider that would allow a little wider monitor and also a little more space between the fingers of the right hand holding the handle and any large lens mounted.

Mockup G7 rear. The function of most buttons is user assignable.  The JOG lever is used to directly move active AF area around the frame without having to press another button and without having to move the eye from the viewfinder or shift grip with either hand.


Rear of camera
The mockup's fully articulated monitor housing has 12mm less width than that of the G6. I had a good look at the preview and review image in 4:3, 3:2 and 16:9 aspect ratio on the G6 (and other Panasonic cameras with fully articulated monitor). In no configuration does the image occupy the full width of the screen. Presumably there is a technical reason for this but other makers manage the same actual image size with a narrower monitor housing. I have assumed that if others can do it then so can Panasonic.

The relevance of this is that the main issue leading to inadvertently pressed buttons on the G6 is that the wide monitor housing steals width from the control panel (the remainder of the camera back on the right side). This in turn crowds buttons together and forces them across very close to the right side of the body.

This also pushes the rear control dial way over to the right where it is located on the corner of the body rather than on the back. Here it is slightly awkward to operate with the right thumb. Operation of the dial is further impeded by a slightly too recessed position and slightly rounded serrations. Each of these details has it's influence and each detracts from the user experience a little. Anyone who handles a G6 then a GH3/4 will instantly experience the difference. On the GH3/4 they got those details right making these cameras much more positive to operate.

During the process of making the G7 mockup I investigated whether there was enough room for a rear dial. I increased the width of the control panel from 29 to 38mm. This allowed a larger thumb support which I suppose could have incorporated a rear dial. But it would have been a tight squeeze. One of the principles which guides me in making the mockups is to always aim for layouts which are uncluttered, providing plenty of space for the fingers to operate freely. So the control dial went to the front where I have created plenty of space in a very high value location.

The thumb support is of the optimal diagonal type so the thumb can help support the mass of the camera without having to grip tightly. There is a clear space on the upper section of the control panel for the thumb, such that the thumb will not inadvertently hit any buttons.

The lower right side of the body is rounded off for comfort but also to allow the 4 way controller and button 8 to sit below the level of the slightly raised right side of the body. Thus they are easy to press when required but will not be bumped inadvertently.

Top view shows the quad control set and the [Alt] button is just visible.

Top of camera The main item here and one of the signature features of my mockups, is the quad control set, consisting of shutter button, front control dial, button 1 and button 2. Space for this quad set is created by the inverted L design of the handle. Function of the buttons is user selectable from a long list of options. (I would allocate ISO and Exposure +/- to them but others will have different ideas) Both the shutter button and the front control dial are set quite high and both are strongly textured so they are easy to locate and operate by feel and also so buttons 1 and 2 will not be pressed accidentally. Both buttons are also strongly textured.

The quad control set is a very efficient way of controlling the most frequently changed primary and secondary exposure and focus parameters with just one finger, without having to take one's eye from the viewfinder and without having to change grip with either hand. It is sympathetic to the preferred natural movements of the index finger. Many DSLR's require the index finger to undertake a large amount of side to side movement in order to reach buttons and or dial located in front of and behind the shutter button. The quad control way utilises the index finger's natural range of movements more effectively.

On the left side I have put a set and see dial which I would use for Drive Mode. On the right side of the hump is the Main Mode Dial with Auto, P,A,S,M etc Modes. There is space for a third set and see dial but I elected to use two buttons, both with user selected function as this gives the user more options. There is space for more than two buttons but I am mindful that some recent cameras have an overly cluttered top deck leading to frequent miss hits.

Front of camera The lens axis has been moved 2mm to the left (as viewed by the user from behind the camera) to free up space for a larger handle than that on the G6. The mockup's handle has been raised to allow a full five finger grip even for a slightly larger than average adult hand. Shutter button height is 73mm on the mockup and 70mm on the G6. This might not sound like much but I have found that camera ergonomics is sensitive to quite small changes in dimensions, shape and control module layout.

The inverted L shape of the handle is very apparent when viewed from the front. This has two benefits over the more traditional layout seen in the G6. First the right index finger has space to lay where it wants to go. This in turn allows the shutter button to follow the finger and the quad control set to be created. Second it provides a deep overhang beneath which the right middle finger fits allowing the right side of the camera to be supported with minimal effort and maximum security.

Conclusion The G6 is a good small full featured camera which has been underappreciated by the marketplace. The ergonomic improvements suggested by my mockup could, if implemented by Panasonic make the G7 the best small ILC on the market.


The Nikon 1 V3 could have been...............

$
0
0

V2 on the left with 10-100mm lens, Mockup on the right. You can see the inverted L shaped handle topped by the quad control set


Using a mockup to illustrate how it could be done


The Nikon 1  series cameras which arrived on the scene in late 2011 certainly caught my interest.  The V1 in particular had a remarkable performance capability never previously seen on a budget consumer camera.  But Nikon right from the start has appeared to be conflicted about it's 1 series, not able to clearly identify it's position in the product spectrum.  Was the V1 a super speed demon for sports/action enthusiasts, even some professionals, or was it a half baked "inbetween" camera with crippled ergonomics, not knowing what it's purpose in the world might be ?


The V2  came along about a year later.  This model corrected many of the glaring ergonomic deficiencies of the V1. There are three V2's  in our family, each white, each used by a woman, each with the 10-100mm lens.  So I have had plenty of opportunity to familiarise myself with it. It's not a bad camera at all. It almost meets  my Proper Camera  definition apart from the fixed monitor. I think the V2 has  lots of potential for development.  It has some very impressive guts. The system also has the 1 series 70-300mm lens coming along soon. If this is good optically it will be very interesting for bird/nature/sport/action/wildlife photographers, of whom there are many. But a long lens like this needs a camera which can be held securely and it needs a built in EVF as viewing with such a lens will almost exclusively be through the EVF to contain camera shake.


V2 on the left, Mockup on the right. You can see the anatomically shaped thumb support and JOG lever to the right of the EVF. The V2 looks to me like a "styling" exercise. The mockup has it's own style born out of form following function. They are effectively the same height although the higher shoulders of the mockup make it appear larger. It is certainly easier to hold.

My hope   for the Nikon 1 system has been that Nikon would develop and market  it as a fully fledged but very much more compact alternative to the traditional DSLR.   So, I really wanted the V3 to look like the mockup illustrated in this post.  This represents a  further evolution of the V series ergonomic design.


But some reviewerssaid they thought the V2 was ugly. Has this been the reason for the V3 reverting to a boxy shape similar to the V1 or many compacts, with minimal handle and no built in EVF ? Who knows ?  Nikon has continued to output a range of lower cost, lower spec 1 Series cameras each looking very like a compact but with interchangeable lenses. The market has delivered  it's collective verdict on compacts without EVF, sales of which have crashed over the last few years. So I really don't understand why Nikon keeps rolling out multiple minor variants of these things.  


I also don't understand why Nikon keeps crippling the V Series, it's top tier 1 System camera with sub optimal ergonomics.  It's a baffling mystery to me. If they got the ergonomics right and priced it right and were able to supply the thing to buyers, I suspect they would sell plenty.


The camera I wanted them to make  is shown in the mockup.  Camera evaluation can be considered under the headings: Specifications, Picture quality, Performance and Ergonomics. This post and the mockup are about the ergonomics.


Dimensions


Width mm

Height mm

Depth body

Depth total

V2

108

82

23

56

V3/4 Mockup

111

83

30

56


You can see the mockup is marginally wider and taller than the V2 but they are essentially the same size.


V2 in the hand. Holding and operating the V2 is not a bad experience but it could so easily be better with more evolved ergonomic design.
 
Ergonomic issues with the V2   The V2 provides a reasonably decent user experience but it could be considerably improved with some design modifications. The specific design features  which I have identified as capable of improvement are:


Prepare Phase   When using the camera I find myself having to access the main menus in Prepare Phase of use. The camera needs a Q Menu or equivalent quick access menu separate from the main menu and able to be populated with user selected items. The existing F button is an awkward access portal to some of the  items  which would better be found in a well designed Q Menu.


Most of the buttons on a camera like this should allow user selectable function from a long list of options.  Novices can select the green zone on the mode dial and leave all other user interface modules at default settings.  There is no need to dumb the camera down just because novices and snapshooters will use it. Novices also use high spec DSLR's. Some of them will become experts one day.  They need a camera which can grow with them through it's ability to be user configured.


Capture Phase


Holding   The V2 has a built in handle which is desirable but it could be better designed. It could be taller, providing a better grip, if the shoulders of the camera were raised. The boxy, squared off shape does not conform well to any known human hand or fingers.


There is no proper thumb support.


Viewing  The EVF needs to be of higher quality, needs to be more adjustable by the user and it needs a more effective light excluding eyecup.


Fixed monitors are much less versatile than the fully articulated type.


Operating  The user interface needs a rethink.


Buttons on the left side of the monitor require the left hand to be removed from holding the lens. No great problem if the lens is very light and small, but the 1 System is acquiring some lenses of decent heft.


Changing AF area position requires the lower rear dial used as 4 way controller. This works but a JOG lever located just to the left of the thumb in rest position would be better.


The mockup uses my signature quad control set consisting of shutter button, front control dial button 1 and button 2 (both with user selectable function). This is the most efficient way which I have yet discovered to drive most Capture Phase functions with just one finger.


Holding the mockup. The shape is just right and the main controls are in the optimum locations because I shaped the body and handle to fit into the natural half closed position of the hand then put the buttons and dials where my fingers wanted to find them, not where some stylist decreed they should go.
 
How the mockup improves the user experience 


Holding  There is a fully anatomical, inverted L shaped handle. This is one of my signature design features.  It provides a very comfortable grip for the right hand because it has been shaped to fit the hand, not the other way around. The overhang allows the right middle finger to take the mass of the right side of the camera without muscle effort. It is not necessary to "grip" the camera, it is held securely with minimal effort. The increased height of the handle allows a full five fingered hold even with many adult male hands.


The inverted L shape provides a wide top platform on which the quad control set can be located.


The substantial thumb support complements the handle to make the camera very easy to hold without strain.


Viewing  The width of the monitor is the same on both the mockup and the V2. The available space could be used for a swing up/down or fully articulated version.


Operating  The quad control set allows control of  all the following with one finger, while continuously looking through the EVF and without having to change grip with either hand:  AF, Aperture (or Shutter Speed depending on mode dial position), ISO (or other parameter as user selected), Exposure Compensation (or other parameter as user selected) and capture.


The JOG lever allows the active AF area to be moved directly without looking away from the viewfinder and without shifting grip with either hand.


There is space on the left side of the hump for a second set and see dial so I have placed one there.  I would use this for direct access to Drive Mode.


Summary 


The V3 which has appeared on the market recently has disappointed many reviewers on many levels and for many reasons. Nikon had an opportunity to improve on the V2 but instead went backwards, sideways, down (in size), any way but forwards. On their top tier 1 System model line they took away the inbuilt EVF, took away the proper handle, shrank the body so it is more difficult to hold,  made the battery smaller, used a smaller memory card for no apparent reason at all and shifted the lens axis back towards the center of the body, providing less room for an accessory handle.


They paired this with a new kit lens having mediocre performance and no ability to fit a screw in filter.


By way of contrast, the mockp improves on the V2, allowing a more efficient, streamlined experience in all phases of use.  The layout is clean and uncluttered yet provides a comprehensive suite of controls for the expert/experienced user while remaining perfectly suitable for the novice.  It represents a win-win result in all aspects of use.  Nothing has to be given up in order to proved improved ergonomics.


This is the camera I want Nikon to make.


Panasonic GH4 User Review Part 1 Exterior and first impressions

$
0
0

GH4, Panasonic 100-300mm lens, hand held
 
The GH4  is the latest iteration of Panasonic's top of the line GH series combining a high level of stills and video capability in one compact unit.


My GH4 has finally landed in the household. It will be my main camera, replacing the GH3. I will be reporting my owner/user experience with the GH4 over the next few months.  Most reviews of the GH4 have concentrated on it's amazing video capability. But I don't do video so I will be reporting on it purely as a stills camera.


First impressions  It looks like a GH3, it works like a GH3.  That's a good thing. The camera has good ergonomics and is a pleasure to use. It uses the same battery and other accessories as the GH3. So users stepping up from the GH3 will feel right at home. 


It is, at 920 grams one of the  largest and heaviest mirrorless interchangeable lens cameras (MILC) with standard 12-35mm f2.8 kit lens fitted.  Even the full frame Sony Alpha 7/7R/7S MILC's with the 24-70mm mounted are about the same weight although the lens is larger and only f4.


The GH4 is also, at AUD2500-2700  retail in Australia for the single lens kit one of the higher priced MILCs, although the Sony Alpha 7 cameras and lenses are considerably more costly as are the Leicas.


Some people might think that buying a camera like this purely for stills use is a poor allocation of financial resources and they might be right.  On the other hand in all the excitement about the GH4's remarkable motion picture performance I think the message about it's stills performance is not getting much of a hearing.  So you can read about it here over the coming months.


Exterior appearance and feel  Differences between the GH3 and GH4 are minor.


* There is a little  lip running down the inside of the handle on the GH4, providing a slightly better grip for the finger tips, not that there was any problem with the GH3 grip.


* There are two little nipples on the ISO button, so it is easier to locate by feel.


* The rubber eyecup is wider. I am not enthused by this. I think that if they wanted to improve the eyecup it should have gone deeper, with a thicker, softer feel to the rubber and a more ergonomic shape to better fit the orbital curve in both landscape and portrait orientation. I tried the GH3 eyecup  (it fits) but decided I didn't much care for either of them.


* The Drive Mode dial has an extra position for direct access to the interval timer.


* The Main Mode dial is taller, presumably to make it easier to operate, not that I ever had any difficulty with the one on the GH3, and is fitted with a push/push locking button. This can be set so the dial is locked or unlocked. I never had a problem with the dial moving unintentionally on the GH3 so I will leave it unlocked. The dial itself is a bit stiffer than that on the GH3 and clunks into each setting in a slightly more positive fashion.


* The memory card cover feels a bit tighter, requiring a bit more force to open. Several users had complained about this cover opening inadvertently on the GH3 and I also had this happen occasionally.


* A minor irritation, there is no plastic cover or even a little ziplok bag for the battery, GH3 style. I will look for a small ziplok bag at the supermarket tomorrow.


The really significant upgrades are all inside the camera. Most improvements relate to the EVF, the imaging sensor, autofocus performance and especially continuous AF and of course the video about which you can read elsewhere.


Panasonic GH4 User Review Part 2 EVF

$
0
0

GH4, 100-300mm lens, hand held
 
Problems reported with the GH3  


The feature of the GH3 which has drawn most criticism is  the EVF.  This is  prone to a "smearing" appearance towards the edges of the frame if the eye is not held exactly centered and/or the diopter adjustment is a bit off. In addition there have been  various minor complaints about color balance. My GH3 is in for repairs right now in fact for fine superficial scuffing and loss of clarity on the surface of the viewfinder eyepiece caused by normal cleaning. There have been reports on user forums about this. Apparently the glass is too soft or has not been hard coated.  In addition the preview/review image in the GH3 EVF is not really sharp, making accurate focus determination before or after capture a bit more difficult than it needs to be.


From the earliest days of  EVF technology, refresh rate and blackout time have been  impediments to widespread acceptance of the EVF as an alternative to the established optical viewfinder (OVF). The blackout time is a particular problem when shooting in Burst mode, using AF Continuous when following a moving subject as in sport/action/birds in flight etc. 


But EVF's are improving with each new model and the one in the GH4 is no exception. 


The GH4


* Externally the eyepiece lens of the GH4 looks the same as that of the GH3 so I hope they got the surface hardness right this time round.


The EVF can be set to DSLR style view with camera data on a black strip beneath the preview (my choice) or monitor style with camera data superimposed over the preview image. Brightness, contrast and color balance are all adjustable. The EVF can be configured to look exactly the same as the monitor so the segue from one to the other is seamless.


EVF<>Monitor  switching can be triggered by the eyepiece proximity sensor, a button or by folding the monitor in/out. The system is highly versatile and can be configured to suit the individual user.


EVF refresh rate, mysteriously referred to as Live View Mode in the Setup Menu can be set to 30 or 60 fps.  The higher speed is said to provide smoother panning but I found little difference between the two settings in practice. On that subject the EVF pans smoothly in good light, becoming jerky in very low light. It remains perfectly usable however even when ISO 25600 is required, providing a clear well defined preview image. In these conditions you would see hardly anything through the OVF of a mid range DSLR. I was photographing junior indoor basketball a few days ago in rather dull light requiring ISO 10000. The EVF remained sharp and clear with smooth panning even on fast action.


* I am pleased to report the smearing problem has gone.


* Overall the EVF is excellent even at default adjustment settings.  I have set the contrast down one notch to improve highlight/shadow detail and calm down a bit of slightly over exuberant color saturation.  I also lifted brightness one step which suits my eyes.


With my right eye looking through the viewfinder and my left eye looking at the same scene simultaneously, both views look extremely similar. Via the EVF color saturation and accuracy are very good and the preview has a very natural appearance. The direct eye view reveals a bit more highlight and shadow detail in scenes with high subject brightness range but apart from that the EVF provides a very natural looking preview.


* Some reviewers have praised other cameras (for instance the Fuji X-E1)  for providing a more magnified EVF view as if that were a self evident benefit. However the very large view cannot be taken in all at once so there are advantages to the slightly smaller but still plenty large enough approach taken by Panasonic.


* EVF sharpness is clearly improved, making evaluation of image sharpness/focus accuracy easier even with peaking switched off.


* Fortunately the GH4 does have focus peaking which on my initial tests appears to work very well.  I have it set to the "High" position for greater accuracy.


* In burst mode and AF continuous, EVF blackout time is noticeably less, making it considerably easier to follow a moving subject and keep it in frame. I do not have a way to accurately measure the amount but my subjective impression is this:


I guesstimate a good  DSLR  as having about  20%  blackout when shooting continuously. That is, the user spends about 20% of the total capture time looking at a black viewfinder. Again subjectively I guesstimate the blackout time for the GH3 in Burst M Mode to be about 60%. This is so high it makes birds in flight or other unpredictably moving subjects very difficult to hold in the frame.


I put the blackout time for the GH4 at about 30-40% in Burst Mode M at 6 (RAW) to 7 (JPG) frames per second.  This is still significant but subjectively is a big improvement over the GH3. It makes the operator's task of keeping the subject in frame substantially easier.


Summary  Apart from the rubber eyecup which I think they haven't quite got right yet all the problems and issues with the GH3 EVF have been fixed or markedly improved in the GH4.  The overall improvement is so great that in my first few days of use the EVF has "disappeared" in the sense that I am not aware of it's intervention between myself and the subject.  And that is how it should be.


Panasonic GH4 User Review Part 3.1 Focus Technologies

$
0
0

GH4 with 100-300mm lens


From 1989 to 2009  my main cameras were Canon SLRs then DSLRs.  In many respects these were decent cameras with good image quality and performance. But every one of them suffered from inconsistent autofocus accuracy.


Then in 2009 I bought a Panasonic G1, the first mirrorless interchangeable lens camera (MILC) with EVF.  Compared to DSLRs of the time, this camera had second best image quality, performance and ergonomics. But it focussed accurately. First time, every time, all the time. This was a revelation. In single shot use the G1 hardly ever missed focus.  The G1 and all subsequent Panasonic MILCs used a different type of focus technology which clearly delivered a big advantage in accuracy. 


For several years camera reviewers kept asking the wrong question: "how fast does it focus" ? when they should have been asking "how accurately does it focus" ?


In the event Panasonic brought it's MILC AF speed up to match and now surpass that of DSLRs, while maintaining a clear advantage in accuracy and consistency.


DSLR focus  systems  Refer to the DSLR schematic.


A standard flipping mirror DSLR has three separate focus systems.   


For manual focus with eye level view the image coming through the lens reflects off the main mirror and is focussed onto  the focussing screen which lies beneath the pentaprism.  The user turns the focus ring on the lens back and forth until the image appears at it's sharpest.  In  manual SLRs of yesteryear this was the only way (apart from setting a distance by scale on the lens) to focus.  On my 50 years old Pentax Spotmatic this actually works quite well with a fast prime lens feeding plenty of light through the optical pathway.  Fast forward to the autofocus era with zoom lenses of smaller aperture and manual focus becomes very difficult at the wide end of a kit zoom. In the digital era sensor size reduced to the 28mm diagonal and pentaprisms gave way to pentamirror design. Manual focus became even more difficult.


For autofocus using the optical viewfinder (OVF)  some light from the lens passes through the main mirror, reflects off a submirror and proceeds to an autofocus module at the bottom of the mirror box. This module uses mirrors, lenses and sensors to tell the main lens which way it should turn to bring a specific part of the image into focus. There are multiple potential sources of inaccuracy in this system. It uses phase detect AF which is inherently both imprecise and inaccurate. It also depends on all the optical and mechanical components in the focussing chain being precisely aligned in the correct position. This is frequently not the case leading to further inaccuracies.


For autofocus in live (monitor) view a completely different focus system is used.  In this case, focus is assessed directly on the imaging sensor. Some cameras use a phase detect array built right into the sensor, many use a contrast detect system like most MILCs.  This has the potential to be more precise and accurate than the PDAF module in the bottom of the mirror box.  Whether it actually is or not depends on the implementation of the technology in each case.


Panasonic MILC focus system  Refer to the MILC schematic.


Focus arrangements in Panasonic MILCs are conceptually much more simple. No doubt the actual technology involved is very sophisticated and complex but in principle the ideas behind it are straight forward. 


There is just one focus system. It works by contrast detection (CD) directly on the imaging sensor. This works the same for eye level or monitor view. It is also the same for manual focus except that the contrast detect function is carried out by the operator's eye and the lens is focussed by hand.


Panasonic is one of the few makers to rely entirely on contrast detect focus technology. In the past this meant good single shot AF performance but sub standard follow focus capability using AF continuous on a moving subject. However as I will describe in a subsequent post, Panasonic has  been able to achieve excellent follow focus capability with the GH4 while staying with CDAF.  


In  the next three posts I will describe how the GH4 works and performs with manual focus, single shot autofocus and continuous autofocus on moving subjects. As you will read I have found it to perform exceptionally well in all three focus modalities. In fact the GH4 has the best focus performance of any camera used by me, ever. It is a big step up from the GH3  particularly in AF Continuous on moving subjects.     

Panasonic GH4 User Review Part 3.2 Manual Focus

$
0
0

GH4 with 100-300mm lens

 
The Panasonic GH4   has a very sophisticated and effective focus system. This post is about manual focus.  The user who has never before encountered a recent model Panasonic M43 camera might find the number of options and functions for manual focus a bit daunting at first. Fear not, with help from the owners manual and a bit of practice the process of camera work will become second nature.

The GH4 has several technologies and features to make the user experience enjoyable and the results of manual focus very effective.

Focus on the imaging sensor  All focus determination is carried out right on the imaging sensor. As a result focus is both precise (repeated measurement gives the same result) and accurate (that result is the correct one).

Focus looks and works  the same in EVF view or monitor view.

Setup for focussing  I use and recommend the following settings in the Custom Menu:

* Direct Focus Area On

* AF+MF  On

* MF Assist On, set focus ring on lens.

* MF guide  On

* Peaking  On,  Detect level High, select a color, I use cyan.

* Leave Fn3 with default function which is Autofocus Mode.

To enter manual focus   push the Focus Mode lever around the AF/AE Lock button to MF.

To move the active MF area  Press Fn3. This brings up the manual focus rectangle with bounding arrows in a box within a box display. Note MF uses a rectangle,  AF uses a square so you can tell at a glance which focus function is active.

Move active MF area with the Control Dial. Recenter by pressing Disp. The MF area can be set anywhere in a box about 3/4 the linear size of the whole frame.

To change the size of the MF area use the rear dial for big steps and/or the front dial for small steps.

To activate MF  turn the focus ring on the lens. This brings up a box within a box showing the preview image magnified at the position of the MF area.

Move the box around the screen with the Control dial.

Change the zoom level with the rear dial for big steps and/or front dial for small steps.

Peaking  if set to On in the Custom Menu will activate automatically. The implementation of peaking in the GH4 is very good  and a genuine aid to focus speed and accuracy. The only exception I would make is that in very low light levels peaking is less effective and AF works better.

AF in MF  Set the function of the AF/AE Lock button in the Custom Menu to AF On. Now you can press the AF/AE button in Manual Focus and the camera will quickly autofocus on the active area, so you only have to fine tune with the focus ring on the lens.

MF in AF  If you set AF+MF On in the Custom Menu you can MF while in AF. Just turn the focus ring on the lens while half pressing the shutter button or holding down the AF/AE Lock button.  This brings up the MF box in a box with peaking.  This allows you to fine tune focus manually while in AF focus mode.

Summary  The GH4 provides a very comprehensive and effective suite of Manual focus functions and options. It readily enables the practiced user to find precise and accurate manual focus in all conditions except the very lowest light levels when AF appears to be more effective.

The new GH4 owner will find perusal of the owners manual and some practice using the manual focus functions pays dividends with more confident camera handling  leading to more effective MF operation.


Panasonic GH4 User Review Part 3.3 Single Shot Autofocus

$
0
0

GH4, 100-300mm lens


The GH4 is reallytwo cameras in one body, a high performance stills camera and a highly capable 4K video camera.


This post is about  autofocus for still photos. There is extensive information about AF for video elsewhere.


Panasonic M43 cameras  have delivered very good single shot AF right from the G1 of 2008. Successive models have improved AF speed and added features and capability. The GH4 has the best AF Single of any camera I have ever used.


Newcomers to  the Panasonic AF user interface might be a bit overwhelmed at first by the number and variety of AF options and features available. Careful perusal of the owners manual is definitely recommended.  Fortunately the GH4 manual is well designed and easy to use but with 420 pages it's no light read.  I hope this and other posts in the current series will be useful for new GH4 owners.


Recommended Setup  In the Custom Menu, set Direct Focus Area On, AF+MF On, MF Assist On (Focus ring on lens), MF Guide On, Peaking On, AF/AE Lock button to AF On, Shutter AF On, Half Press Release Off, Quick AF Off,  Eye Sensor AF Off, AF assist lamp Off (not required:  the AF works just fine in very low light without the assist lamp), Focus/Release Priority FOCUS, .  In the Rec Menu set AFS/AFF to AFS. (page 1/7)


Allocate Autofocus Mode to the Fn3 button (this is the default setting so you can just leave it there).


General caveats about AF  All AF systems will fail in certain situations. Some of these are due to the inherent nature of AF technology, others are due to the inability of the camera to read your mind. Examples:


* A smooth subject with no lines or exclusively horizontal lines or no  texture provides nothing for the AF system to read.


* A dark/small foreground subject which you want in focus in front of a bright/contrasty background. The AF system will be attracted to the bright lights and focus there. You need to set an AF area smaller than the subject and make sure the AF area does not stray outside the edge of the subject.


* Lights on Xmas tree or any other subject with multiple bright light sources in frame will tend to confuse AF systems. The lights produce multiple small flare sources making it difficult for the AF system to figure out which are in focus and which are not quite in focus.


* A forest of little branches is another type of subject which the AF system can't resolve. No matter where the lens is focussed, some branches are in focus and some are out of focus. I switch to manual focus in this situation.


Hints about technique  Achieving accurate AF is not a passive process which you leave to the camera's automatic functions. It needs active guidance from the user.


* If time is not of the essence, half press the shutter button or press the AF/AE Lock button, wait for the AF square to go green and hear the double beep, check that the part of the subject which you want to be in focus actually is, then fully depress the shutter button.


* Adjust the size and position of the active AF area so it lies exactly over and is smaller than the part of the subject you want to be in focus. With the GH4 you can be very precise about this.


Settings  Set the Drive Mode dial to Single Shot. (single rectangle icon).  Set the Focus Mode Lever to AFS/AFF.


Activating AF  As usual with a high end Panasonic camera you get several options. You can activate AF with a half press of the shutter button or by pressing the AF/AE Lock button (back button AF start). However if you set Quick AF in the Custom Menu to On, the camera will continuously try to focus. If you set Eye Sensor AF in the Custom Menu On, the camera will focus when you bring the viewfinder to the eye. I find these last two options distracting so I switch them off. Some users might like them on although they do drain the battery somewhat.


But wait, there's more. The GH4 has a capacitive touch screen. This can be used to select and activate AF, change AF area position and size and fire the shutter. I mostly use the EVF for viewing so I find the touch screen functions not useful for me. Even with monitor viewing I find operating the touch screen awkward. Some reviewers and users report they like the touch screen. Anyway it's there if you want it.


There is also a function called Touch Pad AF which enables the user to move AF area with the touch screen while eye level viewing. Some users have reported they like this function but I found it very awkward as you have to push a finger between the screen and your face. I find moving AF area with the Control Dial much more satisfactory.


Autofocus Mode  The GH4 has a very comprehensive Autofocus Mode which enables the user to manage virtually every conceivable contingency. The price for this is a learning curve to manage the complexity. The AF Mode options are:


Face detect, Tracking, 49 Area, Custom Multi, 1-Area, Pinpoint.


Face Detect does what it says and I find it works well most of the time. The face detect system is quite sophisticated. It will identify a face then locate the eyes and indicate which eye will be selected, usually the closest.   If the system cannot identify a face it defaults to 49 area with auto selection. You may or may not like this as auto selection assigns selection of AF area(s) to the camera.


Tracking This has been a feature of Panasonic AF from the G1 but I never use it as I am not convinced it works for my requirements. The function identifies the part of the subject in the center of the frame when the shutter button is half pressed then endeavours to keep that part in focus if it moves laterally (left/right, up/down) within the frame. I think this could possibly be useful for video or some types of slow subject movement across the frame. Unfortunately many reviewers and users set tracking when they want the camera to follow focus on a subject moving towards or away from the camera as in sport/action. This is not a good idea, see 1 Area below. Unfortunately the owners manual does not clarify which situations are best served by tracking and which are best managed by another AF function.


49 Area  This covers a box about 3/4 linear size of the whole frame. You can let the camera decide which of the 49 areas to select using it's inscrutable electronic brain, or you can select any subgroup of  9 contiguous areas. I never use the 49 area option as it does not give me enough control over the position and size of the active AF area.


Custom Multi  This is a new AF mode for the GH4 designated by the [Free] icon in the AF Mode submenu. I have to confess this looks to me like the answer to a question nobody asked.  It is a variant of the 49 area Mode which allows you to create an AF area of any size or shape provided it is built up from any of  the 49 areas, which don't even need to be contiguous.  It also allows you to save three of these shapes as Custom AF areas.  


1 Area  I find this to be the most useful AF Mode for most types of photography. It gives the user full control of  AF area position and size. It also works best for AF-C, see the next post.


You can set the active AF area anywhere in the frame. The size can vary from a very small to a very large box.


Activate control of the AF area by pressing the Control Dial anywhere on it's rim (Pre select Direct Focus Area in Custom Mode)  and directly move AF area position by press and hold or repeated presses of the Control Dial. Change AF area size in big jumps with the rear dial or smaller intermediate steps with the front dial.  Return the AF area to center by pressing the Disp button while AF area is active (yellow with bounding arrows).  Half press shutter button to resume normal operation.


With practice this is much quicker to do than read about. I change AF area position and size very frequently as it is so easy to do.


The GH4 offers both smaller and larger options for AF area box size than the GH3. As a result I now find few situations where Pinpoint is required.


Pinpoint  This does what it says. Focus is confined to a very small pinpoint in the frame. Position of the point can be moved within a box smaller than that available for manual focus. Use the Control Dial as for 1 Area above. When the shutter button is pressed half way or the AF/AE Lock button is pressed focus is initiated and the monitor or EVF shows a magnified view of the in focus area as a box within a box. The time for  which this displays can be adjusted in the Custom Menu> Pinpoint AF time> Long/Mid/Short.  The Mid setting gives about one second which is usually plenty.


Pinpoint can be useful for situations like the bird in a tree subject where you want to focus precisely on the bird without catching  all the branches and leaves around it.  I don't use pinpoint very often but when I have used it focus appears to have been very accurate.


Results  You can see from the description above that the GH4 offers the user an astounding plethora of autofocus modes, functions and options. But does it all work ?


In a word, Yes. In a few more words, I have found the GH4 to have the most effective AF system of any camera which I have ever used.  In general use, with a variety of lenses in a range of conditions from very bright to so dark I can hardly see, the AF system nails correct focus almost every time. I have to put that "almost" in there because on my count about 0.5% of the 2000 or so photos I have made with the GH4 to date are not quite in sharp focus, for no apparent reason. The system is just ever so slightly less than perfect.


Panasonic claims that the camera will focus down to EV minus 4 which seems about right to me. In very low light levels the system shifts gears to Low Light mode in which the sensor is sampled at a slower than normal. This slows down AF acquisition but maintains accuracy.


In the early days of MILCs there was much discussion about the relative AF speeds of various camera types and models.  Recent model MILCs from many makers are now so fast at acquiring single AF that the process is almost instantaneous and too fast to measure effectively. The question "has camera A got the fastest AF" has become largely irrelevant as most of them are so fast it hardly matters. In the case of the GH3/4 the only exception to this is that some single focal length lenses, for instance the 20mm f1.7 are noticeably slower to AF than newer primes and zooms.


When comparing the GH4 with the GH3 it is hard to see much improvement in single shot AF as the GH3 was already so capable. Some reviewers have opined the GH4 is a bit faster, maybe that is so but the difference must be quite small. The big improvement in focus capability delivered by the GH4  lies in AF Continuous which is the subject of the next post.


Panasonic GH4 User review Part 3.4 Continuous autofocus

$
0
0

GH4, 35-100mm f2.8 lens


In the previous post  I commented that GH4 single shot AF  is not much better than  the GH3 largely because the GH3 is already excellent and difficult to improve.


But continuous AF   is another story altogether. Since the first MILCs appeared in 2008 they have lagged behind the best DSLRs in follow focus performance, using AF Continuous and Burst Mode to photograph subjects moving towards or away from the camera or moving unpredictably. 


The GH4 changes all that.  The GH4 is both faster and more accurate than the GH3 in Burst Mode using  AF-C. Even better the GH4's EVF blackout time after each frame  is substantially less than that of the GH3. Together these improvements make for a much improved user experience and much better results.


Recommended Setup  In the Rec Menu, page 2/7 set the Burst Rate to M. This is the fastest rate which provides AF and live view on each frame and is therefore the optimum rate for sport/action.


In the Autofocus Menu set 1 Area, not tracking.  Set the active AF area to center position and the second or third smallest (not the very smallest) size.


Preparing for Continuous AF   The GH4 allows very quick shifting from  single shot settings for general photography to follow focus settings for sport/action.


1. Move the Drive Mode Dial to Burst.


2. Flick the Focus Mode Lever to AFC.


3. Move the Main Mode Dial to S (shutter priority AE) having pre set the shutter to a speed suitable for the lens in use. I use about 1/500 with the 35-100mm lens at 100mm and about 1/650 second with the 14-140mm at 140mm.


4. Set ISO to Auto ISO if it was not there already.


5. Check that OIS is On.


6. You can use E-Shutter or the mechanical shutter. I prefer the mechanical shutter provided the shutter speed is faster than the upper limit of the observed shutter shock zone, which is about 1/400 sec. Distortion of subject elements moving within the frame is quite likely with the E-Shutter.


Lenses matter  With the GH4 Panasonic has introduced some new AF technology which means that optimum performance is achieved only with certain Panasonic M43 lenses and not with lenses from other brands even though they are dedicated M43 models.


I  have not yet used many lenses with the GH4 in Burst Mode but I have determined that the Panasonic 35-100mm f2.8 and the  Panasonic 14-140mm f3.5-5.6 allow the GH4 to produce it's full  performance. The Panasonic 100-300mm does not. This lens is good optically but delivers about half the frame rate of the other two lenses together with a much lower success rate expressed as percentage of frames in sharp focus. The operational deficiencies of this lens have become glaringly obvious now the GH4 has arrived. I would like Panasonic to upgrade this lens tout suite.


Memory cards matter  For the results reported here I used a San Disk Extreme Pro UHS 3, 280MB/s card. However I also noticed and others have reported there is little or no loss of performance using a San Disk Extreme Pro UHS 1, 95MB/s card.  Any slower card is not recommended.


Technique  There is nothing arcane here. Zoom to frame your subject, place the active AF area over the part of the subject you want to be in focus, press and hold the shutter button.  Follow the action by panning as required. I gave found it is not good practice to zoom while capturing a burst of exposures. Zooming seems to unsettle the AF function. My practice is to zoom between capture bursts.


Results  It is early days yet and I have many more tests to run but my initial results are worth reporting.  Remember these results are all obtained using Burst M and 1Area AF Mode setting.


Frame rate  JPG capture gives 7 fps.  RAW capture starts at 7 fps then  after about 15 frames slows slightly to about 6 fps.


Frames to slowdown  When the buffer is full the frame rate slows suddenly. This point is reached after 48 RAW files in 8 seconds. With JPG capture the camera was still ripping along at 7fps after 100 frames in 14 seconds at which point I stopped recording. Presumably capture will continue at that rate until the card is full.


Recovery after burst  (time to clear the buffer)  This was 23 seconds after 48 RAW files and 7 seconds after 100 JPG files. The camera continues to operate while the buffer is clearing, allowing adjustments to be made and photos to be taken.


Percentage of sharp frames  This is the big test. There is not much point having a camera which runs fast unless it is also accurate. I found that the  GH4 is indeed remarkably accurate, on easy and difficult subjects alike.


Easy subjects:  Cars moving towards and away from the camera and people walking or running towards or away from the camera. Just two model generations ago this would have been a difficult test but now it is no problem for the GH4 at all. On  all my tests in bright light or dull, overcast conditions the GH4 with 35-100mm lens scored 95% or better of frames in sharp focus. The only frames not in sharp focus have been those produced by holding the shutter down until the subject came impossibly close such that I doubt any camera could hold focus.


A more difficult subject:  As it happens three days after picking up my new GH4 I had the opportunity to photograph one of my grandsons playing indoor basketball. The occasion was a grand final so the 11 year olds were running as fast as they could and made very good game of it.   Lighting was mediocre, consisting of a few small skylights and a few high banks of fluorescent tubes. I set the shutter speed to 1/500 sec and Auto ISO selected ISO 6400-12800.


To my surprise and delight 95% of  the 200 frames of boys running were in sharp focus at the active focus area position. This means I didn't always get the right boy in focus but that was a framing issue not a focus problem.  Sometimes I didn't get any of the players in the middle of the frame. The camera simply focussed on the background on that frame then jumped back to the player on the next frame. The remarkable thing is this all happened at 7 fps.


Summary The GH4 represents a big improvement over the GH3 in follow focus performance using AF-C on fast moving subjects. The frame rates are impressive and  the number of sharp frames even more so. The main former advantage of the DSLR over MILC type cameras is held  no longer.


Footnote about technology  Over the last few years most camera makers already had beneath the mirror box (DSLR) or incorporated onto the imaging sensor (some Canon models and several MILCs)  the capability for phase detect autofocus. Many in the camera commentariat opined this was necessary for good follow focus performance. The only holdout using contrast detect AF exclusively is Panasonic which with the GH4 appears to have produced the current champion for AF-C among MILCs, with a performance equal to or better than many DSLRs.    Go figure.  It appears the commentariat was wrong. No doubt other manufacturers will catch up soon, using a variety of technologies. Us camera users are the beneficiaries.


There is a curious irony afoot right now. Camera sales are falling steeply across all categories but the actual cameras being offered are better than ever and improving with each new model.  Happy days for those of us who still like to use a real camera to make photos.   


Panasonic GH4 User Review Part 4 Shutter Shock

$
0
0

Mechanical shutter 1/80sec

E-Shutter 1/80sec

All Micro Four thirds cameras to date have a mechanical shutter.  All of those which I have tested to date can produce unsharpness with or without double imaging with some lenses at some shutter speeds. 
In order to  prevent the occurrence of this nasty little problem recent Panasonic cameras have an Electronic shutter and recent Olympus cameras have an "Antishock 0" setting, which has been reported to utilise an electronic first curtain.  
On my testing Panasonic E-Shutter completely eliminates blurring due to shutter shock. I have not tested Olympus Antishock 0 but it is also reported to be effective.
I have no idea why Panasonic does not offer electronic first curtain shutter operation. Several other manufacturers do and it is reported to eliminate the shutter shock problem with no adverse effects as far as I am aware.
The benefits of Panasonic E-Shutter are the result of there being no mechanical parts thus allowing
* Silent operation, with or without beeps as set in the Custom Mode.
* No vibration and therefore no blurring due to shutter shock.
The disadvantages of E-Shutter are largely due to the fact that the process of scanning the sensor electronically takes 1/15 second. The GH3 E-shutter takes 1/10 second.
* Incompatible with electronic flash.
* ISO limited to 3200. (1600 in the GH3).
* Longest shutter speed available is 1 second. For vibration free exposures longer than 1 second set Shutter Delay page 4/7 in the Rec Menu.
* Subjects moving in relation to the camera may be distorted in shape.
* There have been reports that E-Shutter on the GH4 may provide only 10 bit capture. Panasonic M43 cameras have 12 bit capture with the mechanical shutter. The trade  off  for the faster scanning speed on the GH4 may be a lower bit rate.
The Panasonic GH4 has a faster mechanical shutter than the GH3 which allows a faster  shutter speed to be used with flash (1/250 sec vs 1/160 sec) and a faster top speed (1/8000 vs 1/4000) which can be useful in bright light when a wide lens aperture is desired.  I was wondering if it also causes more problems with shutter shock than the GH3 and other Panasonic M43 cameras.
So I ran my usual test procedure which is:

* Select camera body, lens, focal length for testing.
* Set up a suitable test target. I use classified adverts from a newspaper as this provides clear differentiation between sharp and unsharp frames and readily shows any double imaging if present.
* Mount the camera on a sturdy tripod. This is to eliminate camera movement as a source of any unsharpness.
* Use remote shutter release, wired or wireless, for the same reason.
* Switch OIS or IBIS off. This is recommended by the manufacturers for tripod use.
* Set Shutter Priority auto exposure and auto ISO.
* Focus with AF or MF. Run some preliminary tests to ensure your equipment is focussing accurately.
* Make a series of exposures from 1/4 sec to 1/500 sec. Use the mechanical shutter for the first run then the E-Shutter (or Olympus Antishock 0) for the second run.
* Look at the results at 100% on screen. Any unsharpness or double imaging will be clearly evident.    

On this occasion I used the Panasonic 14-140mm lens set at 140 mm. I had previously determined that this lens at this focal length is affected by unsharpness due to shutter shock with the GH3 and G6 camera bodies.
Results  I got essentially the same results with the GH3 and GH4. With the mechanical shutter, speeds of 1/15 sec or lower were no problem. From 1/20s to 1/50s there was some blurring visible. From 1/60s to 1/200s there was blurring with double imaging. 1/250s and 1/320s were slightly soft.  1/400s and faster were sharp.
When using the E-Shutter all the frames were sharp.
Recommendations for use  With the 14-140mm lens I always use the E-Shutter for general photography and have no problems at all. 
If I want to use a shutter speed of 1/500 sec or faster which is usually for moving subjects, sport/action and the like, I set E-Shutter OFF which causes the camera to revert to the mechanical shutter.
If I need to use a shutter speed longer than 1 second, with the camera on a tripod, I set Shutter Delay to ON. If I am firing the shutter remotely a delay of 2 seconds is plenty. If I press the shutter button it can take longer for the camera to settle down so I use 4 seconds.
The only problem with these usage strategies is that you have to keep an eye on the shutter speed and remember when to switch the E-Shutter on or off.
Some in the camera commentariat have proclaimed the E-Shutter to be "useless" because of it's limitations. But I use it all the time with no problems at all. One just has to be aware of the limitations and work around them as described above.


Panasonic GH4 User review Part 5, 100-300mm lens compatibility problems

$
0
0

GH4 with 100-300mm , hand held.  f8, 1/1600 sec. It was a hazy warm day, not really good for long distance photography however the 100-300mm lens has handled the conditions well. The buildings in the foreground and the old crane which is being dismantled by the men from Marrs are about 1.5 kilometres from the camera. The buildings in the background are about 3 k away.
 
The Panasonic Lumix 100-300mm lens was announced in September 2010 along with the GH2 camera body. Since then Panasonic has introduced the G3, 5, and 6, then the GH3 and now the GH4. With each new model comes an increase in performance especially when using burst Mode and AF-C for follow focus on moving subjects.
Unfortunately the performance capability of the 100-300mm lens has not been able to keep up with the camera bodies. The GH4's frame rate in Burst Mode M (7fps) is almost double that of the GH3 (4fps).  Even on the GH3 the 100-300mm lens was unable to run at 4 fps, giving on average about 3 fps.  Unfortunately the 100-300mm lens is not able to match the performance of the GH4 at all.
This is a particular problem because in the GH4 we have for the first time a Panasonic Lumix camera which can genuinely claim to be usable for follow focus on sport/action/wildlife with a high frame rate and on my tests with the 35-100mm lens a very high rate of frames in sharp focus.
For many sports, action, wildlife and similar subjects the 100-300mm lens has the ideal focal length range and is very good optically.
But many users reporting on forums are expressing frustration that the 100-300mm lens does not allow the GH4 to express it's potential.  I have had the same problem.
Crop of the top photo. It appears the Navy has parked a ship in the middle of the city, which it has, more or less.  The 100-300mm is great for single shot photos, when it focusses correctly which is about 90% of the time.
Timings

I ran some timings on the 100-300mm lens mounted on the GH4. I used a SanDisk Extreme Pro 95 MB/sec card, Burst Mode M (which allows AF, AE and live view on each frame), 1 Area center AF Mode, AF-C and AF-S  Focus Mode, RAW capture. I timed bursts of 40 frames. The GH4 will deliver 48 RAW frames before the frame rate slows due to the buffer filling.

At f4: AF-S gave 7fps,  AF-C gave 4 fps.
At f8:  AF-S gave 3fps,  AF-C gave 2.3 fps.
When the lens did not have to focus or close down the aperture diaphragm for each shot it ran at 7fps which is the same rate as the 35-100mm lens.
Forcing the lens to focus on each frame slowed it considerably. Forcing it in addition to close the aperture diaphragm made the lens slow even further.
In addition I found that when using the lens on moving subjects in AF-C the hit rate of sharply focussed frames was significantly less (variable but about 70%) than that delivered by the 35-100mm (around 95% with many types of subject).
Other issues  I have been using the 100-300mm a lot lately and have found two other problems on the GH4.
* Even in AF-S Focus Mode, the hit rate of perfectly focussed frames is lower than I get with most other lenses. With the 12-35mm, 35-100mm and 14-140mm which are the lenses I most often use, I see about 1% of frames not in perfect focus provided I use the camera thoughtfully,  don't expect the impossible and don't expect the camera to read my mind.
But with the 100-300mm I am seeing 5-10% of frames not quite in perfect focus. Furthermore I can see no particular reason why the slightly off focus  frames should be so.
* The last one is that the EVF on my GH4 flickers intermittently when the 100-300mm is mounted.  At first I thought I had a faulty camera but it appears to work fine with other lenses. I think the problem is one of partial incompatibility between the GH4 and the 100-300mm lens.
I would very much like Panasonic to update this lens very soon as it has become  obvious that it is not a good match for the GH4 camera body and is holding back the performance capability of the GH4 for sport/action/wildlife photography.


Panasonic GH4 vs GH3 What's the difference ?

$
0
0


The recently released GH4  looks the same and mostly works the same as the GH3, Panasonic's previous, and still available, top tier pro level, hybrid stills/video camera.
So, is it worth the cost to upgrade from the GH3 to the GH4 ?  Let's see the differences between them.
* Top of the list is the very well advertised 4K video which comes to a consumer camera for the first time in the GH4. So heavily has this feature been promoted that the prospective buyer might be inclined to think the GH4 is for motion pictures and little else.
I think of the GH4 as two extremely sophisticated capture device in one body,  one for motion picture the other for stills.  
I use the GH4 exclusively for still photos. So this post compares the two cameras for still photo capture. There is a great abundance of commentary available elsewhere about motion picture capabilities. 
* Next comes the electronic viewfinder. The EVF is the feature of the GH3 that drew the most criticism. The GH4 has a completely new EVF and optics which answers all the criticisms of the previous one. It is a delight to use. I posted about it recently on this blog.
* The GH4 has much improved continuous autofocus capability. With the right lens, for instance the 35-100mm, 12-35mm or 14-140mm f3.5-5.6, the GH4 delivers almost twice the frame rate, a noticeably reduced EVF blackout time and a substantially higher rate of sharply in focus frames when follow focussing on moving subjects. I have posted about it recently.
Specifications and features    In no particular order here follows a list of features of the GH4, most but not all of which represent an upgrade from the GH3.
* Auto ISO in Manual Exposure Mode.  At last, after many requests by users, Panasonic has finally offered this capability. I use it frequently. For instance if I am shooting with the 100-300mm lens at the long end, I want the shutter speed at 1/1600sec for sharp pix hand held (1/600sec is definitely not fast enough and even 1/1000sec gets me some unsharp frames) and f8 for best image quality. So I set those two exposure parameters and the camera adjusts ISO to ensure correct exposure.
* Peaking is now available in Manual Focus Mode. This is another  feature frequently requested by users. On the GH4 it is well implemented with numerous options and it works very well.
* Extended ISO now goes down to 1/100sec, was previously 1/125sec.
* Highlight/shadow/tone curve adjustment is available in the EVF or monitor, prior to capture.
* Face detect adds eye detect and puts cross lines on the selected eye, usually the nearest.
* E-Shutter scans the sensor in 1/15 sec which is faster than the GH3's 1/10 sec. This should offer less rolling shutter effect (distortion of subjects moving in relation to the camera). In addition the highest ISO setting available with E-Shutter has increased from 1600 to 3200.
There is a possible downside to the increased scanning speed. One blogger has reported that with E Shutter the GH4 captures at 10 bits instead of the usual 12 bits available on M43 cameras and the GH4 with mechanical shutter.
* There are many improvements to the manual focus and autofocus capabilities of the GH4. I have posted about this here.
23 Area AF on the GH3 becomes 49 Area on the GH4. 1 Area AF can be set anywhere in the frame.
* There is an extra position on the Drive Mode dial for time lapse.
* Still, you cannot set AEB +Timer delay. They are occupy separate positions on the Drive Mode dial. There is no position which combines both. Furthermore there is still no facility to actuate the shutter mechanism once and have all 3 or 5 AEB frames fire automatically. So as with the GH3 you still need a wired remote shutter cable or smartphone app.
* There is an item in the Setup Menu called [Live View Mode] which is a bit confusing. It is said to refresh the "Live View Screen" but doesn't clarify if that is the EVF or monitor or both, at 30 or 60 fps. The 60fps setting is supposed to provide smoother panning at the expense of greater power use.  I tried both and had difficulty convincing myself there was a difference.
* Part of the AF/MF upgrade is about being able to seamlessly integrate AF with MF. On the GH3 you can focus manually while in an Autofocus Mode. Now with the GH4 this is still available but you can also autofocus with the AFL/AEL button while in Manual Focus Mode. This is handy to get quickly to the desired focus point ready for manual fine tuning.
* AF area size can now be adjusted in large steps with the rear dial and smaller steps with the front dial. This might be considered overkill but it does allow almost any AF area size and position to be quickly set.
* Pinpoint AF has additional options for screen magnification, also using the front and rear dials.
* Zoom level in MF Assist can also be adjusted with the front and rear dials, also using the rear dial>large steps, front dial>small steps feature which operates on several functions on the GH4.
*Silent Mode is available on the GH3 as a firmware update. It is built into the GH4.
* Flash shutter speed has increased from 1/160sec to 1/250sec.
* Top shutter speed is up from 1/4000sec to 1/8000sec. This could be useful in bright light if a wide lens aperture is used. Shutter longevity rating has increased from 100000 to 200000 cycles.
* The GH4 has extensive options for in camera playback of images including RAW processing and image editing.
* Wi Fi is available and compatible with NFC on the GH4.  There is extensive coverage of Wi Fi features in the owners manual.
* The Owners Manual has increased to a massive 420 pages. The full version is still available only as a PDF.   However it is better designed than before. In particular navigating the PDF is more coherent and streamlined than before.  The GH4 owners manual is the first one from Panasonic that I feel reasonably confident of being able to use without having to print the whole thing out.
* The list of items assignable to the Q menu has increased from 24 to 35. However the maximum which can be carried on the Q Menu is 15 of which only 5 are visible without scrolling.
* The list of items assignable to a Function button has increased from 39 to 54. In addition the GH4 has more soft Fn buttons if you want to use the touch screen feature. Just for fun I worked out that if you used all the hard and soft Fn buttons the total number of possible combinations of Fn button functions would be  86839771950000000, or something like that.
I will post a series on "setting up the GH4" soon to help new and maybe some not so new owners manage the hyper configurable environment of an upper spec Panasonic camera. There is a logical approach to it, which makes the task considerably less daunting than might appear initially.
* There appears to have been a backwards step with the auto ISO upper limit setting. On the GH3 you can change ISO with one dial and auto ISO upper limit with the other dial. But on the GH4 the auto ISO upper limit can only be set in the Rec Menu. I was unable to find any other way to do it. So I just set 25800 as the upper limit and leave it at that.
* There also appears to have been a backwards step with flash exposure compensation. On the GH3 you can change exposure compensation with one dial and flash exposure compensation with the other dial, while looking at the same screen. But on the GH4 the quickest access to flash exposure compensation appears to be the Q menu, to which this can be allocated.
Summary  The GH4 is the most highly specified camera I have ever encountered. Panasonic has included almost every conceivable feature, specification, option and capability in the one amazingly capable device. Other manufacturers hold features back from some models forcing buyers to change models or buy several bodies to access different capabilities. Some have touch screen some do not. Some have a fully articulated monitor, some do not.  Some have high grade video some do not.   The list goes on....
But the GH4 has the lot. A novice could pick up the camera, set iA Mode  and use it as a point and shoot device. Yet it can function as a professional video or stills camera or both at once if desired.
The user can choose which of the camera's myriad functions he or she wishes to utilise. These choices can be altered at any time without having to invest in a different camera body.
What about image quality ?  You will notice I did not mention picture quality in the list of features above. Adobe Camera Raw 8.5 final has only just become available as I write this so I have not done systematic picture quality comparisons yet. However the GH4 has a DXO Mark score only 3 points greater than the GH3  so I do not expect much difference to emerge from real world testing. My subjective impression is that the GH4 performs better at high ISO settings but we shall see.
Is the GH4  worth the upgrade cost from a GH3 ? 
For still photos I would say yes if: 
* You regard EVF quality as an important part of the user experience.
* You want the GH4's superior burst rate and follow focus performance with moving subjects.
Otherwise keep your GH3 or buy one new at the current discounted price or get one second hand.
Just a word about used GH3s. Mine is in the repair shop at the moment with a superficially scratched EVF eyepiece lens, resulting from normal cleaning. I have read reports by users that others have had this problem, so be alert. Presumably the eyepiece glass is soft. In addition some of them have developed looseness in the articulated monitor joint.
I do not do video, never use a touch screen, never set iA and  never use Creative Control Mode. I have no interest in Wi-Fi and never want to perform image editing in camera. But I will be keeping my GH4 and selling the GH3 which is still an excellent camera, by the way. I do regard EVF quality as important and I do want the superior burst/AF-C performance.
I doubt whether many owners would care to use all the possible functions of the GH4. But they are there for those who want them and each individual will have his or her own ideas about that.
The GH4 is like Photoshop to me. I run Photoshop in preference to Lightroom. I don't  use or even remotely understand many of Photoshop's more advanced features but I don't care because it has Bridge which I do want and  I often use functions of Photoshop which Lightroom does not have.


GH4 User review, Shoelace as neck strap

$
0
0

Shoelace as neck strap

How I carry a camera

About 10 years ago  I stopped using the neck straps supplied by camera makers and switched to shoe laces.
Why ?
* I rarely carry a camera by the neck strap. I carry a camera as shown in the photograph, ready for immediate use or in a bag. You can see the shoelace strap is wrapped around my wrist.
* The neck strap is for changing lenses, a two handed operation.
* Standard neck straps are excessively wide and bulky. They consume too much space in a camera bag.
* If the camera has strap lugs of the type seen on the GH4 a normal neck strap requires those pesky little triangular metal connector thingies, which I hate.
* Shoe laces are plenty strong and durable enough. I have never had a problem with them.
How ?
If the strap lugs are round type as seen on the GH4 and many cameras, I use round shoelaces. I cut off the crimped plastic ends and taper the cut end with a soldering iron. This allows the lace to be threaded through the round eye. A cut length of 90 cm is about right. I tie off the lace with a bowline and tidy up the loose end with a bit of black electrical tape.
If the strap lugs are of the D type, flat laces can be used. These can be sewn in or tied as above.
Result   Light weight, minimal bulk, maximum convenience and utility.  The ideal camera accessory.

Setting Up the GH4 Part 1 Custom Modes, Setup and Playback Menus

$
0
0

Setting up the GH4 can be a challenge but there are worse things............
 
The GH4 is one of the mostcomprehensively specified cameras ever produced with an amazing array of features, specifications, functions and capabilities for still and motion picture. The camera can be extensively configured for individual preference.  
This little series  of posts on setting up the GH4  reflects my own use of the camera. As a result I am unable to provide the new user with guidance on some aspects of the camera's many capabilities.  The GH4 resembles Adobe Photoshop. It has a multitude of sophisticated functions and capabilities enabled by software (firmware). Each individual user has the option to select some capabilities and ignore others.
* I do not do motion picture at all. This is simply an individual preference. Some might think it sacrilege to buy the most capable video/stills hybrid camera ever made then not use the video component. But there it is. You can read all about motion picture starting at Page 191 of the Owners Manual.
* I do not use any touch screen functions. I have tried them all in a succession of Panasonic cameras and have concluded that touch screen operation just gets in the way of a streamlined picture taking workflow.

* I never use Creative Control Mode, Page 77 of the Manual.  If you do want to experiment with this Mode, make sure the item labelled Menu Guide on page 8 of the Custom menu is set to On. This allows all the special effect filter settings to be displayed.  
* I do not use Wi-Fi /NFC. Not yet, anyway. Maybe in the future it might find a place in my workflow.  A very comprehensive description of Wi-Fi begins on Page 254 of the Manual.
* I have no interest in image editing in camera, which receives extensive coverage starting on Page 221 of the Manual. I shoot RAW, transfer images to the computer using Adobe Bridge, perform initial editing in Adobe Camera RAW 8.5, then on to Photoshop CC2014 for final editing if required.
If you have never before  used a recent model Panasonic M43 camera your first encounter with the GH4 might be a bit daunting.  Operation of  almost everything on board can be configured by the user by choosing from a multitude of options. Fortunately the newcomer can set the main Mode Dial to iA or P, leave all the Fn buttons at default and proceed to make pictures immediately.
After a familiarisation period you will probably want to start setting up the camera to suit your personal preferences.
Custom Modes  The GH4  allows you to memorise five completely different camera configurations. This works via the Custom Modes on the Main Mode dial. These are C1, C2, C3-1, C3-2, C3-3. Unfortunately you can't personalise the name of each Custom Mode, so you need to write down somewhere which Mode does what.
Each Custom Mode will memorise all the Main Menu, Q Menu and Fn function settings plus the Main Mode Dial setting present at the time the Custom Mode is set.
The only settings which cannot be attributed to a Custom Mode are those of  the Drive Mode dial and the Focus Mode lever, for the simple reason that these are hard (physical, not electronic) controls.


So, you might want different groups of settings for general photography, sport/action, tripod and motion picture, for instance.  No problem. I note in passing that there is currently much enthusiasm in the camera commentariat for retro style cameras which use a control layout lacking a Mode Dial. This type of user interface finds no favour with me for many reasons, just one of which is that it is unable to provide Custom Modes. I fail to understand why, in the electronic era one would make cameras which deliberately underutilise the potential benefits of electronic operation.
Viewfinder diopter  Viewfinder eyepiece diopter can be adjusted to personal preference with the knurled wheel on the right side of the eyepiece. I have found it is worth rechecking this several times in the first few weeks of use to make sure of optimal sharpness.
Throughout this guide  I indicate my own menu selections with reasons as appropriate. This is in no way prescriptive but might help a new user to streamline the process of setting up the camera. There are a LOT of decisions to make.
Setup Menu  This, as you might expect, is the place to begin setting up the camera.
* Clock Set.  You will be prompted to set this when the camera is first switched on.  World Time and Travel Date are there for you to play with.
* Wi-Fi. There is extensive coverage of this feature in the  Advanced Owners Manual.
* Beep. Adjust Beep volume and E-Shutter volume to personal preference.
* Speaker Volume and Headphone Volume. Adjust to personal preference.
* Live View Mode. This item is confusingly named.  It appears to be a reference to the EVF refresh rate, although the Manual doesn't say whether the monitor is also affected. 60 fps is supposed to give a smoother response when panning but use more power. I found little difference between 30 and 60 fps in practice.
* Monitor Display (Note: to adjust EVF display simply look in the viewfinder while making adjustments. Both the monitor and EVF have the same adjustments).  You can change Brightness, Contrast/Saturation (increased contrast produces increased saturation) green/red color balance and yellow/blue color balance.
For the record I have left all monitor settings to default.  I set the EVF to Brightness +1, Contrast/Saturation to -1, Color balance to neutral.
Each individual has different brightness sensitivity and color perception so can benefit from the adjustments available.
* Monitor Luminance. I just leave this at the default setting which is Auto. But you get the option of more direct control if desired.
* Economy. Here you select elapsed times with the camera idle before entering  Sleep Mode and Auto EVF (LVF)/Monitor Off.  I set 5 minutes for each.
* Battery Use Priority.  This comes into play if the accessory battery grip is fitted. It tells the camera which battery to drain first.
* USB mode and TV connection are both about connectivity options. Select to personal preference.
* Menu Resume. When set On, each menu opens at the item last used. This is a very useful feature for quickly finding items most often used. In my case that would be Format in the Setup Menu. When preparing for low light tripod work it can be useful to pre locate Shutter delay in the Rec Menu so it is easily found in Prepare Phase of use.
* Menu Background. You get to play with the options here. Select to personal preference. I find the second option from the top easiest to read.
* Menu Information. For someone unfamiliar with Panasonic menus it might be worth leaving this On initially. When you are familiar with the camera switch this Off to declutter the screen a bit.
* Language.
* Version Disp. Here the current Firmware version of body and lens (if mounted) are displayed.
* Exposure Comp Reset. If set On, then any exposure compensation set during a shooting session will be automatically cancelled when the camera is switched off. I always set this feature to On because I often forget to reset Exposure Comp. Obviously I am not the only forgetful one.
* No. Reset allows you to reset the file number of a picture.  Reset returns all settings to shipping condition (default) and Reset Wi-Fi settings does what it says.
* System Frequency. In previous model Panasonic cameras motion picture settings were region specific, e.g. PAL or NTSC. But now all the cameras are the same and all can be set to preference. At last, thank goodness.
* Pixel Refresh. This optimises the imaging device and processing. Presumably something to be used if hot or blank pixels appear in your images.
* Sensor Cleaning. This is performed automatically every time the camera is switched on by vibrating the optical filter in front of the sensor, but can also be activated via this menu item.
* Format. This initialises the memory card, effectively erasing all data.  Because I test equipment a lot and make a lot of photos I use this frequently.
Hint: Always press the Playback button before formatting to ensure you are not about to wipe out precious images.  
I always format a new card in the camera before using it and always format a card which has previously been used in a different camera. If this is not done files may become corrupted.
Playback Menu
As a result of my workflow as described above, I have very little use for the Playback menu. I just leave everything at default. I make sure that Rotate.Disp is On so that pictures taken in portrait orientation are automatically rotated 90 degrees for playback.
The process of reviewing images on the monitor (or EVF, it works the same providing a seamless segue from one to the other)  is very sophisticated. After pressing the Playback button to bring up the last captured image you can
--Move from one image to the next with the Front Dial.
--Zoom into the displayed image, or zoom back to display several frames,  with the Rear Dial.
--Move the magnified area around the frame with the Control Dial.
--Scrolling with the front dial will move from one frame to the next at the same zoom level and the same frame location.
This is a very efficient way to quickly review a series of images of the same subject such as a portrait.  The three dial configuration does have advantages.


Next, Rec and Custom Menus


Viewing all 824 articles
Browse latest View live


Latest Images