Quantcast
Channel: Camera Ergonomics
Viewing all 824 articles
Browse latest View live

Sony RX10, Ergonomic Issues

$
0
0

Interesting New Camera, Old Ergonomic Problems
Photo courtesy of Digital Photograpy Review  dpreview.com
This photo is worth a thousand words. It shows how the user's right index finger has to be pulled back to reach the shutter button. Also the right thumb support is at the extreme right side of the camera. Together these ergonomic errors conspire to lift the palm of the right hand away from the camera leading to a weak grip. In use, you must fully support this camera with the left hand so the right hand can operate the main controls. It need not be so.


The Universal Camera   The Sony RX10 caused a fairly large wave of interest among enthusiast photographers when it was announced just a few days ago. On the specifications, it comes perhaps closer than any previous model from any maker to the universal, do everything wunderkamera so lusted after by those of us who really don't like changing lenses.  Check the star points:
* Constant f2.8 lens covering a diagonal angle of view of 84 degrees at the wide end to 12 degrees at the long end. This replicates the aperture and angle of view range of the classic professional photographer's 24-70 and 70-200mm f2.8 zooms for the full frame 43mm diagonal sensor. The extra good news is you never have to change lenses.
* Decent image quality. The RX10 apparently uses the same 15.9 mm diagonal sensor as the RX100Mk2, which has a DXO Mark score of 67. This puts it right in the middle of current Canon APS-C and M43 cameras on technical image quality, at least at the lower end of the ISO range.
* It has a largish handle so you can grip it firmly. It certainly needs one with a mass of 813 grams including battery.
* High resolution EVF.
* Swing up/down monitor of good quality.
* Sony is claiming very good performance for focussing and image throughput.
So has the ultimate wunderkamera  been delivered unto us ?
In a word, no.
The handle on this mockup camera is of the hybrid projecting/parallel type. That is, projecting at the bottom and parallel at the top. The shutter button is exactly where the index finger wants to find it. This is so because I put my fingers in place first, then designed the camera to fit them. This provides a very secure, comfortable hold and allows the provision of the quad control system on top of the handle with a control dial, shutter button and two buttons with user selectable function. Sony could easily fit this configuration to the RX11 or whatever it will be called.
 
The problem is ergonomics. The reason I continue to write this blog is that the world is awash with cameras, many of which feature good enough picture quality and performance but compromised ergonomics. The RX10 is just one of the latest.
There are two main ergonomic issues which I can see from the promotional photographs, particularly photos of someone holding the camera.
Location of the shutter button  I have thus far seen only one reference to this problem in early, hands on reviews of the RX10. This is from Dave Etchells of Imaging Resource who wrote  "......I found myself having to reach back a bit to get my index finger on the shutter button...." and   "...there wasn't much of a choice for any other way to do it...."
My comment about this is:
a) He is absolutely right in pointing out that the shutter button is not where his right index finger wanted to find it.
b) On my analysis he is altogether too pessimistic in thinking there is nothing to be done about it.
X marks where the shutter button needs to go


My interest in camera ergonomics was sparked several years ago by the Panasonic Lumix G1. This was the world's first mirrorless interchangeable lens camera. I found it's ergonomics distressingly poor. Fortunately Panasonic has lifted it's game since 2008 and current model Lumix M43 cameras are among the best on the market for ergonomics, and most other things as well.
One of the problems with the G1 was the location of it's shutter button on the tip of a thin projecting type handle. The RX10 repeats exactly the same problem. The shutter button needs to be located where the distal phalanx of the right index finger wants to find it, as indicated on the photographs. Sony has no excuse for putting the shutter button in such an awkward place. They could easily put in the optimal position. Doing so would free up more space on top of the camera and allow a more effective configuration of buttons plus the inclusion of a top/front control dial.
Rear view of the RX10 showing the preferred location of the shutter button and improved location of the right thumb and control dial. The grip is more secure if the thumb is angled across the camera in "ready to shoot" position. It is easier to maintain stable grip on the camera while turning the rear control dial if the thumb and scroll wheel positions are reversed as indicated in this photo. For those who disbelieve this, I suggest you make your own observations on some cameras with different rear control layouts. 
 
Thumb position and thumb support, relationship to rear control dial.
This ergonomic error is a little more subtle and is one made by several manufacturers. When holding a camera the right thumb wants to lie diagonally across the back of the camera, not cramped up at the extreme right hand side. The RX10 requires this cramped position which provides a less secure grip on a fairly weighty camera than would be provided if the thumb could angle across in a more natural position. Please refer to the attached photos for further description about this.
Panasonic Lumix GH3. A camera with mostly excellent ergonomics showing optimum relationship between the right thumb , thumb support and rear control dial. The hand in "ready to shoot" position, as here, is in relaxed half closed position, providing maximum hold on the camera for minimum effort.
 
Summary  The Sony RX10 is one of the most interesting cameras to hit the market in my 60 years experience with photography. Really. It's potentially a game changer for the entire camera industry. The evolution of cameras like this could turn interchangeable lens cameras into a niche product. I have been predicting the arrival of such a product  for some time.
But Sony's designers need to go to ergonomics school and learn some basic principles. Or they could read the first 20 or so posts in this blog. If they do that, and correct the ergonomic mistakes of the RX10 next time round, they will have a mighty strong product with wide appeal to many enthusiast/expert and amateur photographers, maybe even some professionals.


Panasonic Lumix GX7 Ergonomic Review

$
0
0

GX7 on the left with G6 on the right.
 
Much goodness but holding could be better


Market position and user demographic   The Micro Four Thirds camera system came to market in 2008. The original Panasonic G cameras looked like little DSLR's.  Presumably Panasonic was hoping to attract buyers wanting a DSLR style camera in a more compact size. Olympus' first M43 cameras used a flat top style without a built in EVF. Panasonic followed with a range of similar cameras with monitor only viewing.
There have been  requests from user forum members over the years for a rangefinder style M43 camera, flat top style with built in EVF located top left on the body.
It seems Panasonic was listening and responded with the GX7,  packed  with  features and specifications likely to appeal to the enthusiast user.
Some reviewers have described  the  GX7 as an evolution of the GX1, but I prefer to understand it as the first iteration of a new product line with a new style.  It could be seen as a modern version of the rangefinder "look-a-Leica" style, also found in Fuji X-Cameras.
On the left GH3 with 12-35mm lens, in the center G6 with 14-42mm (original version), on the left GX7 with 14-42mm Mk2 kit lens. The size and style differences are self evident.


Specifications and features  You can read a list of these in the manufacturer's brochures and other published material. I make just a few comments.
The list of specifications and features is very extensive, suggesting Panasonic is working hard to make this model a success.
Just to pick out some of the features which attracted my attention, the GX7 has:
* A tilting EVF located top left on the body, both features a first for Panasonic M43 cameras.
* An accessory rubber eyepiece, DMW EC-1 available separately, to shield the EVF from stray light.
* The monitor tilts up and down but is not fully articulated.
* Two axis in body image stabiliser (IBIS), a first for Panasonic.
* Wi-Fi capability, now becoming standard on current model Panasonic M43 cameras.
* Twin dial user interface with the front dial surrounding the shutter button, Olympus style.
* Video reported to be of very good quality.
* Focus peaking with selectable colors in addition to focus assist zoom with manual focus.
* Fast flash shutter speed of 1/320 second and a top shutter speed of 1/8000, allowing wide apertures to be used in bright light.
* Silent E-shutter with maximum available ISO increased from 1600 on the GH3/G6 to 3200.
* Time Lapse photography.
* In camera panorama mode (JPG only). This was introduced in the G6  but the version in the GX7 brings visible improvement.   Problems with stitching errors and other artefacts in the G6  appear to have been eliminated in the GX7.
* In camera HDR blending (JPG only).
* Shutter delay feature to eliminate any risk of shake with shutter speeds longer than 1 second which are not supported by the E-Shutter.
* Multiple hard and soft Function buttons with  user selectable functions.
* Touch screen controls which can be disabled for those who prefer to control the camera with the buttons and dials.
* Wireless remote flash unit control with FL360L or R.
* Ability to autofocus (AF-S) at extremely low light levels.
* The battery is rather small for a camera with EVF plus monitor, no doubt a consequence of the camera's compact dimensions and small handle.
The list of features goes on and on,  indicating a camera of considerable technical sophistication and capability.
ISO 3200. This photo has had some color balance correction in Photoshop Camera Raw 8.3 but no other adjustment and no noise reduction.

 
Picture quality  This review is mainly about ergonomics, that being the main theme of this blog. However picture quality has a direct influence on the user experience and is obviously important.  Note that I distinguish "Picture Quality" being something which any user can evaluate, from "Technical Image Quality" which a laboratory would determine  using a special test protocol in a controlled environment.
For all tests I used RAW capture and Photoshop Camera Raw 8.3.
I had the opportunity  to test the GX7 alongside a G6, GH3 and a Fuji X-E1. I used a test chart and also made many photographs of general subjects with each camera using the same lens (except for the X-E1 of course on which I used the 18-55mm f2.8-f4 zoom). I will just summarise my findings.
Resolution/sharpness I found all four cameras gave the same resolution/sharpness at low to mid ISO settings. At ISO 6400 the EX-1 was best followed by the GX7, GH3 and G6 in that order. The difference was due to the amount of noise which when prominent interfered with rendition of fine details.
At ISO 12800 and 25600  (not available for RAW capture with the Fuji)  the GX7 had less noise than the GH3, with better retention of color accuracy and image detail. The G6 showed marked purple color shift in the dark tones, heavy noise and loss of detail at these ISO  settings.
ISO 5000. Mild noise reduction was applied in Photoshop Camera Raw 8.3.


Dynamic Range  At low ISO settings, rendition of highlight and shadow detail in scenes with high subject brightness level (dynamic range) appeared to be the same with all four cameras but the Fuji images had clearly less shadow noise than the GH3 or GX7.
Overall  I found the GX7 made excellent pictures in almost any circumstance. I would use this camera without hesitation right up to ISO 25600 and expect to get a usable photo. This represents a dramatic improvement from the original G1 of 2008, and a big improvement at high ISO settings over the G6 which is still a current model. Even better, the camera will autofocus in the low light levels which might require such high ISO settings.
Lens  I tested the GX7 with the diminutive featherweight, Lumix 14-42mm f3.5-5.6 OIS Mk2 kit zoom. The one tested had a plastic, or should I say "engineering grade polycarbonate" lens mount. Other  versions of this lens apparently have a metal mount, but the same optics. The fixed rear element of the optical pathway has a greater diameter than the diagonal of the sensor. This lens turned in a generally excellent performance. Zoom action was smooth. AF and OIS worked well. Performance on the test chart was right up with the much more expensive Lumix 12-35mm f2.8. In the field however I found that  sharpness at focussed distances greater than about 10 meters from the camera was not as good as the  12-35mm or the older design 14-45mm Lumix.  This may have been an issue with sample variation.  Lenses like this demonstrate that modern budget kit zooms can deliver remarkable picture quality in a very small package.

Performance   Shot to shot times with single AF are very good. The camera will make shots each with AF and AE almost as fast as I can  press the shutter button.  In M Burst drive with continuous AF, RAW capture,  the GX7 made 10 shots in 2 seconds, with a 95Mb/sec card, which is the same 5 fps frame rate as the GH3. However the GH3 has a much larger buffer and faster write times making that camera more suitable for continuous shooting.
Otherwise I found the GX7's performance to be brisk and responsive, in keeping with it's enthusiast appeal.
Autofocus, especially AFS  is very fast, sensitive and accurate even in low light levels. The camera will very occasionally miss focus but only in situations which would confuse any AF system.
Manual Focus  As with other recent Panasonic M43 cameras the GX7 offers full time manual focussing, which means you can focus manually while autofocus is active. Focus assist with variable zoom is automatically activated with MF and focus peaking is available in user selectable colors. Unfortunately focussing by preset distance on an analogue scale is not yet available on Panasonic M43 cameras. This feature is present on several other cameras, for instance the Canon G16 compact and Fuji X-E1, both of which I reviewed recently.  It is very useful when you want to preset the hyperfocal distance for any given aperture. The camera can then fire quickly without having to autofocus.
This photo and the one below demonstrate that sometimes a photo does not tell a thousand words. I doubt most people could tell by looking at the photos whether the GX7 above or the G6 below is the more comfortable to hold. My experience and that of several other users is that the G6 is more secure and comfortable to hold. 

You can't see it on this photo but the strap and it's lug fit easily in the wide gap between the thumb and index finger.

Ergonomics
Setup Phase A newcomer might find the menu system of a current model Panasonic camera rather daunting. But the number of items is a consequence of the high degree to which the user can configure the camera to personal requirements. The visual presentation of the menus is clear and easy to navigate. Allocating functions to each Fn button and items to the user selectable Q Menu will be a steep learning curve for Panasonic novices. However all these things can be left at default settings initially and the camera will operate just fine. As with other recent Panasonic M43 cameras, the cursor buttons can be configured for Direct Focus Area  which allows the active AF area position and size to be changed quickly while looking through the viewfinder.
Menu Resume is available. This means a  menu will open at the last used item. It is very handy for people like me who often need to format a memory card.
In order to set up the camera for optimum responsiveness to individual requirements and in order to understand all those functions,  I found it very helpful to download and print out the entire 379 page  Advanced Operating Instructions.
The instruction manual has drawn some criticism on user forums but I think it represents a good approach to managing the considerable complexity involved. It's no light read though. You need to study it like a textbook and think carefully about the alternative settings available.
Just for the record I have found Olympus M43 menus and user manual even more difficult to fully comprehend.
Prepare Phase   Most items requiring adjustment in the few minutes prior to image capture can be congregated in the Q Menu. The contents of this are user selectable from a long list of options. Q Menu graphical interface is nicely designed, logical and works well.


Capture Phase 
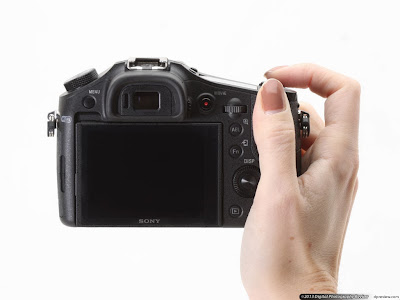
Holding  This is the part of using the GX7 which I found least satisfactory. The GX7 has several characteristics which adversely affect holding. It is very small for a full featured camera and it is designed to a faux  rangefinder style. Part of the style signature is the horizontal silver band running along the top of the front face of the body.  This forces the grip downwards where it cannot be anatomically shaped like the grips on the GH3 or G6, and it forces the shutter button upwards onto the top plate. Some people have expressed themselves happy with the resulting hold on the camera but I had problems with it. 
Even after several weeks of frequent use to acclimatise myself to the new shape, my right index finger kept wanting to find the shutter button forward and to the left (as viewed by the user) of it's actual location. The middle and fourth fingers of my right hand never felt they had a secure grip on the mini handle with which the GX7 is equipped. The thumb support is very shallow for reasons which escape me. The designers could easily have made it deeper as on other recent Panasonic M43 cameras.
The GX7 with kit zoom lens or a small prime like the 20mm f1.7 is light enough to carry without a neck strap. A wrist strap would be sufficient.
Unfortunately I found and so did several others who handled the camera that the right side  strap lug dug into my palm just below the junction of the index and middle fingers. If one did use a neck strap the right side of it would be in an awkward  position relative to the right index and middle fingers.
I asked various family members to hold and operate the GX7 and G6. Every one of them preferred the G6 for the reasons given above.
Already there are reports on user forums of owners fitting a thumbs up type thumb support into the hotshoe and commenting that this greatly improves holding  and handling.  In this regard the GX7 appears to be like the Fuji X-Cameras many of which are kitted out by owners with aftermarket handles and thumb supports.  I would not be surprised to see aftermarket accessory handles being offered for this camera in due course.
GX7 Hold Top View. Some users will be happy with this, others will not. You can just see that pesky little strap lug which presses into my hand. Imagine this with a neck strap fitted. The strap and fingers will be competing for the same restricted little piece of real estate.
 
Viewing    The GX7 has the well advertised tilting EVF. This feature could be quite useful in some circumstances and I am sure some users will appreciate it. In the old days when I was doing macro work with a SLR I had to buy a separate angle viewfinder eyepiece at considerable cost. Such a thing is no longer required.
The EVF itself provides an acceptable but not wonderful viewing experience. I found the EC1 accessory eyecup desirable to reduce stray light entering the eyepiece. This does the job but when fitted restricts access to the Fn4 button.
The EFV is sharp but prone to blocked up shadows and purple/magenta color cast in the shadows. Reducing contrast to improve highlight/shadow detail also lowers color saturation.
I  found myself squinting more when using this viewfinder than I do with the G6 or GH3. The reason for this is not clear to me  but it also happened with the X-E1. I seem to be able to relax the left eye when viewing with the right eye using the GH3 and G6.
The monitor can swing up or down but is not fully articulated. In consequence the camera can readily be used overhead or underhand in landscape orientation but not in portrait orientation. The monitor cannot be turned inward to protect the screen.
Operating  Camera operation is generally very effective.  The Mode Dial and twin control dial control system is fast and effcient. The user has very good control over all primary and secondary exposure and focussing parameters which can be quickly adjusted with a minimum of finger actions while keeping the eye to the viewfinder.
Design and operation of the control dials and buttons is improved over the G6.  The control dials are easy but not too easy to turn. Buttons protrude slightly more than the G6 and have a slightly sharpish edge for easy location by touch. However the GH3 with it's larger buttons and dials is easier to operate with gloves. The cursor buttons have a raised sharpish edge which is easily located by feel. This design is a slight improvement over the G6 and a huge advance over the GH2, the rounded cursor buttons of which I could never find or operate by feel. Neither the GX7 nor the G6 cursor control system is as easy to find and operate by feel, with gloves, as that on the GH3.
Fn button functions are user selectable. This enables each individual to configure the camera so it operates to personal requirements. Operation of the cursor buttons is user selectable. There are few cameras which allow more individual selection of button/dial functions. Users need to have  a comprehensive understanding of camera operation to obtain maximum benefit from this capability.
There is an AF/AE lock button with user selectable function, located where the thumb can reach it easily. It can be set to provide back button AF start,  DSLR style.  Surrounding this is an AF/MF switch. This gives only two positions, AF/MF, unlike the similar switch on the GH3 which offers AFS/AFC/MF and is therefore more useful. In addition there is more space on the GH3 allowing the toggle lever for the switch to be positioned on the right side of the AF/AE button for easier operation by the right thumb. The lever on the GX7 points upwards which is not where the thumb wants to find it.  It works, but is not as readily accessible as the layout on the GH3. These little ergonomic details do have a significant effect on camera operation. They remind us that shrinking the camera can adversely affect functionality. 
Notes on other reviews
Digital Photography Review  This site did it's typically thorough job although  I would like to see more discussion about ergonomic issues from dpreview. Some user forum members were disappointed the GX7 was awarded a silver, not gold rating by dpreview. On my assessment the silver rating was fair.
Imaging Resource This is another site which has a record of doing thorough reviews with plenty of comment about the user experience as well as picture quality and technical analysis.
Camera Labs  This New Zealand based site offers a well researched review and comparison with other recent camera makes and models.
Popular Photography This magazine/website's GX7 review contains some remarks which are at odds with my evaluation. They describe Panasonic's approach to RAW as "lackadaisical" which leaves me wondering what that is intended to mean. They describe the GX7 noise levels at 1600 as "unacceptable" which is not my experience at all. They do however make reference to the holding and handling issues which I experienced.
Dxomark  This site publishes analysis of RAW sensor performance and lens performance using descriptors unique to DXO and often raising comment on user forums when, as happens quite frequently,  DXO's results seem at odds with user experience. For instance on 13 December this year DXO published results indicating that the Lumix 12-35mm f2.8 lens would resolve 9 "Perceptual Megapixels" (P-Mpx, a unique DXO metric) on a GH2 or GH3 camera but only 5 P-Mpx on a GX7 camera. These results are completely at variance with my own test findings are drew many responses on forums indicating other  users have the same experience as me, namely that the GH3, GX7 and pretty much any 16Mpx M43 camera, deliver the same sharpness with any given lens.
Summary The GX7 is an interesting addition to Panasonic's growing stable of M43 cameras and one which I am sure will please many enthusiast users. It is a good illustration of the way in which a Mirrorless ILC can be designed to any shape, with the EVF located just about anywhere you want it.
I think this camera will be useful for candid and  street photography where small kit size and responsiveness are desirable. It would work well with a pancake style  prime like the 20mm f1.7   for fast unobtrusive operation.
I  found myself at odds with the holding arrangements and decided not to keep the camera. I am sure many other users will have a different experience with the GX7 and will enjoy using it. However I would suggest that "Try before you buy" might be a good policy, just in case you are like me and don't like the way it handles.


I kept the G6 and sold the GX7: Why ?

$
0
0

GX7 on the left, G6 on the right. Obviously the EVF is in a different location.  But also the entire right side is different in each case. Can they both handle well ?
 
It's all about holding and handling


Moving against the tide ?  Last year I bought an Olympus EM5 with accessory battery grip and several lenses. I used this for several months then sold it, having decided to keep the GH2 already in my camera drawer. At the time the EM5 was the hottest thing in M43 world,  receiving many awards. It had better image quality and better performance than the ageing GH2.


So why did I sell it ?  In five words,  ergonomics and the user experience. The EM5 was a polarising camera. Some people loved it, others just couldn't adapt to its user interface. I was one of the latter.
Control layouts have similarities but also differences dictated by the style.
 
Lumix GX7 vs G6  I recently had the opportunity to own and  test the GX7 and  G6  at the same time. I found the GX7 to have  better picture quality especially at high ISO values. In several ways the GX7 also had better performance. The GX7 received many glowing reviews. The G6 did not even get reviewed by some sites.  But I kept the G6 and sold the GX7.  I went against the tide again.
Why ?  Same reason, ergonomics and the user experience.
I should make it clear that my main M43 camera is a Lumix GH3. So the G6 or GX7 would just be a back up in case of problems with the GH3 (of which there have been none, by the way). 
If I were choosing between the GX7 and G6 as a main or only M43 camera the decision might be a bit more difficult.  In that case I might keep the GX7 for it's better picture quality and investigate aftermarket thumb supports and accessory handles to improve it's holding and handling.
My hands are of average adult male caucasian size.

GX7  top, G6 above. Both handle/grip arrangements get the job done. I happen to find the G6 more comfortable and secure. It is also easier to carry in the hand all day with a lens attached.

The language of ergonomics (or lack of it)   There are many ways to identify and describe technical image quality, but the language and taxonomy of camera ergonomics is poorly developed. This blog is one camera user/buyer's attempt to rectify that deficiency.
One of the negative consequences of the paucity of language by which ergonomic issues may be described is a lack of attention to ergonomics (compared to technical image quality) in many camera reviews. A consequence of this is that it is possible to read many reviews of some camera only to discover after purchase that it is difficult or uncomfortable to hold.
Holding a hand held device   Given that the great majority of cameras are hand held devices one might have expected that analysis of holding and handling would have prime place in camera reviews. Unfortunately that is not the case. My own experience is that I have to buy or borrow a camera to evaluate it's holding and handling qualities. It might be argued that holding is an individual matter and that a camera which feels good to one person might be uncomfortable for another. But this ignores basic human anatomy. Human hands differ in size and length/width ratio. But they are all constructed the same way with the same fingers and joints operating the same way. No humans have the forelimb of a possum or a seal.
Studies of holding and handling  My investigations using mockups of whole cameras and handles have shown that it is possible to design small, medium and large cameras which can accommodate the normal range of variation in human hand size and shape.  The key lies in understanding which hand/finger positions provide a comfortable, strong base position and which finger movements are preferred by nature. The functional anatomy of hands and fingers preferences some positions and movements over others.

Mockup handle, front and top views. The mockup body has the same depth as the GX7. The handle is 3mm deeper but does not protrude beyond lens mount depth. You see here two versions of the parallel type. The mockup gives a  secure hold with less strain and positions the index finger to more readily operate the shutter button and top plate controls.

The design process  Earlier this year I read some promotional material by a well known camera maker (Nikon) describing the in house team's approach to designing a new camera. The promo indicated the team started with preliminary drawings then moved on to detail drawings and after that they made shaped mockups.
I think they are going about it the wrong way.   My work strongly supports the construction of  rough mockups as the  first step of the shaping  process, once guidelines about overall dimensions, mount size, flangeback distance and other essential engineering parameters have been set.
Nikon's capacity to make a camera with truly awful ergonomics was demonstrated with the 1 Series V1, described by one reviewer as a "mongrel".
How was the GX7 designed ?  I have no inside knowlege of the design process at Panasonic or any other camera maker. So I have to guess. Hypothesise to put a fancy word to it.  The GX7 looks and feels as though styling came before ergonomics. It has a specific shape and style which interferes with the creation of an anatomical handle and thumb support.
The G6  looks and feels as though it's designers learned from from the mistakes, of which there were many,  of  previous cameras in the "Small SLR-like" series of  Lumix MILCs since 2008. These include the G1,2,3,5 and GH 1,2,3.
GX7 and G6, Holding  The G6 has a substantial handle with anatomically sculpted shape. There is a distinct thumb support. You can get a proper hold on the thing without having to grip tightly. Finger spacing is close to that which the hand and fingers seek to adopt by nature with the "half closed, relaxed" posture.
The GX7 handle is small and does not conform to the shape of the fingers which are trying to grip it. The shutter button is not where my index finger wants to find it. There is only a vestigial thumb support. The space between the index and third fingers is greater than the space between the thumb and index finger. But the human hand in half closed natural position has a substantial space between the thumb and index finger but at the most only a few millimeters between the index finger and middle finger.
Holding the GX7 could be dramatically improved  if it used the handle and thumb support as shown in the attached photos of the mockup. But it would look different. I don't mean the color.  The style would be different and the layout of controls would be different.  Size could  be the same. The holding issue is not primarily one of size but of ergonomic design.
The challenge of design  Do camera designers preference style over function ? In my assessment they do it all the time, to the detriment of the user experience. I live in the eternally frustrated hope that camera designers will put ergonomics first and let the shape of the thing evolve to best serve the user experience.
So, I keep the G6   It's ergonomic realisation is some way short of perfection.  I would like to see the Function Lever (just behind the shutter button)  changed to a front control dial. It could perform all of it's present functions but also be available as part of the preferable twin dial control system. The rear dial needs to protrude slightly more, have sharper serrations and be angled upwards a little. These things would make it easier to operate without being unduly prone to accidental activation. Some detail improvements to the buttons would help make them a little easier to locate and operate by feel. The Fn4 button and surrounds need to be redesigned to make the button less prone to accidental operation. The shutter button could with advantage move 5-10mm to the left, giving a more natural position to the index finger.  Details, details,  but they affect the user experience.
However the basic size, shape, handle and thumb support are good for a small ILC and would be hard to improve I think.  The viewfinder is well located and the fully articulated monitor is very useful.


We shall see what the next round of models brings.


Favourite Cameras of 2013

$
0
0

GH3 with Lumix 35-100mm f2.8.


Favourite main camera: Panasonic Lumix GH3
Favourite backup: Panasonic Lumix G6


The season for awards    I have not the slightest clue which make or model might have been "best camera" of 2013. Such an award seems artificial and pointless to me. Individual photographers' requirements differ so greatly that it is quite likely one person's ideal camera will be another's nightmare.
But I can tell you which is my personal favourite and why. The reasoning process might be of interest to readers considering their next camera purchase.
Photographic requirements  I am an amateur photographer. I record family, holidays, travel, and events. I like to record sport/action. Another section of my work is documentary, recording people, places, work and activities. I need a camera kit which is highly portable but also extremely capable, able to make images which are suitable for magazine reproduction or large format printing.  I am old and feeling my age. Anything large, heavy or bulky is completely off  the  menu. I don't care how many line pairs per image height it can reproduce.
Camera System  After many years experimenting I have settled on Micro Four Thirds (M43) as the system which offers me the best balance of image quality, performance and ergonomics in a compact kit.
Panasonic or Olympus ?  Having tried both I prefer Panasonic's approach to the user interface. This applies to the menus, control systems and ergonomics. Current model Panasonic and Olympus M43 cameras are quite complex due to their high degree of configurability. But I find Panasonic's ergonomic logic more direct, less convoluted.  The GH3 has features reminiscent of  Canon (D)SLR's with which I have a long history.  Control modules on the Panasonic are usually  located  where I expect to find them.


Why the GH3 ?   The first camera which I used, 60 years ago, was a medium format rollfilm Baldafix. Since then I have used almost every type of camera and system. The GH3 is my all time favourite.  Many reviewers appear to regard the GH3 as a video camera with less relevance to still photography. But I use it exclusively for still photos. I have to confess I have no interest in movie capture and have never made a minute of video with the GH3.
Overall evaluation  The GH3 is a photographer's camera. It rewards the expert/enthusiast user with a streamlined operating experience. It encourages the user to take control of the image capture process. It does not set up roadblocks.  It has thus far been reliable.
Image Quality  This is good enough for my requirements. Would I like more ?  Sure, but that will come in the next generation of GH cams and will be a bonus.
Performance  The camera operates swiftly. It is easy for the practiced user to drive efficiently. I never have to stop in the middle of a sequence and wonder how to reset some function. It has a large battery and a big buffer. It is easy to carry and operate.
Ergonomics  Holding, viewing and operating are all carried out smoothly and efficiently. The camera is very versatile. It can switch from photographing an infant close up to architecture to sport/action with just a few adjustments to the well designed and positioned control modules.
I can adjust all the primary and secondary exposure and focussing parameters in Capture Phase of use, with my eye to the EVF. 
Prepare Phase adjustments are readily made  via  Set and See modules, buttons or the well implemented Q Menu.
The test of time  After 10 months of moderately high frequency use I still enjoy using the GH3. Of course I have ideas about ways in which the next GH camera could be improved but they are about details, not fundamentals.  Panasonic got the basics right.
I await the next iteration of the GH series with interest but am in no haste to replace the GH3.
Favourite Backup: The G6  The G6 got a bit lost in  market excitement about other cameras but I have been using it intermittently for six months and have found it to be nice to hold, with good image quality and performance. I conducted a big test earlier this year comparing the G6, Nikon D5200 and Nikon 1 V2, each with a 10x "travel zoom" lens. I found the G6 to be  the best all round performer providing the most satisfying user experience. I prefer it to the GX7, kept the G6 and sold the GX7.


Favourite Lenses of 2013

$
0
0

Antipodes Islands. Panasonic GH3 with Lumix 14-140mm Mk2.
 
Most Versatile: Panasonic Lumix 14-140mm f3.5-5.6 Mk2
Highest Quality: Panasonic Lumix 35-100mm f2.8
Lots of M43 lenses  Micro Four Thirds camera users have a great selection of lenses from which to choose. Here are my two favourites.
Dream of the universal camera  I hate changing lenses. Professional photographers try to avoid changing lenses by mounting a body to each lens they expect to use on an assignment.
I suspect most camera users hate changing lenses. Ironically having to change lenses may be the least appealing aspect of owning an interchangeable lens camera.  Wouldn't it be wonderful if someone invented a universal all purpose do everything in all conditions camera/lens combination. Plenty of makers have tried.
All purpose or "Bridge" cameras can be found in the form of several models from Fuji, the Sony RX10,  Olympus Stylus 1 and several small sensor superzooms.  But there is a viable alternative with a larger and better performing sensor in the form of the Lumix 14-140mm zoom lens mounted on a  Panasonic G6, GX7 or GH3.
Panasonic's all purpose travel zoom  The first version of this appeared in 2009. It had an f4.0-5.8 aperture range. Most users found it had modest performance not matching the 16 Mpx sensors which soon came to dominate the M43 system. The current version was released in 2013. It is smaller, lighter, less expensive on release, has a wider aperture and significantly better imaging performance. Yes, it does everything better.
It is ideal for expeditions when you really don't want to be troubled by having to change lenses, but still want decent imaging quality in a lens with 10x zoom ratio.  I have been using one mounted on a G6 or GH3 for several months. It really is as good as Panasonic and the reviewers claim.
It delivers very acceptable image quality at all focal lengths with a bit of softness at the edges and corners cleaning up when the lens aperture is stopped down a little. Build quality is very good. AF is fast and OIS works well.
Total kit size and weight is about the same as one of the larger bridge cameras.
GH3 with Lumix 35-100mm f2.8.


The Lumix 35-100mm f2.8  This is the M43 equivalent of the classic 35mm ("full frame")  70-200mm f2.8 zoom, greatly favoured by professional and enthusiast photographers. The 35-100mm offers the same angle of view and constant aperture.  But it is muchsmaller, lighter, less obtrusive and less expensive than the 70-200mm f2.8.  In the 9 months I have been using the 35-100mm it has impressed me with excellent imaging quality at all focal lengths and apertures. It has excellent AF and OIS. It makes a very agreeable high performance walk around photographic companion.
Image courtesy of  camerasize.com.  Images of neither the  EF 28-300 nor the Lumix 14-140mm Mk2 were available so I edited this image of closely similar lenses to correct size in Photoshop.
Left, Canon 5D3 with EF28-300mm f3.5-5.6 lens. Right, Panasonic GH3 with Lumix 14-140mm f3.5-5.6.  Same angle of view, same aperture range.

Image courtesy of camerasize.com
Left, Canon 5D3 with EF 70-200mm f2.8. Right, Panasonic GH3 with 35-100mm f2.8.
Same angle of view and aperture.

M43, full frame and kit size  Much is being made as I write this about the new Sony full frame mirrorless ILC's.  Some excited commentators are forecasting the end of all systems which use smaller sensors. This is nonsense. The bodies are small but the equivalent lenses, particularly the superzooms and long zooms will be the same size as those for full frame DSLR's. The reason for this is that lens size, for any aperture and focal length, is primarily determined by sensor size. So the A7 and A7R are about the size of the full featured M43 cameras, but some of the FE lenses which have been released or planned  are a very different proposition.
My own view is that the full frame sensor will stay where it is now, in the hands of professional photographers and some enthusiasts while most development will be in systems using smaller sensors which are already delivering excellent image quality.

Fuji X-E1 vs Panasonic GX7 MILC comparison Part 1

$
0
0

On the left Panasonic GX7 with 14-42mm Mk2 lens. On the right Fuji X-E1 with 18-55mm lens.
 
Two modern versions of the "Look-a-Leica" style
Part 1
Historical background  One of the most famous camera designs of the 20th Century was the Leica M series, dating from the M3 of 1954. Although these cameras were too expensive to be popular, they were used by some famous professional photographers.  Leica M cameras with digital sensors are still made.  They still have manual focus lenses and continue to use the classic optical view/rangefinder top left on the camera body (as viewed by the user).
The first mirrorless interchangeable lens camera [MILC] priced for the rest of us and fitted with an electronic viewfinder [EVF] was the Panasonic G1 of 2008. It was, and many of it's descendants are,  styled like a little DSLR.  But a MILC can be made almost any shape and the EVF can be located almost anywhere.
So now we have MILC's in both "rangefinder" style and "DSLR" style.
At the time of writing rangefinder  style MILC models  with built in EVF are available from Fuji (X-Pro1, X-E1/2) Panasonic (GX7) and Sony (NEX 6/7).
Cameras tested  I recently had the opportunity to test the Panasonic GX7 and Fuji X-E1 side by side. This proved to be an interesting experience. These cameras have several similarities, notably the EVF top left and flat top body style. But each has a very different approach to the user interface.
User interface  The X-E1 uses a variant of the traditional, mid 20th Century film camera interface using a lens aperture ring and camera top shutter speed dial. 
The GX7 uses a Mode Dial and  control dial interface. This  system  started appearing on digital cameras from about year 2000.
So we have the traditional vs the modern.
Target user group  Professional photographers could use either of these cameras and come away with excellent results in the right circumstances. However my impression is that both are targeted at the enthusiast/expert/amateur user group. Neither has the performance needed for some types of photography, such as sport/action.
Kits tested  The GX7 came with it's Lumix 14-42mm f3.5-5.6 (Mk2) OIS  kit lens. The X-E1 had the Fuji 18-55mm f2.8-4.0 zoom, also with image stabiliser. I used the X-E1 fitted with accessory handle from Really Right Stuff and thumbrest from Thumbs Up.
As those two zooms are not a very good match for size or aperture I also included a Panasonic GH3 with 12-35mm f2.8 zoom which is closer in specification to the Fuji 18-55mm.

Dimensions and masses 


Unit

Dimensions Body only mm

Box Volume Body only cc

Mass Body + battery

grams

Mass Body + battery+zoom lens +hood

Mass body + acc handle and thumb support +Lens

Mass Lens grams

X-E1

129x76x38

373

350

705

845

18-55mm 355

GX7

123x71x55

480

402

535

N/A

14-42mm 110

GH3

133x93x82

1014

550

910

N/A

12-35mm 305


Longer lenses  As lens focal length increases we can see a striking difference start to appear in the size/mass of  Fuji X kit compared to  M43 kit. I was unable to find an exact lens match but the Lumix 45-150mm f3.5-5.6 is the closest current M43 match I could find for the Fuji 55-200mm f3.5-4.8. The Fuji has slightly more zoom range and a slightly wider aperture at the long end. At 580 grams the Fuji has almost three times the mass and 2.3 times the volume of the 200 gram Lumix. 
Initial impressions 
Feel  The X-E1 has a solid, hard metallic feel, reminiscent of a 1980's 35mm film camera. Presumably this is intentional and part of the X-E1's retro appeal. The Panasonic cameras have a  rubber or similar covering on the gripped parts which gives them a softer feel.
Size and mass  The X-E1 feels larger than the GX7 because it is slightly wider and higher. But the GX7 has a more prominent handle which gives it more depth and total box volume. The X-E1 bare body is surprisingly lighter than the  bare GX7  but that reverses when lens, handle and thumb support are added.
Comfort   Although, or perhaps because,  the GH3 is substantially larger than the other two cameras it is also the most comfortable to hold  and operate with my adult male hands.  The bare X-E1 felt as though it was about to fall unless I gripped it tightly. Holding the X-E1 was greatly improved with the accessory handle and thumb support.
System  The M43 system provides a wider range of  cameras and lenses than the Fuji X system. Until recently the Fuji X-Cams and lenses have been pitched at the upper/enthusiast market sector.  The recent arrival of the X-A1, X-M1 and X-Q1 suggests that Fuji also wants a piece of the budget market.
Test method  I made numerous photos of a variety of subjects with each camera and also photographed a test chart in controlled conditions, using RAW capture and Photoshop Camera Raw 8.3 (updated just days before the tests).

Both these photos are crops from a single frame. Top, Panasonic M43 with Lumix 12-35mm lens. Above Fuji X-E1 with 18-55mm lens. I used a GH3 for the M43 camera here. It makes pictures which appear identical to those of the GX7 to my eyes.

Picture Quality  You can read all about the different technologies and sensor sizes inside the cameras elsewhere. I just evaluate the output picture quality.
Low ISO settings  Both on the test chart and with a variety of general photographic subjects I could not tell the difference between pictures made with each of the three body/lens kits.  There were the expected minor variations in exposure and color balance but these were easily equalised in PsCR.  Otherwise there was nothing in it.  With subjects having normal brightness range, I saw no difference in resolution, highlight/shadow detail or overall picture appearance.
With subjects having high brightness range I was able to achieve good highlight and shadow detail with each of the cameras, using the sliders in PsCR,  but there was noticeably less luminance noise in the lifted shadows of the X-E1 files than those from the GX7 which in turn had slightly less noisy shadows than the GH3.
The other thing I noted  was that at very high magnification the X-E1 files showed sharpening artefacts around  fine subject details such as small text or leaves. You would be hard pressed to notice this in the great majority of photographs. I saw virtually no sign of moiree artefacts or false color in any of the files from any of the cameras.
When Fuji introduced the X-Trans sensor (as found in the X-E1) they claimed it would have better resolution than a standard Bayer type sensor, on the grounds that the X-Trans sensor would not need the anti aliasing filter found on most Bayer sensors. 
Well, on my tests the pictures do not support Fuji's claim.
High ISO settings  One thing which Fuji does not claim for the X-Trans technology as far as I am aware is substantially lower noise at high ISO settings than other types of sensor.  But that is in fact where the X-E1 is clearly superior.   
With RAW capture the X-E1 at ISO 6400 delivers files with noise levels, color fidelity  and shadow detail the same as the GX7 at ISO 2500, an advantage of about 1.3 stops. The GX7 actually performs very well at high ISO settings, even slightly better than the GH3.  This ranks the X-E1 as  really excellent in the high ISO range and equal to many full frame cameras.


So, the X-E1 has a larger sensor than the M43 cameras with lower pixel density so you would expect it to perform better at high ISO settings and it does, convincingly.  All you have to do is persuade it to focus in the dim lighting conditions which might make high ISO settings necessary.
Performance  To cut a long story short, the E-X1 is a bit slow, the GX7  is really fast. This speed differential applies to almost everything: shot to shot times, AF single, AF continuous, and all round responsiveness to user inputs. I should make it clear that in most conditions the X-E1 is not bad, it's just slower than the latest M43 cameras including the GX7 and GH3. The X-E1 was running without the latest firmware upgrade.  I understand that the firmware upgrade improves performance and the X-E2 delivers further improvements particularly to autofocus.
The only performance issue which I rated a real problem in testing was the X-E1's slow, hesitant and often failed autofocus in low light levels. This made it difficult to utilise the X-E1's excellent high ISO picture quality.
I quite liked the manual focus system on the X-E1. You don't get FTM (full time manual focus simultaneous with autofocus)  and focus assist zoom with MF is not automatic as with M43 cameras. But you can press and rotate the rear dial to zoom in at 3x or 10x. Having to do this manually gives a level of user control over the process which I found quite satisfying.
Ergonomics--Holding   My regular camera is the GH3. By comparison, most cameras I have used including the X-E1 and GX7  present the user with a sub-optimal holding experience.  Worst is the X-E1,  which  I found  really quite difficult to hold securely.  There are reasons for this:
* The  X-Pro 1 lens axis is inset approximately 61mm from the left side of the camera. The X-E1 lens axis is inset 57mm.  On the GX7 the distance is only 42mm and by way of comparison the Sony NEX 6 lens axis is inset just 40mm. 
So what ?  Well, the X-Pro1 has an optical viewfinder which needs to be kept away from the lens or that is mostly what you will see in the viewfinder.  But the other cameras all have an EVF the position of which  in relation to the lens is irrelevant. Panasonic and Sony moved the lens axis well over to the left, allowing room for a handle on the right side.  But the Fuji designers did not move the lens axis across with the X-E1,  so there is not enough room on the right side for a handle and the fingers which hold it. Instead we get a vestigial little blob which is of  little assistance to the would be holder.
As a result there is a brisk trade in aftermarket handles. The one from RRS which was fitted to the tested X-E1 greatly improves holding and operating the camera, relocates the tripod socket to the lens axis and mates directly to several brands  of tripod head.
Panasonic's designers didn't do much better with the GX7.  They included  the  horizontal silver strip style signature running right across the top front of the body, just like  Leica M and   Fuji X cameras. But this compromises the handle and prevents the designers from using an anatomical shape.
* The E-X1 needs a control dial of some kind to operate many of the functions of a modern electronic camera. So a Rear Dial is provided.  As correctly described by Digital Photography Review, this is ..."perfectly placed for operation by your right thumb".  However most of the time when making photos you don't actually want to operate that dial. But it is located exactly where your thumb wants to rest. So Fuji X cam owners go get an accessory thumb support which keeps one's  thumb off  that dial most of the time and also improves grip stability. Fuji doesn't even make the aftermarket kit but they promote it's use.
Rear of camera arrangements on the GX7 are better but could be improved. The rear dial is well located but there is little support for the thumb. Already I read  in user forums that owners are experimenting with thumb supports which slip into the hotshoe like those on the Fuji X cameras and reporting beneficial results.
Wouldn't it be wonderful if  manufacturers got their products right before they left the factory ?
Viewing  Each of the three cameras has an EVF for eye level viewing and a monitor for viewing with the camera held away from the eye. The E-X1 and GX7 have the EVF located top left. The GH3 EVF is located in the hump on the lens axis, SLR style.
When I began studying camera ergonomics I thought the top left, rangefinder style would be the best place for an EVF. But after using both types over the years I have decided it makes very little difference, at least for the right eye viewer. The left eye viewer might have a different experience.  As is often the case with things ergonomic, I have found that detailed implementation of the viewing system does matter.
Eyecup  Each camera has a very different looking eyecup but each works decently well. The X-E1 and GX7 without it's accessory eyecup both tend to admit more stray light in bright conditions than I found comfortable.
EVF quality  The X-E1 has the nicest looking EVF with accurate colors and good highlight/shadow detail. It is not as adjustable as the Panasonics but doesn't really need to be. The only problem I encountered with X-E1 was a peculiar transient shimmy shake in the EVF preview image when I half pressed the shutter button. This was actually a bit disconcerting especially in low light.
The GX7 tilt up EVF  As far as I am aware this is a first for the camera industry. It could be useful in several circumstances.
Monitor    In my early days with digital cameras I only had access to models with fixed monitor, so I became accustomed to that, just as X-E1 users will adapt to their fixed monitor. But the  GX7 swing up down monitor is more versatile and the GH3's fully articulated monitor even better,  allowing the camera to be held high or low in either landscape or portrait orientation. It also allows other angles of view not possible with the other monitor styles.  Last but not least the fully articulated monitor can be turned inward for protection when not in use.


Part 2 follows......................


Fuji X-E1 vs Panasonic GX7 MILC comparison Part 2

$
0
0

On the left Panasonic GX7 with 14-42mm Mk2 lens. On the right, Fuji X-E1 with accessory handle, thumb support and 18-55mm lens. The accessories make the X-E1 much more secure to hold but add to the bulk, mass and cost. The GX7 could probably benefit from some similar accessories.
Two modern versions of the "look-a-Leica" style
Part 2
In this post  I will briefly discuss the operation of each camera with emphasis on ergonomic issues. I will also investigate the various ways in which camera designers might utilise "Set-and-See" modules and the effect these have on the user experience.
Ergonomic issues vs ergonomic mistakes  Modern cameras are very complex, presenting their designers with a multitude of decisions which must be made  in the product development process. Most of these decisions affect the user experience. They are neither good nor bad, they just dictate that the camera will operate in a certain way and not in other ways.   For instance a digital Leica M rangefinder provides a very different user experience from, say, the Panasonic GX7 which we are talking about in this post. Both are "right" in the sense that they both work and  each is ergonomically coherent.
Mistakes  Some decisions are just plain wrong by any functional criterion. Here is an example:
Fuji X-cams AF button   The X-100 of 2010 has a button labelled [AF] on the left side of the monitor. You press this to activate the AF area, then press the 4 Way (cursor) buttons to move it's position.  The X-10, X-Pro1 and  X-E1 all had the same button in approximately the same location.
So what ? The problem is that with each of these cameras you need your left hand on the lens barrel to support the lens, adjust aperture,  zoom or all three.
So you need to become a juggler to move the AF area. The sequence is: left hand off lens> left hand press AF button> left hand back on lens> right hand off gripping/holding duties> right thumb presses 4 way controller> right hand returns to gripping/holding duty> continue with capture phase of camera use.  Feel lucky if the camera does not fall on the floor while you practice juggling.
With the X-20, a firmware upgrade to the X-E1, the X100s and X-E2 they fixed the problem by moving the [AF] button function over to the 4 way controller so you could change AF area position and size with the right hand while maintaining a constant grip on the camera with the left hand.  At last, they got it right.  But why was that button on the left side in the first place ?  Strange.................  
But enough about  mistakes, now I want to talk about camera control systems.
The glory days ?   The X-E1 and GX7 which are the subjects of this two part post appear to be styled to recapture some sense of the glory days of  mid 20th Century photography, when a camera was something special, a work of high craft,  to be handled almost with reverence, not just another electronic gadget.  In those days  a photographer had to know all about apertures, shutter speeds and much more to make any photos at all.
Pentax Spotmatic. I owned and used one of these for several years. It remains my all time nostalgic favourite camera. You can see all the control modules in this photo. I do understand that camera users might yearn for a return to this camera's simplicity. Until they actually start using it of course, at which time it's auto nothing operation might get a bit tedious.
 
Old technology operating systems  For many years  from the 1960's through to the late 80's,  I used film cameras with basic control systems and predominantly manual operation.   These included the Pentax Spotmatic, Leica M6 and Mamiya 7. 
Leica M6. Although this is a rangefinder the basic control layout is the same as that found on the Spotmatic above.  Basic, simple, engaging.
 
Although one of these is a SLR and the other two are rangefinders and two are 35mm while the other is a medium format, their user interface is very similar. At the front you have a single focal length manual focus lens, there  being no zooms and no autofocus in those days. There is a focus distance scale on the lens barrel and a depth of focus scale. You can preset focus distance and establish hyperfocal distance right on the lens barrel.  There is an aperture ring on the lens with fStops clearly marked. On top of the body there is a shutter speed dial. There is a little window in the dial to indicate  ISO setting, which in those days was called ASA or DIN. There is a little mechanical self timer lever and levers to advance and rewind the film and that is about the lot.
A camera like this is simple and direct in operation.  The user has to be very engaged with the camera's controls and the process of photography in order to make it work.   There is no "Auto" Mode or indeed any other kind of mode.
Note that all the control modules are of the Set-and-See type. You make the settings  and can see all of them  simply by looking at the camera from above.
Having enjoyed using cameras like this for many years then moved on to digital photography and electronic camera operation I  feel that  I have some understanding of the counter technology appeal of  cameras which reprise the good old days. 
It might be thought the disadvantage of the old style user interface would  be it's rather slow operational speed. In fact the experienced user with a high latitude film like Kodak Tri-X would set focus distance, aperture and shutter speed when moving into a location,  in the Prepare Phase of use. When the decisive moment arrived,  in the Capture Phase of use, the only action required was to press the shutter button.
No, the disadvantage of  Set-and-See modules is  that you can't see them while making pictures with your eye to the viewfinder.
This led camera makers to develop over a period of many years increasingly electronic means of  presenting  readouts of the primary exposure parameters (ISO, Aperture, Shutter Speed)  in the viewfinder.
Which leads us to the next question.  If  ISO, Aperture, Shutter Speed and other parameters of exposure and focus can be clearly displayed in the viewfinder, and they can, why put them on Set-and-See modules ? 
The answer to this question I think is that you don't need them on Set-and-See modules at all, but if they are located on such modules than those same modules are not available for any other purpose. This is the opportunity cost of locating any function on a Set-and-See module.
New technology operating systems     Since about year 2000, the standard operating system for digital cameras has been the Mode Dial and Control Dial  system. Sometimes there are two or even three control dials. The more the merrier (maybe).  Adjustments to ISO, shutter speed and aperture are made with the control dial(s) while the user is looking through the viewfinder.  This is not fundamentally  better than the old tech system but it does open up more options for the use of  Set-and-See modules.
Modern cameras have a vast array of features, functions, modes and options not even imagined in the old days.  These include such things as Focus Mode, Autofocus Mode, Drive Mode, Exposure Mode, Flash Mode................and  on  and  on and on.....it seems there is no end to them. One of these, the Main Shooting Mode,  is conventionally and sensibly allocated to a Set-and-See dial on the camera top somewhere. This allows the user to see at a glance whether the camera is in Aperture Priority Mode or one of the other modes.
The functions/modes most frequently adjusted  in Prepare Phase of use can be allocated to any remaining Set-and-Seemodules.  
Back to the Fuji X-E1 and Panasonic GX7 


The X-E1 uses a modified  version of the old tech control system described above.  The autofocus lenses have no distance scale or depth of field scale. However an analogue distance scale can be set in the viewfinder or monitor.  There are fStop markings on single focal length lenses but not the zooms which are of variable aperture design. There is a shutter speed dial. There is also an exposure compensation dial top right which is not part of the old tech control suite at all.
The GX7 uses a completely new tech Main Mode Dial and (twin) control dial layout.
Time and motion studies It is possible to break down the actions required to operate a camera into a series of steps,  observe the number and complexity of movements required to complete each step and note the time taken to perform each step.
Thus one can study actions required to shift from Manual to Shutter Priority to Aperture Priority to Programmed Exposure Modes. Once in one of those modes one can study the actions required to change Aperture, Shutter Speed, or both.  The exercise can be extended to include all primary and secondary exposure and focussing parameters and also to setting various modes used in Prepare Phase of use.
I have done this and found that for most of  these steps the X-E1 requires more movements of the fingers and most of those movements are more complex than is required to carry out the same steps with the GX7.
So the GX7 is quicker to operate, and as we saw in Part 1 it performs faster and in some cases (low light focussing) better.
But as the song goes......"Is that all there is....?"...............Apparently not.
Several reviewers report they like using the Fuji X cameras including the X-E1 very much.  One said  "it's a wonderful way to operate a camera..". Other comments I have read include  "..it is a simple, elegant and highly functional design...." and  "...a beautifully designed and engineered camera..".
So some reviewers like it and there does appear to be a loyal fan base on user forums.


So whence the appeal of the Fuji X- cameras ?  I am unable to read minds so I don't know, but maybe the X-E1's semi retro style, user interface and slowish performance are  the appeal. 


For instance to change from Aperture Priority exposure mode to Shutter Priority mode on the GX7, simply turn the Main Mode Dial one notch. With a little practice this can easily be done with the eye to the viewfinder in 2 seconds, tops.
With the X-E1 and a zoom lens the procedure is more involved. It might, I suppose be possible for a very experienced user with a lot of practice to do it with the eye to the viewfinder but for me it went like this: Drop camera down from the eye> find the little slider right near the lens mount> push the slider to the correct new position> return camera to the eye. 
Another example:  If you want to operate the GX7  in Shutter Priority Mode, just turn the Main Mode Dial to enter S-Prio Mode. To change the shutter speed just rotate the front (or rear, depending on how the dial functions have been set in the menus) dial. That's it. Fast. Easy. Do it with the eye to the viewfinder  without having to perform a two handed juggle with the camera.


With the X-E1 things are not so simple. First lower the camera from the eye. If you start from Aperture Priority Mode with a zoom lens you need to locate and move the little slider which switches aperture function, probably with the left hand.  Then hold the camera with the left hand and grip the shutter speed dial with the index finger and thumb of the right hand. Rotate the dial off the A setting. Now every time you want to change the shutter speed you have to release your grip on the camera with the right hand to rotate the dial.  It may be possible for some users to do this with one finger but I found it more reliable to use two fingers. If your camera is fitted with a thumb support, forget about Shutter Priority, it's impossible to get two fingers onto the dial.    
To an ergonomics boffin like me these  X-E1 arrangements just seem like a  kludgy  workaround. But to another user, perhaps seeking a more contemplative style of camera operation, they  might be just what is wanted.   The X-E1  certainly engages  the user more in the process of operating the camera. This dialectic  could  be very appealing when compared to the fast but remote control  experience with the GX7 and many other current camera models.
Summary  The X-E1 and  GX7 might appear to occupy a similar retro, look-a-Leica market position. But each provides a very different operating  experience and  is likely to appeal to a different user group.
My advice --- Try before you buy. If you really like one of these cameras you might hate the other.
My pick ?  There is no way the  X-E1, (or the improved X-E2) or GX7 will tempt me away from my GH3, even though they have slightly (GX7) or substantially (X-E1/2) better high ISO  picture quality. Performance, ergonomics and the user experience all favour the GH3.  
By the way, the latest rumor I am reading  about the Fuji X-Cams is that the next model will have a hump top, DSLR style shape. I guess Fuji wants to be in all the key market slots. It will be interesting to see if they stay with the "Old tech" control system or go with the flow and use a Mode Dial and Control Wheel interface.


The Camera in a Smart Phone World Part 1

$
0
0

Who needs a camera ?
 
Part 1 Concept and Users


In the past,  not so very long ago, anyone who wanted to make a photograph had to use a camera of some kind.  Most people used a compact camera.
Yesterday,  my wife and I took our grandchildren to a popular Sydney tourist attraction. As usual there were great crowds of  people, many taking photographs. On my extremely rough estimation about 80% were using a smart phone, 10% a tablet of some kind and 10%   a camera. There were compacts, superzooms and the occasional ILC.
Most of the tablets, the screens of which were readily visible, appeared to be making good pictures.
So, who wants a camera?
I think the negative part of the answer to this question is rather obvious already  --- most people don't want and probably don't need  a camera at all. The corollary of this is that the once popular compact camera is likely to become extinct.
I think that for the majority of amateur users,  the camera has become to photography what the sports car is to motoring. Not necessary for transport from A to B, but fun to drive.  A camera is not  necessary for making pictures but it is, or can be if properly designed, fun to use.
The camera can  provide the discerning user with performance, engagement and control .  There is an inverse relationship between automation (as typically found in a smart phone) and  control  as found in a well designed and operated camera.
Of course there are plenty of users who buy a sophisticated Interchangeable lens camera (ILC)  then use it in Fully Auto Mode with  monitor view.  I suspect these people hope that their expensive camera will make better pictures and like the ideaof  performance and control. Or maybe they just like the idea of having something better than the mob.
What sort of camera drives like a sports car ?
I call this the Proper Camera.  It has the following minimum feature set:
Inbuilt electronic viewfinder, fully articulated monitor, inbuilt flash unit, anatomical handle, anatomical thumb support, zoom lens, good enough picture quality, good performance with still or moving subjects and a comprehensive, ergonomic user interface, reliant on hard (i.e. operated by the fingers) user interface modules (dials, knobs, buttons, levers etc).
It  could have a fixed lens or interchangeable lenses.
It has a user interface which allows the operator to quickly adjust  primary and secondary exposure and focussing parameters in the Capture Phase of use, while looking through the viewfinder and without having to change grip with either hand.
I recently read an interview by a photography magazine of the marketing director of a camera company which had just announced a new M43 camera without a built in viewfinder. The marketing director was quoted as saying   "....this is a CSC [compact system camera with interchangeable lenses] designed for a smartphone audience..."  I wonder  if  it occurred to this hopeful gentleman that the smartphone audience was already taking pictures with their smartphones, making the camera as a separate entity largely irrelevant for this group.


Next.....Flat Top or Hump Top ?


The Camera in a Smartphone World Part 2

$
0
0

Just hanging on ?
 
Part 2   Flat top or hump top ?


DSLR style or Rangefinder style ?


Background   From the mid 20th Century many cameras with fixed and interchangeable lenses adopted the rangefinder design, with an optical viewfinder top left as viewed by the user and a flat top.  Then along came the single lens reflex camera (SLR) which with digital capture became the DSLR. This type has a hump more or less mid position on top to accommodate the pentaprism and viewfinder.  The shape of these cameras was determined by their internal mechanical and optical configuration.
They were not "styled' to look like that, their shape was an example of form following function.
The electronic era  Now cameras can be designed to be any shape at all and their electronic viewfinders can be located anywhere  in, on or off  the camera body.  Notwithstanding this  most modern electronic cameras are styled as either rangefinder or SLR lookalikes. This may be in part  be an acknowlegement of tradition but my investigations of ergonomics would suggest these two styles also provide good functional efficiency.
Which is better ?  I have used numerous rangefinders and SLR's over the years so becoming quite familiar with both types. I have also more recently used, tested  and compared electronic rangefinder and SLR lookalikes.  My initial thinking was that the rangefinder style would be preferable as it allows a slightly lower overall height.
However I have now come to the position that in everyday use each style has it's advantages and disadvantages with neither being overwhelmingly superior. But I still think one is a bit better.
Advantages of the rangefinder style 
* Slightly lower overall height possible
* EVF position may be preferred by some right eye viewers, as the nose does not have to be pushed against the monitor.
Disadvantages of rangefinder style
* EVF may (some models definitely do) need an accessory eyecup to keep stray light out of the eyepiece. This accessory protrudes above and to the left of the body. It increases the actual dimensions of the camera at the top left corner. With the accessory eyepiece fitted the camera can take  up the same amount of space in a camera bag as the hump top style. In addition the eyepiece is located where it is repeatedly subjected to stress and risk of damage as it goes in and out of the bag.
* Space on top of the camera is restricted. This limits the designer's options for placement of flash, hotshoe and control modules.
* The handle issue. In my work with mockups I have made several flat top designs with a full handle. So it can be done without any functional problem. However most of the actual flat top cameras in production have no handle or at best a small or vestigial one. I can only guess that the designers feel "big handle" does not fit well with the rangefinder-esque style.  Whatever the reason, it's a problem because modern cameras have a big monitor covering most of the back and lots of buttons all over the place. Without an anatomical handle these cameras are difficult to hold securely.
Advantages of the SLR style
* Although total height is greater, shoulder height can be lower. This can actually make the hump top camera easier to place in a camera bag. 
* There is more space on top of the hump top style for flash, hotshoe and various control modules (dials etc).
* Designers are happy to fit their hump top creations with a decent big handle.
* The flash and hotshoe are on the lens axis, at least in landscape orientation.
* In practice there is less problem with stray light entry into the viewfinder.
* With long lenses there may be an advantage to having the viewfinder on axis with the lens for stability.
Disadvantages of the SLR style
* The eyepiece has to protrude backwards 14-15mm or thereabouts from the plane of the monitor, so the user doesn't have to twist the head and look sideways through the viewfinder. This adds to the overall depth of the unit.
* It's a bit higher than the flat top style.
Overall    I have come to the view that the hump top, SLR lookalike style  has more advantages than disadvantages. It has therefore, somewhat to my own surprise, become my preferred camera shape.


The Camera in a Smartphone World Part 3

$
0
0

The need for speed. Predator and prey
 
Part 3  Control Layout,  Traditional or Modern ?
Is looking back the way forward ?


Traditional  This user interface originates from the mechanical cameras of the mid 20th Century. You have a manual focus lens with distance and depth of field markings on the barrel. Apertures are set manually via a ring also on the lens barrel with fStop markings. Shutter speed is allocated to a dial on the top plate. Film speed is usually set via a little window in the shutter speed dial. And that's all there is.
This system has the considerable virtue of simplicity. All adjustable parameters can be found on set-and-seemodules. Current settings can be seen at a glance without having to switch on the camera and without looking through the viewfinder. Of course when you do look through the viewfinder those nice clear set-and-see modules become invisible, just when you need them most..... oops.....
Modern  From around year 2000, the Mode Dial and Control Dial  interface became popular and is now  dominant. This interface allows camera designers to introduce the multitude of functions and modes which did not exist on manual film cameras. We have Auto, P, A, S, M Shooting modes, Focus Mode, Autofocus Mode, Drive Mode, Metering Mode, etcetera...........
Hybrids  There are numerous current model cameras which feature some attempt to blend the traditional and modern styles of user interface. Even cameras such as the Fuji X- series which promote their retro heritage and operation are really hybrids with autofocus and a mixture of old and new  style user interface modules. 
The recently released Nikon Df  looks to me like a head on collision between the traditional and modern systems with the resulting clutter of disparate control modules scattered about like wreckage all over the place. A fine example of how not to do it, methinks.
Which is best ?
On my assessment, a well executed  modern user interface has the advantage in two ways:
1)  Time and motion analysis.
The operation of a camera designed to be controlled by the user (as opposed to one which operates automatically with little user input)  can be devolved into a series of tasks. For instance, adjust aperture while in aperture priority mode;  switch from aperture priority mode to shutter priority mode;  adjust shutter speed in shutter priority mode......... etcetera
It is easy enough for anyone so inclined to conduct a time and motion study which for each task examines
a) The number of actions required and
b) The complexity of the action.
I recently did this exercise when comparing the Fuji X-E1 (hybrid traditional) and Panasonic GX7 (modern) cameras. I found that for the great majority of tasks the GX7 required less actions and each action was less complex.


2) The opportunity cost of  set-and-see  modules.  
If the designers elect to put, say, shutter speeds on a set-and-see  dial on the camera top then they cannot put anything else in that location.  They might of course elect to stack dials and put, say, an exposure compensation dial on top of the shutter speed dial.
But modern cameras utilise a multitude of Modes,  such as shooting modes, focus modes, autofocus modes, drive modes  etc.....etc.
Setting modes is a Prepare Phase action. This takes place in the few minutes before actually making photos. In Prepare Phase the camera is held down from the eye.  Set-and-see modules are ideal for adjustments in this phase.
Shutter speed, aperture and ISO are primary exposure parameters which require adjustment in Capture Phase, when the user is holding the camera to the eye. The user needs to see readouts of these parameters in the viewfinder and needs to be able to adjust them without taking the eye from the viewfinder or shifting grip.
The consequence of all this is that if visual information about primary exposure parameters is allocated to set-and-see modules, that information needs to be duplicated in the viewfinder. It also means that the designer now has no room to locate Prepare Phase parameters (such as modes)  on set-and-see modules, so Prepare Phase parameters have to be accessed some other, ergonomically less streamlined way, such as via a menu or Quick menu.
Summary  Looking back is not the way forward.
The traditional, mid 20th Century user interface worked well enough on the  manual cameras of the day.  But on a modern electronic camera with it's multitude of features, functions and modes, a well designed version of the  modern user interface brings a much higher level of ergonomic efficiency.
The retro appeal  Notwithstanding the observations detailed  above, which by the way can be made  by anybody prepared to carry out the requisite time and motion studies, the idea of the retro camera continues to find appeal with some buyers.  Why ?
I don't really know. I don't think it has much to do with the age of the photographer, or even the person's experience with cameras.
I suspect it's part of the backlash which usually accompanies any technological development. The ongoing niche market for vinyl records might be an example of this.
Maybe some people yearn for the  idea of the simplicity of the good old days. Mind you, I suspect that if they actually had to operate a mid 1960's manual camera the reality might be rather less appealing.  In any event, the genie will not go back in the bottle.  Electronic cameras with all their attendant complexity are here to stay for quite a while.  The challenge for designers is to make that complexity manageable for photographers and at the same time design cameras which are enjoyable to use.

Calling Them Names

$
0
0

Fire's Out
 
The importance of naming cameras and their characteristics


What kind of camera is it ?  I was recently visiting with family. One person got a beaut new white Nikon 1 V2 camera with a 10-100mm superzoom lens for her birthday. She loved it. And it was stolen a few days later. Ouch.
Anyway, back to my story........Another family member asked  "What Kind of camera is that ?"  Is it a DSLR ?  .....Well....no.....it's one of those other ones....It's a ...............oh,  heck........... it's a nice white one................good for the boys' soccer.................
The Importance of Naming  Ideas, principles, medical conditions and devices all need a name. Until the idea or thing has a name it has not yet acquired a recognisable identity. People cannot identify it, ask about it or conduct a discussion about it. Something without a name hardly exists.
Names of Camera Types  The names of established cameras have historical roots. So we have the "View Camera" so named because you directly view an  image of the subject on the focussing screen.  Then someone invented the "Twin Lens Reflex" [TLR] camera, which made it possible to preview the subject without having to look through the taking lens and without requiring the dark cloth. The "Rangefinder" camera was so named because it had a ........yes you guessed it......an optical rangefinder (messsucher with 3 s's in German) for estimating focus.  The Single Lens Reflex [SLR] camera found a way to eliminate the upper lens of a TLR and was perhaps the best camera idea of the 20th Century. Small film cameras with a simple optical viewfinder and mainly automatic controls were called "Compact", for obvious reasons.
Fast forward to the 21st Century and things have become a bit more complicated. Compacts are still compact so they keep the name. SLR's got digital sensors so they become DSLR's.
The new Camera Type
But now we have this new (well, new since 2008 anyway)  type of camera with interchangeable lenses but which is not a DSLR. And so far there has been no general agreement as to what we should call it.
Let us review some of the contenders for naming.
CSC, Compact System Camera. This was initially adopted by several groups but has not  gained universal acceptance.  I think this is because the name does not really convey a sense of the nature of the device. Any such camera might or might not be "Compact" but so might any other kind of camera. "System" is a bit non specific. Any particular camera of this type may or may not be part of a recognisable camera/lens/accessory system.
DSLM,  Digital Single Lens Mirrorless is Panasonic's recent attempt to name the beast, but has not been well accepted even in Panasonic World. I notice on various Panasonic National websites MILC, ILC and CSC also being used. Calling a digital camera "Digital" in a world where 99% of cameras are digital is just redundant. Calling it "Single Lens" in a world with no new "Twin Lens" cameras is meaningless.  
ILC, Interchangeable Lens Camera.  Some of Sony's recent model releases have been advertised with this prefix. Some of the same cameras have also attracted different prefixes so I think you could say things are in a state of flux at Sony, or maybe total confusion.
MILC, Mirrorless Interchangeable Lens Camera.  Much as I dislike naming something for a component which it lacks, this name conveys several things  meaningful about the nature of the device. One day when interchangeable lens cameras with a mirror (DSLR's) have become a minor or absent player in the camera world, we can drop the M and just call them ILC's.
So, MILC is my preferred name for the reasons given.

Bridge Cameras  Several manufacturers brought these onto the market about ten years ago.    Presumably they did not sell very well because they slipped into the background until recently. Sony is trying to revive the type with it's RX10 "all in one" camera.  The name "Bridge" was a reference to the idea that this camera type might be a bridge between compacts and DSLR's.
Recent improvements in the performance of small sensors and mass production of aspheric lenses have made these cameras more viable than they were previously. I think they could suit many photographers very well. But we can't keep calling them bridge cameras because they are not really a bridge from somewhere to somewhere else. If well executed one of these cameras could be all many photographers ever need.  So we need a meaningful name for them.  "All in one" sounds like some kind of kitchen appliance.
After some doodling on the back of an envelope I came up with HPZ,  High Performance Zoom.  I think this encapsulates some of the characteristics of the type.
Sensor Sizes  Once upon a time, way back in the good old days we had film sizes. There was 4x5 inch large format, various kinds of medium format and the ubiquitous 35millimeter double sprocket size which was actually based on  movie film. There was a bit of confusion with medium format film sizes and there were some "Half Frame" sizes on 35mm film but I think most camera users understood their film sizes pretty well.
Fast forward to the early part of the 21st Century and we now have a profusion of sensor sizes.  Various naming attempts have arisen in haphazard fashion. Some are named for the cathode ray tube diameter which in 1950 might have been needed to deliver that particular size of light sensitive device. I could hardly think of a less relevant way of naming sensor size 60 years later but that is the basis of the Nikon 1 and Four Thirds/Micro Four Thirds sensor size names  The 24x36mm size which used to be known as "Miniature" is now called "Full Frame".
Fortunately there is a simple, useful and consistent way to describe sensor sizes. That is by measuring and quoting the diagonal of the sensor. Easy. The table below gives the most common ones.


Type

Aspect Ratio

Dimensions in mm Exact dimensions may vary

Diagonal in mm

Area in

squ  mm

Traditional 35mm

3:2

24x36

43

864

APS-C Nikon, Sony etc

3:2

15.6x23.5

28

367

APS-C Canon

3:2

14.9x22.3

27

332

Four Thirds/Micro Four Thirds

4:3

13x17.3

21.5

225

One inch, Nikon 1, Sony 1"

3:2

8.8x13.2

15.9

116

2/3inch, Fuji X10/20

4:3

6.6x8.8

11

58

1/1.7 inch, many compacts

4:3

varies but about 5.6x7.5

9.35

42

1/2inch, some Fuji cameras

4:3

4.8x6.4

8

30

1/2.3 inch, many small compacts, superzooms

4:3

varies but about 4.6x6.1

7.72

28.5


Lens Angles of View  Once upon a time, when lots of photographers used 35mm cameras there was widespread understanding that a "28mm" lens was a wide angle lens and a "24mm lens" was even wider. A 600mm was a real super telephoto. Today very few people learn photography (if they ever learn it) on a camera with a sensor measuring 24x36mm. Most cameras have a  much smaller sensor.  But camera makers and reviewers persist in referring to the angle of view of the lens in terms of focal lengths which would give the same angle of view on a camera with 24x36mm sensor.  In fact some even inscribe "Equivalent" focal lengths on the data panel of compact camera lenses.     This is totally irrational and confusing to absolutely everybody.
Thankfully, as with sensor sizes there is a simple and  robust solution to this problem. In fact it is so simple I am at a loss to understand why it has not already been widely adopted.
The answer is to quote the diagonal angle of view of the lens and in the case of zooms the maximum and minimum diagonal angles of view.  You can see some of these in the table below.
In this table I have given some focal length equivalents for 43mm and 21.5mm sensors.


Focal length for 43mm sensor (so called full frame)

Diagonal Angle of View

Focal Length for 21.5 mm sensor (4/3 and m4/3)

Description of angle of view

14

114

7

Ultra wide

24

84

12

Wide

28

75

14

Wide

35

65

17.5

Moderately wide/wide standard

40

57

20

Standard

50

47

25

Standard

70

34

35

Portrait

150

16

75

Short telephoto

200

12

100

Moderate telephoto

300

8.2

150

Medium long telephoto

400

6.0

200

Long telephoto

600

4.1

300

Super telephoto


If this convention was promoted by photo websites,  publications and manufacturers I think it would  be accepted readily. I think camera users will easily be able to visualise an angle of view stated numerically together with a one or two word verbal description of the angle of view.


The Camera in a Smartphone World Part 4

$
0
0

Lighting the way ?
 
Part 4  Handles and thumb supports
Why does a camera need a handle ?   For many years through the 20th Century most cameras did not have a handle.  35mm film SLR's had, by today's standards, few control modules. As a result there was plenty of camera surface on which one's fingers and thumb could get a decent grip.  But cameras became larger, heavier and more complex with many more control modules.
Canon's T90 of 1986 weighed 800grams bare, had an LCD on the top plate, 5 buttons on the back and several more on top, and a control dial.  How could the operator get a hold on this thing ?
It needed a handle and it got one, thus setting the basic shape for SLR and DSLR cameras to the present day.
Thumb support   In the digital era cameras have acquired a great big monitor screen covering most of the rear of the body.  Those parts of the camera back not occupied by the monitor are filled up with buttons, dials and other user interface modules.
Now there is even less camera real estate on which the user might gain purchase. The electronic camera needs a thumb support as well as a handle, if it is to be held securely.
Relaxed half closed hand position  Adult human hands vary in size and length:width ratio but they all work the same way. The photo shows the position into which the right hand falls naturally when the wrist is slightly dorsiflexed, as is usually the case when holding a camera. This is the "ready for action" position. The muscles are relaxed. The hand and fingers are in position to grip something with minimal effort. Those with small hands can open the grip a little, those with large hands can close the grip a little. Both can comfortably hold the same  anatomically shaped camera handle.


Optimum camera handle and thumb support design shapes the device to match this natural hand position.
Right hand in half closed natural position.


Panasonic G5 camera
 
 
Holding the G5 camera. The right hand is able to adopt a position very close to the natural half closed one. This provides a good grip on the camera without strain. The fingers are in position to operate the controls.
 
Cramped hand position  Many cameras require the user to take up this position with the right hand. The thumb support is at the extreme right side of the rear of the body. The thin handle is likewise as far to the right as possible. The shutter button is not far enough from the right side forcing the index finger to lift back and flex.  This hand position is not a disaster, it is just uncomfortable, ergonomically sub optimal and also unnecessary.
 
Cramped hand position
 
 
Olympus EM5 camera. This is the same size as the G5 but it's design makes it more difficult to hold comfortably.
 
 
Rough mockup of a "no handle" camera. You can see where the fingers want to place themselves.
 
 
The EM5 again. This camera lacks a proper handle on the front. It just has a small ridge running down below the shutter button.  If I try to get comfortable holding the EM5  my fingers end up as shown. The thumb is all over the monitor and the index finger is 15mm beyond the shutter button.
 
 
Holding the EM5 so it works. This is the cramped hand position. It is difficult to feel confident that one has a good grip on the camera with the fingers forced into this position. There are other ergonomic problems with this camera. The buttons just in front of the thumb are difficult to press and the control dial just to the left of the index finger cannot be operated comfortably by either the thumb or index finger.
 
 
The EM5 allows an accessory handle to be fitted, shown here. This is an improvement. The palm is opened up, the index finger is in a more natural position and the fingers have something substantial to grip. But the thumb is still rather cramped over on the right side of the body. Now there are two shutter buttons and three control dials cluttering up valuable top of camera real estate.
 
 
Panasonic G3, right hand hold. Like the EM5, this camera has only a mini handle on the front. In addition it's thumb support is small  and located to the far right. To make matters worse, the control dial, which is just under the thumb as shown, is really difficult to operate. The is one of the ergonomically least satisfactory cameras I have ever owned.   I sold it on pretty quick. You can see the un-natural hand/wrist position which the user has to adopt to hold this camera.
 
 
Good handle and thumb support design  costs no more than sub optimal design. Good design makes a camera more enjoyable to use and therefor more likely to be used. In the smartphone era, camera designers cannot afford to inflict poor ergonomic design on their customers, who have the option of dumping the camera altogether.


The Camera in a Smartphone World Part 5

$
0
0

To make this photo I turned 90 degrees away from the diners with the camera over my head, viewing on the fully articulated monitor.
 
Part 5, Viewing, Operating, Ergonomics
Camera vs Smartphone  The underlying theme of this 5 part series of posts is my view that the experience of using a camera needs  to be decisively different from  not similar to  that of using a smartphone. The camera needs to be more engaging so that the process of making photos is an integral part of the day's activity, not just an afterthought.
Viewing  The three primary elements of camera use are holding, viewing and operating. The smartphone user views on a  monitor screen. If the camera is to bring something more to the experience it must have an eye level viewfinder.  This makes the process of picture taking more engaging for the user who has to shut out distractions and for a short time, concentrate entirely on making the picture.  DSLR's have an optical viewfinder, Mirrorless interchangeable lens cameras have an electronic viewfinder. Both work and  either is better than no viewfinder.
But a proper camera also has a monitor for those times when the user wants to interact with other people while making photos.  There are three types of monitor;  fixed, swing up/down and fully articulated. Having used all three over the years I can assert with some confidence that the fully articulated type is the most versatile. It enables viewing with the camera held above or below eye level, in either landscape or portrait orientation. It also enables otherwise impossible angular relationships between the operator and the camera. You can look in one direction and have the camera pointing in a different direction.
Operating  There has been a buzz of interest on user forums recently about new cameras which feature some kind of hybrid/traditional user interface using marked, set and seedials, rings or levers to indicate the primary exposure parameters: ISO, shutter speed, aperture. Several also display exposure compensation on a marked dial.
The two latest are the Nikon Df and Fuji X-T1. The Nikon is a DSLR and the Fuji an SLR look-a-like MILC. 
My time and motion ergonomic studies indicate that the modern "Mode Dial Plus Control Dial(s)" user interface is faster and more efficient. For most actions required to operate the camera the modern interface requires less actions, each less complex than those required using a hybrid/traditional interface.
I suspect that in due course most users will tire of the sub optimal ergonomics of these  retro style cameras and revert to the more efficient modern user interface.
Ergonomics  Many smart phones have an excellent user interface and very good ergonomics. They enable the user to carry out many actions quickly and efficiently. Camera designers need to equip their products with excellent ergonomics also. But the user interface of a proper camera is completely different from that of a smartphone.
Many designers appear to be on a mission to make their camera work like a smartphone, with touch screens and Wi-Fi featuring prominently. The latest Samsung Galaxy cameras take this notion to it's logical extreme featuring a large tablet style screen on the back and a superzoom lens on the front with a little handle and a shutter button to one side. It will be interesting to see how this travels in the marketplace. If I am right it will not succeed in the long run, because in trying to be both,  it offers neither the elegance of the smartphone nor the engagement of the camera.
I believe the whole enterprise of making cameras like smartphones is doomed to irrelevance. The camera needs to be different from a smartphone and provide a completely different kind of user experience.
What do I use ?  I practice that which I preach. I select and continue to use cameras with good ergonomics, good performance and sufficient picture quality for my varied purposes, which can be quite demanding. Currently my system of choice is  Micro Four Thirds.  It offers the best balance between picture quality and overall kit size/weight, taking lenses into account, particularly long zooms. I use a  Panasonic GH3 which is a no nonsense kind of camera. It is comfortable to hold and provides a streamlined, efficient operating experience.

Panasonic 14-140mm Mk2 lens Shutter Shock Test

$
0
0

Using Panasonic GH3 and G6


This is becoming really boring but........The problem persists and until  camera makers incorporate a complete fix into their products  the topic will stay on the agenda in this blog and on user forums.  Lots of camera/lens combinations including the latest MILC wunderkamera  the Sony A7R (at least with some lenses), have been reported to suffer from the problem.
How to test for Shutter Shock 
1. Affix chosen camera with lens to a sturdy tripod.  Activate the shutter with timer delay or remote triggering. You need to eliminate camera shake as a cause of any potential unsharpness.
2. Switch off any image stabiliser system, OIS or IBIS. You don't want any potential trouble from this source contaminating the results and in any event OIS/IBIS should be off when the camera is tripod mounted.
3. Choose a target and field of view which will show any unsharpness and/or double imaging. I use the newsprint of classified ads in a newspaper. The fine print readily shows any problems. Note I have seen all kinds of supposed "tests" for shutter shock reported on user forums using inappropriate targets which would not be sensitive to small amounts of system vibration.
4. Set the camera to Shutter Priority and Auto ISO.
5. Either set focus manually or AF exactly the same way for each shot.
6. Make exposures at 1/3 EV steps from about 1/4 second to 1/400 second.
7. Look at the results at 100% on screen.
Mechanical shutter. 1/160 sec.  Blurring evident with a touch of double imaging.
The Panasonic 14-140mm f3.5-5.6 (Mk2)  This is a compact, versatile travel zoom lens which has received very favourable review on this blog and elsewhere. SLR Gear (slrgear.com) in their test of the 14-140mm reported unsharpness which they attributed to shutter shock at shutter speeds of 1/40-1/50 second with the GX1 and GX7 using the mechanical shutter. The GM1 which uses electronic first curtain did not exhibit the problem. The GX7 gave no problems when the E-Shutter was used.
E-Shutter. 1/160 sec. Everything is sharp.

 
My results with the GH3 and G6  Both cameras gave the same result.
E-Shutter:
There was no problem at all at any shutter speed if the E-Shutter was used. All frames were sharp.
Mechanical shutter:
Shutter speeds 1/4 to 1/13 sec: no blurring.
Shutter speeds 1/15-1/40 sec:  slight blurring.
Shutter speeds  1/40-1/160 more noticeable blurring with double imaging between 1/100-1/160 sec.
Shutter speeds 1/200-1/250 sec: very slight blurring.
Shutter speeds 1/320 and faster: no problem.
So, yes, Shutter shock does occur with the new 14-140mm lens on Panasonic GH3 and G6 cameras.


How to prevent shutter shock 
With a Panasonic camera which enables E-Shutter, set this ON and shutter shock goes away.  For sport/action/rapidly moving subjects set Shutter Priority on the Mode dial and a shutter speed of 1/400 sec or faster.
The Panasonic GM1 is reported not to have the problem due to it using electronic first curtain even with the mechanical shutter.
With Olympus cameras, test first to see if the problem is present with your chosen camera/lens combination. If it is, try setting Anti Shock to 1/8 second.  

Panasonic Pancake Primes

$
0
0

14mm on the left, 20mm on the right
 
14mm f2.5 (H-H014)  and 20mm f1.7 (H-H020AK)


Single focal length lenses in the age of zooms   For many years in the second half of the 20th Century I used nothing but fixed focal length lenses. There was no such thing as a consumer grade zoom. These days the quality of zooms is such that I use them almost exclusively.
Why use fixed focal length lenses ?  It seems to me that these need to bring something desirable to the user experience.  It might be smaller size, wider maximum aperture, better optical performance, some special feature not available in a zoom or lower price.
Why pancakes ?  Clearly these are designed to be as small as possible thereby making for a very compact kit. There is ongoing  marketing and consumer interest in the possibility of the M43 system delivering high image quality in a very small package. Witness the recent arrival of the Lumix GM1, for instance.
Both the 20mm f1.7 and the 14mm f2.5 have been available since the early days of the M43 system.
I had the opportunity to purchase both lenses at an attractive price. I bought the Mk2 version of the 20mm. This is said by Panasonic to have the same optical construction as the original but with improved coatings for decreased flare and better contrast.
20mm
 
Initial impressions  Both lenses are very small, the 14mm remarkably so. They take up very little space in a camera bag and add  little to the effective dimensions of any camera body onto which they may be mounted.
Physical  The two lenses share styling cues. Both have a smooth turning manual focus ring which actuates a focussing motor. The 20mm focusses by moving the entire inner barrel including filter, back and forth. I was unable to determine whether the rear element is fixed or whether it moves with focussing. These lenses park themselves at infinity focus when powered down and there is no way to operate  manual focus with the lens off camera.
The 14mm focusses internally, there being no movement of the front element or filter with focus.
As a consequence the 14mm focusses very fast,  providing AF speed equal to the 12-35mm zoom.  The 20mm is noticeably slower to focus. In use with general photography this is not an issue.  However if you wanted to photograph, say, small children playing, the 20mm might not quite keep up.
There are no other controls on the lenses. Neither has OIS.  Each uses a 46mm screw on filter.

20mm


Optical   I tested both lenses alongside the Lumix 12-35mm f2.8 zoom for comparison. I photographed a test chart and also made many general photographic pictures.
14mm f2.5  This lens was not quite up to the standard of the 12-35mm at 14mm. It was not as sharp at the edges or corners, exhibited noticeable barrel distortion, obvious corner shading and chromatic aberration.  Stopping down improved edge/corner performance a bit but it never cleaned up completely. There was slight decentering on my copy, evident as slightly greater softness on one side than the other. Resistance to flare was quite good.
20mm f1.7  This lens turned in a better optical performance. Even at f1.7 sharpness was very good with mild softness evident in the corners. By f4 the lens was very sharp right into the corners. There was mild barrel distortion and clearly evident corner shading at f1.7.  Flare resistance was good.  I rated this lens as equal to the 12-35mm (at 20mm ) at f2.8 and smaller apertures. The advantage of the 20mm is that it is 1.5 stops faster  wide open and the lens is entirely usable at f1.7.

14mm


Usefulness  Many photographers find that a  diagonal angle of view of about 55-65 degrees suits their requirements for general walk around photography. With a DAV of 57 degrees the 20mm is more or less in the middle of that range. If I had to use just one single focal length lens for every shot, I would select the 20mm.
The 14mm focal length is a bit more problematic. As  a wide angle complement to the 20mm I would prefer a 12mm. The problem for the 14mm f2.5 is that it is not really wide enough for some  purposes and the aperture is not much greater than most kit zooms at 14mm.

14mm


Summary  The 20mm f1.7 is one of the most popular single focal length Panasonic lenses and deservedly so. It has a convincingly wide maximum aperture, good optical performance from wide open and  a  useful focal length. One downside of this lens is that banding in pictures can occur with high ISO settings on some cameras. Unfortunately the banding problem persists with the Mk2 version. I have no idea why banding might occur but the problem has been reported often on user forums.
The 14mm is less popular,  also deservedly so. It's optical performance is no better than the wide end of a kit zoom and it's maximum aperture is not greatly larger than one of those zooms. It is also in many situations not really wide enough to complement the 20mm as part of a compact 2 lens kit.
If one were wanting to build a kit based on fixed focal length lenses I would think the 20mm would be an easy first choice for the standard, general purpose lens.  For a wide angle complement I would look at the Olympus 12mm f2. The only problem for this lens is it's price, which is much higher than the Lumix 14mm f2.5 and not much less than the Panasonic 12-35mm f2.8 or Olympus 12-40mm f2.8 zooms.


Sigma dp2 Quattro Ergonomic Study

$
0
0

Finger on shutter button. Least uncomfortable basic hold position
 
Using a mockup


Fake, joke or real ?  When rumors and first pictures of this highly unusual looking camera started to appear on the web, some  commentators opined that they thought it was a joke or fake. Others said they hoped it was a fake because it looked so strange and how was anyone with human hands and fingers supposed to hold the thing anyway ?
It's real   Soon enough, the dp2Q was revealed at the CP+ show to be indeed real.  There were plenty of photographs of the device from all angles but no pictures of any one actually holding it.
A "Hands On" published by DPReview (dpreview.com) on 13 February 2014 was actually a "Hands beneath", as if the thing were too hot to hold.  
My enquiring mind  I want to know how stuff works, or indeed if it works at all. So I was intrigued by the dp2Q the shape which was nothing like any thing I had seen in 60 years of using cameras.
The mockup  The basic method which I use to investigate camera ergonomics is to make mockups. So, using the published specifications and photographs, I made one of the dp2Q.  It is built up from some plywood offcuts I had sitting about in the garage. The finish is a bit rough but the dimensions and button/dial locations are correct if the published dimensional specifications are correct.  
The purpose of this was to discover how one might hold and operate such an unlikely looking device. 
Analysis  My investigations and comment are entirely about holding and, to the extent permitted by a non functioning mockup, operating the device as a hand held camera.
There is much discussion in forums about technical aspects of the sensor, lens, etc. I have nothing useful to contribute to this line of discourse.
Questions  I can't help wondering however why the thing is so wide. There must surely be some compelling reason because the extreme width makes the shape difficult  to fit in most camera bags/pouches intended for a single camera. Maybe the  width enhances heat dissipation, or reduces electronic cross talk or something like that.
I also wondered why the lens module has such a large diameter when the glass inside it is so much smaller. Presumably answers to these questions will be forthcoming in due course.
Then I wondered why the handle has been given such an unusual shape and configuration. I wanted to know if it would represent an ergonomic triumph, abject failure or just an eccentric mediocrity.
Hands on  At first I had no idea how the designers intended the hands and fingers should be positioned so as to best hold and operate the camera. So there was quite a bit of experimentation until I settled on the positions you see in the photographs.
Comments on holding  I was unable to find any comfortable, secure hold position with the right hand. The photographs show what I found to be the least uncomfortable hand/finger positions. The left hand was an easier proposition with the thumb and index finger falling naturally onto the top and bottom plates of the body.
In general the right hand grip was weak, bordering on precarious, with no proper forward projecting handle on which the fingers might gain purchase. Use of the rear dial and AF button in particular, require the camera to be held securely by the left hand.
In use the camera would be a two handed proposition with little opportunity for safe one handed use.


Photos 
The header photo shows my average adult male hands holding the camera in the least uncomfortable position which I could find. It's not a particularly enjoyable experience. The third and fourth fingers of the right hand have to wrap around a sharpish corner on the front of the handle. No part of the handle fits the shape of my hand. I have my thumb tucked under the funny little protrusion topped by a button labelled "focus". This provides a reasonably secure hold and enables the right index finger to operate the shutter button and the dial around the shutter button.  Note however that my thumb is almost touching one of the red buttons (of course they are not red in the real camera) which appear to be at high risk of accidental activation.

Now my thumb has moved up to press the "Focus" button. I don't know if this activates AF or a Focus/Autofocus Mode. This is a bit precarious. There is now nothing into which any of the fingers of the right hand can hook to prevent the camera from falling. Some purchase is gained by squeezing the third and fourth fingers of the right hand, thereby pressing the handle into the palm. But the main camera support has to come from the left hand.
The pad around the focus button is a 4 way cursor/controller.  When operating this I need to remove my finger from the shutter button which leaves no part of the right hand actually holding the camera. It is possible to hook the little finger of the right hand under the handle at this time to give some support to the right side of the unit.


Now the thumb is raised further to engage with the rear dial. You can also see that my index finger is obstructing the thumb from rotating the dial to the right. Most times when I tried this it was easier to lift the index finger off the shutter button to give the thumb free movement.  This leaves nothing much holding the camera in the right hand. There is a bit of purchase gained by squeezing the third and fourth fingers in towards the palm.
 
 
To the left, as viewed by the user, of the shutter button is a button labelled "Mode". Presumably one changes Shooting Mode by pressing this button then rotating a dial, with or without holding down the Mode button. Either way, this operation is very awkward, requiring the right hand to completely release it's (somewhat tenuous) hold on the handle in order to reach over to the Mode button. In the meantime my thumb appears to be  accidentally hitting one of those red buttons again.
If I want to press a red button I will again have to completely release the right hand or maintain grip with the right hand and use the left hand to reach the red buttons.

 
Conclusion  So, is the dp2Q an ergonomic triumph, abject failure or eccentric mediocrity ?


I suppose one could say it is a triumph of sorts:  of  modernist angular design over human functional anatomy. Or  some designer's vision over ergonomic reality. But that is probably not the kind of triumph the designers were hoping for.
It's not a complete disaster either, in the sense that a practiced user should be able to operate the device without too many major dramas. And it will only fall to the ground if one forgets to hold on with the left hand or fails to keep some kind of neck strap in place all the time.
So, it's an eccentric mediocrity. The handle in particular feels like something which is different for the sake of difference.
Shame really, they could easily have done it so much better.

Nikon P7800 Large/Advanced Compact User Report

$
0
0

Casual snap, hand held, made on a morning walk
 
I bought a P7800  to discover whether it would serve as a substitute for my Micro Four Thirds kit at those times when I did not care to have a MILC and three or four lenses with me.
P7800 Rear
What is it ?    The P7800 is the descendant of a line of  cameras starting with the P5000 of 2007, followed by the P7000, P7100, P7700 and now P7800.  Various items, such as a viewfinder, have been deleted then returned. Over time the line has grown in size, acquired a faster lens, EVF, articulated monitor and more control modules (buttons, dials, switches etc.).
P7800 Front


Feature set  On paper the P7800 has a more appealing feature set than most of  it's competitors in the compact-in-name-but-not-in-size category. In particular it has most of the features which together make up what I call the Proper Camera.     These are
For Holding:  A substantial, anatomical handle of good ergonomic design and a well designed thumb support.  The P7800 has a handle but it is small and not optimally shaped.
For Viewing: A  built in EVF and a fully articulated monitor. The P7800 has an EVF but unfortunately it is not a top quality unit.  The monitor is very nice.
For Operating:  A full set of controls to enable primary and secondary exposure and focussing parameters to be adjusted with the eye to the viewfinder and without having to change grip with either hand.   The P7800 does allow the user to achieve most of this.


Picture Quality 
The lens  is one of the P7800's best features. I tested it against my 12-35mm f2.8 and 35-100mm f2.8 micro four thirds lenses in a GH3 body. The pro grade M43 lenses out resolved the P7800 by a very small margin which was only evident on a test chart. The P7800 lens delivered excellent clarity and sharpness across almost the whole range of focal lengths and apertures. Vibration Reduction appears to work very well, allowing sharp photos down to 1/30 second at the long end of the lens, hand held.  A standard, screw in 40.5 mm protective filter can be fitted to the front of the lens. The lens is not self capping, a separate lens cap is provided.
The only weak spots I found were:
* Softness in the corners at the wide end with the aperture wide open. Stopping down from f2 to f4 cleans up the problem, should it be necessary to represent fine detail in the corners.
* A tendency to local flare in bright highlights which can lead to loss of detail in bright picture elements. I found this evident with direct sun falling on white fiberglass boats at a marina.
Noise  There is a bit of noise in shadows even at base ISO setting and of course noise becomes more evident at high ISO settings. But overall it is well controlled giving the appearance of fine grain film in the ISO 400-800 range.  Due to the wide aperture of the lens it is not often necessary to use higher ISO settings in general indoor or outdoor photography.


Colorand tonal gradation   Both RAW and JPG files deliver pleasing color and tonal gradation even at ISO 1600.  I did notice there is no option for Adobe RGB, only sRGB. Despite this the pictures looked good to me.
RAW vs JPG   JPG's  look good straight out of the camera however the .NRW  RAW files provide opportunity to recover more highlight and shadow detail.  The .NRW files are surprisingly large, averaging around 25.75 Mb.  This may be a factor in the camera's slow shot to shot performance.
Overall   picture quality is  pleasing.  There is a mild tendency for highlights to blow out, possibly related to the lens flare problem referred to above and possibly to the small (9.3mm diagonal) sensor used by this camera. But for the most part I found very little about which to complain.
Performance  
This is the P7800's most obvious shortcoming. Previous models in the series were criticised by reviewers for their slow operation. Unfortunately this has not improved much in the current model.  The main problem is shot to shot times. Using RAW capture, SanDisk 95 Mb/sec card, AF and AE on each shot, single AF single shot,  I was able to make one exposure every 3.4 seconds.  With RAW+JPG capture the rate was one shot every 3.5 seconds.
Autofocus acquisition is decently prompt although not in the same league as the latest Micro Four Thirds cameras.  AF accuracy is good with very few incorrectly focussed frames. If the camera cannot focus, which is fairly frequently the case in low light, it will put up the flashing red focus brackets, prompting the user to find a brighter or more contrasty subject element on which to focus.
Position of the active AF area can be moved quickly and easily although I did not find any means to recenter the AF area in one action. AF area size is not adjustable.
Ergonomics
Holding    The good news is that the P7800 has a handle, a thumb support, front and rear dials. The not so good news is that the relationship between my right hand and fingers, the shutter button, the front dial and the handle never feels quite right no matter which way I hold the camera. The photos illustrate this.
This is the most comfortable holding/operating position for me. But the front control dial is covered by my middle finger and inaccessible.
In this position the front control dial is now accessible for operation by the index finger. But I find that gap between the index and third fingers an uncomfortable stretch. Younger and more flexible people might not be troubled by this but even so,  the position is not an anatomically natural one.  In use, I find myself forever switching back and forth from one grip position to the other if I want to use the front dial.  

Viewing    The good news is that the P7800 has both a built in EVF and a fully articulated monitor. Thank you Nikon. The monitor is of very good quality and is large. Actually it might be a bit too large for the rest of the camera, pushing the thumb support and user interface modules into a small space on the right side.
The not so good  news is that the EVF is adequate as a framing device but does not provide a particularly enjoyable viewing experience.  It presents a slightly washed out, desaturated  appearance, with a tendency to lose highlight detail.
Unfortunately the EVF is not adjustable in any way. (The eyepiece diopter is adjustable). The monitor is adjustable for brightness but I found it just fine at default level.
The monitor and EVF have the same presentation style, with camera data superimposed over the image preview.  Shutter speed and aperture  are displayed in a black rectangle near the bottom of the frame. The good thing about this is you can see the status of those  essential parameters with any kind of subject being previewed. The bad news is you can't see the section of the subject overlaid by the data display.         Icons for other data types are distributed around the frame. All these except the shutter speed,  aperture, AF rectangle and composition grid  disappear with a half press of the shutter button,  thank you Nikon.
This is probably the best implementation of a monitor style (superimposed) type of display which I have seen. However I still prefer the viewfinder style display, with camera data allocated to a strip beneath the image preview on both monitor and EVF.  With some cameras you get to choose. Not this one.
Some reviewers have complained about the absence of a proximity sensor for automatic monitor/EVF switching. In use I did not find this to be a problem at all. If the monitor is turned in, view will automatically switch to the EVF. If the monitor is turned out it automatically switches on. This is in harmony with the way I use a camera with fully articulated monitor and EVF so I found this arrangement quite satisfactory.
Operating    
Setup Phase  Menus are well designed and displayed, easy to navigate and comprehend. There are enough choices to keep enthusiasts happy without overwhelming novices.  A  My Menu   page with user selectable content and menu resume is available via the Q Menu button.  This is well implemented.
Prepare Phase  The camera is well configured to select main shooting mode, drive mode, focus mode and autofocus mode.  The Q Menu gives ready access to several shooting parameters. The Fn1 button can be three way, user selectable,  multi tasked  by pressing the button then rotating one or other dial, or pressing the shutter button. This is a clever way to finesse multiple functions from one button.   On screen/EVF  prompts remind the user which action will occur.  With practice all the actions usually required in this phase are readily accomplished.
Capture Phase  Aperture and shutter speed are easily adjusted with the eye to the viewfinder. ISO requires a trip to the Q Menu. With some practice this can be achieved while looking through the viewfinder but I suspect most users will lower the camera so they can see the button. Implementation of ISO adjust is good with easy switching from auto ISO to a specific setting.  A minimum shutter speed can be set for auto ISO but the camera will over ride this if light levels are too low. Unfortunately the actual ISO setting chosen by the camera is not displayed in auto ISO. 
Exposure compensation is directly accessed on a top dial. Warning of any compensation is displayed in the EVF or monitor which also gain up or down to provide a live preview of the effect.
You can initiate back button AF with the AE-L/AF-L button,  similar to a DSLR or high end MILC.
Position of the active AF area is easily changed using the OK button and 4 way keys.
AF/MF switch is readily made and MF is useful, with an analogue distance display. There is also an option to combine AF + MF. This is a bit fiddly involving several button presses but one is not usually in a hurry when using MF.
Review Phase  All the usual review functions operate efficiently, with no problems. One minor quibble: I could not find any way to jump from one image zoomed in to the next one at the same zoom level.
Overall  The practiced user is able to operate the camera efficiently in all phases of use.
Summary  The Nikon P7800 is a well specified, well featured small camera with a good lens, versatile zoom range and good picture quality, let down by slow performance, a disappointing EVF  and some unnecessary ergonomic limitations.
The camera is suitable for a leisurely style of photography such as scenes and groups of people in reasonably static settings. It would be suitable for portrait work with a cooperative  subject.
But for children at play or other situations requiring rapid response to subjects moving I think the P7800 might prove frustrating.
It may or may not find a long term place in my camera drawer, I will keep and use it for a time then decide.  


Does the Advanced Compact have a future ?

$
0
0


This photo was made possible by Photoshop Camera Raw. The original image could have come from any one of many cameras. It was in fact a M43 camera with wide angle lens.
 
Is "Large Compact" an oxymoron ?
The Best or Worst of both worlds ?


Background  The advanced compact camera has a history. The genre was popularised by Canon's G series dating from around 2000.  The 3 Mpx G1 weighed a substantial 490 grams and measured 120x77x66mm in size. It was compact when compared with a DSLR. 
Currently there are several cameras which could be described  as  "Large/advanced/enthusiast compact".
These include the Canon G16, Nikon P7800 and  Fuji X20. Smaller versions of the theme might include the Panasonic LX7 and Olympus XZ 10. The Canon G1X is larger but still marketed as a compact.
The march of technology- the little ones  Within the shrinking world of compact cameras the Sony RX100 of 2012 redefined our expectations of the genre, fitting a large, high performing sensor into a genuinely small and for many users, pocketable, housing.  This camera made all other small compacts look distinctly second rate.  I suspect only it's high price saved the opposition from a market wipeout.
The march of technology- the larger ones   Over the last five years or so, interchangeable lens cameras and their lenses have shrunken remarkably. There are now several mirrorless interchangeable lens cameras (MILC)  which are almost as small as the RX100 and are smaller than most of the large/advanced compacts.
Where do these developments leave the advanced compact ?   Squeezed from above and below, I would say.  I imagine the manufacturers are trying to find a size/features/capability formula which will give the user the best features of the little ones and the larger ones.  But my recent experience has me thinking the advanced compact has become unconvincing as a compact (too large) or as an all purpose camera (lack of features, capability and performance).
In the center, Nikon P7800. On the left is my mockup of an "ideal" small compact just 2mm larger than the RX100(II). On the right my mockup of the direction in which I believe the advanced compact could go. This is the same width and height as the P7800. Depth would depend on the lens fitted. It fits in a small camera bag yet has much better handling qualities and would be more enjoyable to use than the P7800. It feels like a proper camera in the hand, whereas the P7800 never feels quite right to me no matter which way I hold it. 
 
My experienceWhen my main camera was a DSLR with 3-4 lenses,  it seemed natural to have an advanced compact for those quite frequent times when I did not want to lug the heavy kit around.  I owned several Canon G cams the inclusion of which in my camera drawer made perfect sense to me.
I recently bought, used and have reviewed on this blog a Canon G16 and a Nikon P7800.  Both have been disappointing. Not because there is anything terminally awful about either but because the genre no longer makes sense to me as it once did.
The RX100 is smaller than the G16 but has a better sensor and picture quality at high ISO settings. My Panasonic G6 with kit zoom lens is only slightly larger than the Nikon P7800 but provides better picture quality, performance and ergonomics. The Panasonic GM1 is incredibly small at the cost of loss of the EVF, handle and ergonomic capabilities.
The bag or pocket decision  If the requirement is for a "pocketable" camera then the package must be very small. Small enough to actually fit in a pocket or lady's purse, for instance.   Some users might deem their advanced compact "pocketable" and for those with very large pockets that might be feasible. I live in Sydney where it is usually fine and sunny so hardly anybody needs to wear a coat or jacket even in the slightly cooler time we call winter.  So many people lack any kind of garment with a pocket large enough to accept an advanced compact.  Therefore it is carried in a camera pouch or small bag slung over the shoulder. 
Now here is the thing.  Once one has decided the camera needs to travel  in a bag of some kind, there is very little impediment to getting a slightly larger bag and  filling  it with a larger and more capable camera.
Is there a way forward ?  It seems to me the advanced compacts are increasingly looking like half baked products, unconvincing in any role. Witness the Canon G1X for example. My family acquired one of these soon after it was released. Canon touted it as a high end product for the discriminating user. It was very disappointing.  Performance was slow in every respect, the optical viewfinder was the same small inaccurate one found in generations of previous G cams, highlight clipping was common and the ergonomics were just barely acceptable. For all this the camera was neither small nor light.  Now the updated model the G1X (II) has lost the viewfinder altogether, lost the articulated monitor and has reduced the size of the handle and control panel on the right side of the body. They want you to pay extra for an EVF and an accessory handle. You could buy a DSLR or MILC with lens for that money and find it only slightly larger in the camera bag. Yes the G1X (II) appears to have a nice lens but that alone does not make a camera desirable.
I would like to see the advanced compacts go one way or the other. Either down in size to match or even improve on the RX100.  Or up in size to gain a full suite of features,  capabilities and ergonomics.  If Canon put the lens (assuming it is a really good one) from the G1X (II) into a fully featured body with proper handle, EVF, good ergonomics and performance, they might end up with a really desirable camera which the enthusiast would enjoy using.
Olympus appears to have gone in this direction with it's Stylus 1 model.  This has a 10.7x, constant f2.8 zoom, nice EVF, and good performance. It could benefit from a more prominent handle but otherwise has a set of specifications and features suitable for an expert/enthusiast, all purpose camera.


Fuji X-T1, A Contrarian Ergonomic View

$
0
0

Appearances can be deceptive. This is the strangest and ugliest ship I have ever seen but apparently it performs its designated tasks very well. The Fuji X-T1 scores highly on appearance but may not be so wonderful in action.
 
If the Fuji X-T1 is the answer, what was the question ?


X-T1, the latest darling of camera reviewers   Since it's announcement at the end of January 2014, camera reviewers have been fulsome in their praise for Fuji's latest interpretation of the traditional/modern hybrid mirrorless interchangeable lens camera. Several early reviews including those from Tech Radar, Pocket Lint, E Photozine and Photography Blog,  gave it 5/5 stars,  a level of support you don't often see. Several of the reviewers wrote that they were very excited to be testing this camera. The X-T1 has generated a level of emotional response not usually seen in journalists whose daily grind is to review stuff.
The Sceptic     I am a sceptic by nature and a grumpy old man as well.  My good humour has not been improved recently by recurrent  problems with osteoarthritis. I can and do  manage to find some kind of fault or imperfection with every camera which passes through my hands.  I am, by the way, completely independent and ecumenical in my criticisms. No make or brand is favoured and none escapes unscathed by critique.  Nobody  gives me product to test.
Notwithstanding  my  disposition to grumpiness, I think there are  real issues with the X-T1's ergonomics which deserve some discussion.
The Camera Ergonomics Blog   I started and continue this blog with the purpose of raising consumer awareness about ergonomic issues in the design of cameras. I was moved to do this by my perception that some cameras featured ergonomic realisation so atrocious it defied belief. 
I don't think the X-T1 has atrocious ergonomics, but it is not the cynosure which some reviewers appear to believe.
What's the problem ?  I identify two specific ergonomic issues about the X-T1 which I believe deserve thoughtful consideration.   They both derive from Fuji's attempt to blend traditional and modern user interface features in one device.
1. Shutter button position on top of the camera body, and the ergonomic consequences which flow from this placement.
2. Use of  "set-and-see" dials for  primary and secondary exposure parameters, and the ergonomic and functional consequences which flow from this.
A little background   To illustrate  the concept of a "traditional" user interface I  use the Pentax Spotmatic of 1970 as an example. This is a classic manual control film SLR.  I used one for several years in the 1970's and recently bought another one on E Bay to reacquaint myself with it's delights and  frustrations, of which there are several. Many SLR's of the era had a very similar appearance and control system.
To illustrate the "modern" user interface I have used the Canon EOS 300, one of the earliest cameras with a Mode Dial.
Pentax Spotmatic.  In the 40 years since I used one of these regularly, I had forgotten just how darn awkward and uncomfortable it is to use. With lens it weighs 830 grams so it's no lightweight. I have trouble getting a secure grip on the thing. The strap lug keeps digging into my third finger which keeps accidentally activating the clockwork self timer. Stop down aperture manual exposure metering takes several seconds even with practice. This camera is my nostalgic favourite but I am glad I don't have to use it any more.


The Pentax Spotmatic photo     You can see me holding the Spotmatic in the photo. This is a minimalist control system. You can see all the control modules in the photo. Manual focus is by turning the front ring on the lens. Aperture is set with the rear ring on the lens. You can estimate depth of focus directly on the lens. Shutter speed is adjusted via the set-and-see dial on top of the body.  Film speed is set by lifting and rotating the same dial. This can also function as a simple form of exposure compensation setting.   There were no zoom lenses for consumer cameras in those days. This camera has the two features which I want to discuss in this post, namely shutter button on top of the body and primary exposure parameters on set-and-see dials.
Canon EOS 300


The Canon EOS 300 photo   Canon's SLR's had been sprouting handles of various kinds for several years through the 1970's and 80's. But the T90 of 1984 took the next step. It enlarged and raised the handle, put the shutter button on top of the handle, (not the camera body)   and added a control dial behind the shutter button.  Around year 2000, the Mode Dial appeared.  The EOS 300 in the photo shows the projecting handle, shutter button top front on the handle, control dial behind the shutter button, a raised thumb support and a Mode Dial. These are the main features of  the "modern" control system found in most DSLR's today.   Primary exposure parameters are adjusted with a combination of Mode Dial setting  and control dial movement.  There is zoom but no aperture adjustment on the lens.


The digital era  The Spotmatic and EOS 300 are of course film cameras. Now digital cameras are festooned with a multitude of features, modes and control modules the like of which could not have been imagined in the film era. But these have been added on top of the underlying core functional control layout. Many  modern cameras use the "modern" system but some including the X-T1 use the "traditional" system.
Photo Courtesy of Digital Photography Review  dpreview.com
Fuji X-T1 top view showing ISO, shutter speed and Exposure compensation dials. You can see the small handle.


Consequences of locating the shutter button on top   Several modern electronic cameras have chosen for reasons known only to their designers to locate the shutter button on top of the body. For example the Sony Alpha 7/7R, Canon G16, Nikon P7800, Fuji X-Pro and X-E1/2 and of course the Fuji X-T1.
If you look at the Pentax Spotmatic photo you can see how the fingers of my right hand have to arrange themselves in order to hold this camera.  The right hand has to rotate back so the index finger can get onto the shutter button.  This has consequences:
* A full anatomical handle cannot be fitted or if it were to be fitted would require uncomfortable separation of the right index and third fingers. The Alpha 7/7R does  this.
* There is no clear place where a front control dial might be located.   The A7/7R, G16, P7800 and X-T1 each does have a front control dial fitted and in each case accessibility of the dial is compromised. It is tucked down in front of the top section of the body and obstructed  by  the right third finger when holding the camera ready to shoot. With each of these cameras you have to shift grip with the right hand to get the right index finger onto the dial.  That is suboptimal ergonomics. The only cameras which I have encountered which manage this situation reasonably well are the Olympus Pens and Panasonic GX7.  These use a horizontally mounted control dial located like a collar around the shutter button. That works because you can rotate the dial without having to shift the third finger.
* There is no opportunity to build a right middle finger hookup notch into the handle configuration. The photo of the orange mockup illustrates a design which does provide such a hookup.   The handle shape is designed with a pronounced notch below the shutter button. This has two benefits.  It permits optimum positioning of the shutter button so the right index finger falls on it naturally. And it allows the third finger of the right hand to support the weight of the camera with muscles relaxed, without having to squeeze the body to gain purchase on it.  Who cares ?  In order to operate the X-T1, the user has to remove the left hand completely from support duties beneath the lens in order to access and turn the ISO dial.
Photo courtesy of Digital photography Review dpreview.com
You can see the position of the right hand and fingers required to hold this camera is very similar to that shown in the Pentax Spotmatic photo above and quite different from that shown in the EOS300 photo, the mockup photo or the GH3 photo.
 
 
This mockup represents my realisation of an ergonomically well designed small camera. The right hand adopts a relaxed half closed posture with wide separation between the thumb and index finger but small separation between the index finger and third finger. The third finger fits comfortably in the notch beneath the shutter button to easily support the weight without strain. The front dial located just behind the shutter button is easily reached by the index finger without having to move a muscle of any other finger. 
 
 
Consequences of  allocating primary and secondary exposure parameters to set-and-see dials on the camera top    The X-T1 places set-and-see dials for ISO, shutter speed and exposure +/- on the top plate.  Aperture is adjusted via a ring around the lens barrel. On single focal length lenses the set aperture is displayed on the lens barrel. But with variable aperture zooms the aperture cannot be thus displayed so it goes to the EVF/monitor camera data display instead.     Some reviewers have opined these direct displays to be a wonderful idea because you can see your camera's primary (aperture, shutter speed and ISO) and secondary (exposure compensation) exposure parameters without having to put the camera to the eye.  However in practice, there are several problems with this. I mention just three:
1. You cannot see any set-and-see dials of any kind when you are actually taking photos, with your eye to the viewfinder, in the Capture Phase of use. This is when you most need to see this camera data.    The camera makers helpfully provide you with the same data as a readout in the EVF or monitor.  But if you have the data in the EVF or monitor you don't need the same data on set-and-see dials on top of the camera.  If modern cameras were really simple things like my old Pentax Spotmatic this would not be a problem. But modern electronic cameras have modes.  Focus mode, autofocus mode, drive mode, flash mode, exposure mode, stabiliser mode, etcetera.....etcetera...... the list goes on and on.  It really streamlines camera operation in Prepare Phase (the minutes just before capture) if the most used modes can be brought out of their hiding place in a menu and allocated to set-and see dials. This is the best use which can be made of set-and-see dials.
The opportunity cost of using set-and-see dials for primary exposure parameters is that those same dials cannot be used for more beneficial purposes, especially modes which require setting in Prepare Phase.
2. It is possible, in fact quite easy if you have a systematic approach, to identify and name each of the actions required to operate a modern camera. Furthermore, it is easy enough to conduct a time and motion study of each of these actions.  This study identifies how many movements of the hands and fingers are required for each action and notes the complexity of each movement,  together with observation about any other movements required to make the index movement possible.  For instance you can study [switch from aperture priority AE to shutter priority AE]  or [change shutter speed when in shutter priority AE]  or [change from single AF, single shot drive to continuous AF, continuous drive, 4 fps].  You get the idea.  On a modern camera there could be dozens of  such actions which might be worth studying as the potential number of permutations of the various modes and operational settings runs into the millions.  Every time I run tests  like this comparing cameras with  modern, Mode Dial + Control dial(s) operating system with cameras having traditional, primary exposure parameters on set-and-see dials, I find the modern method uses fewer movements of less complexity to carry out almost all the actions required to operate the camera.
3. There being no mode dial there is no 'Fully Auto" mode for novices. In fact the whole layout looks as though it would frighten off most novices. Fuji may say they are just looking to fill a niche populated by expert/enthusiast users. But in a market environment of steeply falling sales across all categories I think it highly likely that manufacturers need to capture buyers of all expertise levels.
Panasonic GH3
 
Photo Panasonic GH3  This is an unambiguously modern electronic camera which makes no attempt to appeal to the glory days of traditional photography.  Some bloggers and reviewers have criticised it for lacking "soul" or "character" and there was silly me thinking it was just an inanimate device.  This is my all day every day camera which most decidedly does not work like a Pentax Spotmatic and is thankfully not cluttered with redundant user interface modules to slow down it's operation. It has a proper ergonomic handle and uses set-and-see interface modules efficiently.

Summary  Harking backward is not the way forward.  The hybrid traditional user interface might have nostalgic appeal and "character" (whatever that may be) but it is less efficient than a well designed, fully realised modern interface.


What about the answer to my original question: If the X-T1 is the answer what was the question ?  I really have no idea and have no knowlege of the decision making process which goes on in any camera making enterprise. So I must guess and my guess would be something like: "If you can't beat them and can't join them, do something different."  That more or less describes what Fuji is doing and I wish them well. But I think they are on the wrong track.
In due course the market will deliver it's verdict.


Panasonic FZ 200 Superzoom User Review

$
0
0

At full zoom, focal length 108mm. The yacht in the foreground is about 250 meters from the camera. I used a sturdy tripod for this shot.  Several others, but not all of them,  made hand held with careful technique were of the same quality.
Does this camera point to the future ?


Brief history of Panasonic superzooms  I don't know if Panasonic invented the superzoom category but they have certainly persevered with the concept since the FZ1 of 2002. This camera featured a 2 (yes, 2) Mpx sensor, 12x constant f2.8 zoom,  monitor and built in EVF.  It set the basic formula for a succession of models to follow.
The FZ200 with 24x constant f2.8 zoom was announced in 2012 and was followed in 2013 by the FZ70 with more pixels and an extraordinary 60x zoom range.  Having experienced the challenges of getting sharp results at the long end of the 24x zoom I suspect the main benefit of the 60x ultra zoom lies in the marketing.
This review comes at a time which  I assume to be near the end of the model run for the FZ 200 given Panasonic's history of regular updates. It is still worth reviewing however as it is interesting and may be a pointer to the future of cameras in general.
The FZ200 in hand. It's about the size of an entry level DSLR or MILC with zoom lens and provides a similar operating experience.


Why the FZ 200 ?  One of our family members is interested in birds and wanted a camera which might be readily portable, modestly priced and perhaps capable of photographing birds.  Searches of available products led to the FZ 200 which looked promising as a good all rounder. The 24x constant  f2.8 zoom lens looked attractive too.
The march of progress  If this camera had appeared a few years ago it might have been hailed as the 9th wonder of the modern world. It packs a truly remarkable set of specifications, features and capabilities into a compact, modestly priced  unit, easily carried in a small camera bag.
Why superzoom ?  Hands up all those who like changing lenses. No hands ?  Two perhaps ? Maybe there is a little group of camera users out there the members of which actually like changing lenses. But the other 99.9% of us regard changing lenses as a chore and a bore and wish we had a camera with a single zoom lens which covered virtually all possible requirements. Bring on the superzoom.
FZ200 Top Rear view. Looks like a medium level ILC and works like one too.


FZ 200 overview  I don't know if this is the best superzoom camera available as I write but it is certainly one of the leading group. It is about the same size and mass as a Panasonic G6 with kit zoom lens. It comes with a full set of features including built in EVF, fully articulated monitor, proper handle on which you can get a firm grip and a control layout basically the same as that found in a DSLR or MILC.  It is comfortable to hold and operate, responsive and versatile. It delivers decent picture quality in most circumstances.
So, why doesn't everybody rush out and buy one ?  I will come to that shortly.
Specifications  You can read all the details in the manufacturer's published data. I mention just a few.  You can make still photos or video.  You can follow focus on a moving subject. In camera auto HDR and panorama stitching are available. Novices can use the fully automatic [iA] Mode. Experts can use one of the P,A,S,M  Modes.  RAW or JPG (or both)  capture is available. The RAW files are supported by Photoshop Camera Raw 8.3.  There is a built in flash unit and the lens has an optical image stabiliser.


Weather conditions were atrocious for photography with a heavy misty haze over the harbour. But the FZ200 with a little help from Photoshop Camera Raw (PsCR) has cut through the haze quite well and delivered a decent result. 


Picture Quality
Lens  This is the star feature of the FZ 200. It is I believe,  the first 24x zoom with constant f2.8 aperture offered on a consumer camera. It covers a diagonal angle of view from approximately 82 degrees at the wide end to 4.1 degrees at the long end, sufficient, I would think for the great majority of purposes.  Given it's specification the lens is remarkably compact. No manual zoom is available. Motorised zoom can be activated either with the lever on the front of the shutter button or the one on the left side (as viewed by the user) of the lens housing.  A standard screw in 52mm filter can be fitted and a standard removable lens cap is provided.
Optically the lens is very good for a 24x zoom but is not in the same class as any of my Micro Four Thirds system zooms, each of which it must be said offers a much smaller zoom range.  Resolution and contrast in the center of the field are good at the wide end and middle of the zoom range, with both falling away towards the long end. Edges and corners are soft at f2.8, cleaning up noticeably when stopped down to f4. Optimum aperture at all focal lengths is f4. Reducing the aperture further produces a loss of resolution, presumably from diffraction at the lens diaphragm.
In general photography using the lens at the wide end and middle of the zoom range, clear sharp photos are readily achieved in most circumstances. The long end is a different story.
For most general photography the FZ200 makes sharp, clear photos with good highlight and shadow detail.


Difficulty achieving sharp pictures at the long end of the zoom  On my first outing with the camera I made several fairly casual hand held photos at the long end and found them quite unsharp. In due course I discovered there are several factors working against the achievement of sharpness at full zoom. These are:
* The lens itself loses contrast and resolution towards the long end. This is  easily shown using chart tests with the camera mounted on a sturdy tripod.  The lens also has more chromatic aberration, purple fringing and local flare around bright subject elements at the long end.
* Autofocus is not quite as confident at the long end as the wide end.
* Subjects  shot at the long end are often at distance when atmospheric haze and heat distortion come into play.
* But the main problem is camera shake. Imagine a 600mm lens on a full frame DSLR. This has the same diagonal angle of view as the FZ200 at full zoom extension. The full frame kit weighs 5.5 Kilograms which is 8.5 times as much as the FZ200. It is also much longer giving it  much greater  inertia. In plain language this means the full frame kit is easier to hold steady,  provided you have some means of supporting the lens.  When I was experimenting with ways to hold the FZ200 steady I rested myself and the camera on a large rock, slipping one finger under the lens housing so it wouldn't be scratched. I could easily see the EVF preview image bouncing with the pulse in that finger. The OIS system in the lens is not good at responding to small sharp movements like this.
Strategies for sharpness  After some experiment I came to the following conclusions:
* Don't even think about viewing on the monitor at full zoom.  Use the EVF.
* A lightweight (1 Kg or less) tripod, particularly in any kind of breeze is worse than no tripod at all.
* With the camera on a monopod, I found there was poor harmony between camera movement and the OIS, resulting in jerky corrections of the preview image in the frame. Not recommended.
* Best sharpness was achieved with the camera firmly mounted on a large, sturdy tripod and  two second timer delay applied to the shutter release. However the whole point of a camera like this is to leave the heavy gear including tripod at home.
* Here are some strategies which I find improve the number of keepers with  hand held use.
* Always view through the EVF.
* For every exposure, breath in, then out and gently squeeze the shutter button at the point of full exhalation.
* Acquire a small bean bag. Rest the camera on the bean bag on something solid like a table or a rock.
* Lie on the ground with both elbows on the ground, camera to the eye. Your arms and body/head make a kind of tripod to steady the camera.
* Check the shutter speed.  Even with OIS on , I recommend using 1/500 sec or faster.  Most of my full zoom pictures made with a slower shutter speed were not really sharp.
* Use an aperture of f4.


Other lens issues  I found flare to be  reasonably well controlled and not a problem in most conditions even with the sun in frame.  Chromatic aberration and purple fringing will appear towards the edges of the frame especially at the long end. These are readily correctable in PsCR.  Distortion, possibly corrected electronically in camera, is minimal in output photos including RAW.  OIS keeps the preview image steady in the viewfinder if one uses good camera holding technique.
 I would prefer manual zoom as I find it faster and more precise. Some early models in the FZ series had this feature but in order to fit a zoom ring the lens barrel had to protrude further from it's housing.


Close up  In saying that I found close up capability a bit disappointing I feel  like the child in Charles Dickens' novel who asked for more. As in..... you have 24x zoom, you have constant f2.8, you have excellent AF, you have OIS...you  want  More..?     The lens can be brought very close to the subject at the wide end but as one zooms the minimum focus distance increases markedly, even with the lever set to the macro position. I solved this small problem by putting a 52mm close up filter in the camera bag and mounting it when I want to photograph small things without having to get excessively close to the subject.  
Noise  Raw files processes through PsCR at default settings show virtually no chroma noise at any ISO level.  Luminance noise (grain) is another matter.  This is evident in darker tones even at base  ISO and as expected increases as the ISO setting rises. Testing the FZ200 against the other cameras in the house at the time gave the following:
Each of the combinations below gave approximately the same luminance noise level. The sensor size given [in brackets] is the approximate diagonal measurement of the sensor:
Panasonic FZ200,   ISO800         [7.7]
Nikon P7800,        ISO 1250      [9.3]
Nikon 1 V2,          ISO 1600      [15.9]
Panasonic GH3,    ISO 3200      [21.5]
Subjectively I found the FZ 200 files best at ISO 100 and 200 and quite satisfactory for most purposes up to the Auto ISO maximum of 400-500. 800 is fine if big enlargement is not contemplated. I would try to avoid higher levels.
Dynamic range  (shadow and highlight detail) I found this to be quite good.  At low ISO settings the camera is able to hold detail in bright white clouds and shadows in dark rocks in the same frame. Shooting RAW enables significant highlight recovery not possible with JPG capture.
Colors  appear to be generally accurate with a tendency to cyan rendition of blue skies.
JPG vs RAW   I shot many frames of JPG+RAW and found that in every case I got better results from the RAW files after processing through Photoshop Camera Raw.  JPG's at ISO 400 and above do not treat human faces kindly with smearing of details in skin and hair and JPG artefacts.
Performance
The camera is generally brisk and responsive. It rarely slows down or impedes the picture taking flow.  It responds promptly to all user inputs.
In good light, single shot, single AF and AE on every shot, RAW capture, Sandisk 95MB/Sec card, shot to shot time measured over 20 shots was 1 second.
In burst mode at 5.5 frames per second, AF-C, JPG capture, at full zoom, the camera managed follow focus on cars moving towards or away from the camera at 60 kph, with 65% of frames in sharp focus. 
EVF refresh time is prompt with a  blackout time after each shot which I guesstimate at about 0.2 seconds.
Autofocus speed is very quick in good light and the wide end of the zoom, slowing noticeably in low light or at the long end of the zoom. Accuracy remains good however. The only occasions when I found the camera focussed on something unintended could be attributed to user error, for instance not making the active AF area small enough and placing it over the selected subject.
AF area position and size can be quickly changed with the eye to the viewfinder.
Manual focus is available, with zoom focus assist and an analogue distance scale and hyperfocal distance display in the EVF or viewfinder.
Ergonomics
Holding  There is a substantial handle which makes the camera easy to hold securely. The thumb support is small but useful.  If I were redesigning this camera I would move the shutter button about 10mm to the left (as viewed by the user) to allow a more natural position for  the index finger and a more definite support notch for the third finger. I would also make the thumb support about 5mm more prominent. Just nit picking really, as the camera provides a good holding experience.
Viewing  The monitor is fully articulated and of good quality. The EVF is a little smaller than  one might find on an ILC but is clear and  sharp with generally pleasing colors and good highlight/shadow detail. 
EVF and monitor are both adjustable for brightness, contrast/saturation and color balance. Both can be set to SLR style (with key camera data beneath the image preview) or monitor style (with camera data overlaid on the image preview).  At default settings I found skies tended to appear cyan and faces tended to ruddy red in color. Both  issues easily retcified with the adjustments available.
Some reviewers have complained about the absence of an eye proximity sensor to switch automatically from monitor to EVF view. In fact the camera does switch automatically from EVF to monitor view, just not by means of a proximity sensor. If the monitor is turned inwards, the EVF is active. If the monitor is swung out, it becomes active. Easy.
Operating The FZ200 is generally easy and enjoyable to operate. All the main controls are well located and designed.  Buttons have the correct amount of elevation. The rear dial has just the right amount of resistance. The 4 way controller has raised, sharpish edges which are easy to locate by feel with the eye to the viewfinder. Primary and secondary exposure and focus parameters can be adjusted in Capture Phase while looking through the viewfinder.  With a combination of Q Menu and Fn buttons with user assignable function, all the main adjustments required in Prepare Phase can be made readily.
One review (dpreview.com) complained that the rear dial was difficult to turn. Maybe that was a one off or a problem fixed during production. Another  review (imaging-resource.com) complained that too many actions have been assigned to the rear dial. This dial usually has dual function, controlling aperture or shutter speed depending on which Main Mode is set and exposure compensation if pushed in till it clicks. This is fairly standard Panasonic practice and is better implemented on the FZ200 than some other cameras I have used. When MF is selected via the slider on the left side of the lens housing, the rear dial is additionally used for shifting focus. The screen and EVF clearly indicate whether the dial is set to change aperture, compensation or MF. Push/click to rotate through the functions.
If I were redesigning this camera I would add a front dial behind the repositioned shutter button. The body is easily large enough to host a twin dial layout which would answer the criticism above and allow a more streamlined functional interface.
Comment   Is the FZ 200 good enough to supplant an interchangeable lens camera with 3 or 4 lenses ?  I would think that for many users who are not concerned about ultimate image quality the answer to that question would be yes. It is a very capable camera with a huge zoom range, generally good picture quality, good performance and good ergonomics.
The camera's main limitations derive from
1. The very small sensor required to permit a wide aperture superzoom lens in such a compact package and
2. The difficulty holding such a lightweight, compact camera sufficiently steady at the long end of the zoom.
Enthusiast photographers and those wanting to make large prints will find these limitations restrictive and will likely stay with their DSLR or MILC.
Future Prospects  There is much talk on internet forums these days about the impact of disruptive innovations on the camera world. The smartphone revolution has shaken up the camera industry like nothing ever seen before and there is more to come. Bloggers are wondering when or if the MILC will overtake the DSLR as the most popular interchangeable lens camera type.  But.......
Imagine a near future in which the 7.8mm sensor used in the FZ200 acquires one or two exposure value steps better noise performance and improvements in image stabiliser technology allow more reliably sharp pictures at full zoom.  Such a camera could make both the  DSLR  and  MILC obsolete for the majority of amateur photographers.
Bring it on................I hate changing lenses.................


Viewing all 824 articles
Browse latest View live


Latest Images